Sunday, September 15, 2013

What is the best camera? Today's lesson in photography.

    There is probably no more frequently asked questions by budding photographers than "what camera should I get?" or "which camera is the best." So, strap in folks, today I will not only wade into those questions, but also definitively answer the second of the two. 


    Let's start with the first part. Which camera should I get. The answer is simple in concept, but incredibly difficult in detail. The camera you should get is the one that 
1- Meets your needs, 
2- you will actually use, and 
3- you can afford. 
   What the means will change as you grow into your photography. They already have for me. For a while, I didn't need anything more than a point and shoot. Then when it came time for fatherhood, I felt like I was going to need something more to capture my son growing up. I had been out of the serious photography game for a while, and I didn't have much money to spend, so the D3200 was perfect. Low cost re-entry into the higher end camera game and a lot of room to grow. That was the camera I needed to get for where I was. As I started shooting more circus and performance, it became clear that I needed better high ISO and speed than the D3200, hence Excalibur became the right camera for me to get. So which camera is better for you? Why not just go for the D4 right out of the gate if you have the money? Well, you may not want to lug a three pound beast the size of a kids' lunchbox around with you every day just to take pictures of your kid on the playground. You may not want to be walking around with an incredibly obvious and expensive camera on vacation to a less than safe area. There are as many scenarios and right answers to the "what camera should I get" question as there are photographers. If you start following the pros, you'll see that they often have a collection, and use different cameras for different purposes. 

    So, now we move on to part two- Which Camera is the Best? Again, there are as many answers as there are photography web sites out there. Nikon/Cannon/Sony/Minolta/etc...... which has the most pixels, best high ISO performance, best low ISO performance, greatest dynamic range, most video features, best control layout..... so what is my answer? If you have been playing along at home as this blog has developed, you may think you know what I am going to say. The logical guess would be that I am going to bring up Excalibur, the Nikon D4 I have been raving about since I got it. And that would be a great guess, but in this case wrong. None of the images in this post were taken with Excalibur. Hell, they weren't even taken with my D3200. But they were all taken with what I have come to believe is the ultimate answer to the question of "which camera is best."

   Drum roll please.....


    The Best Camera is..... the one you have with you when you see the shot. 

    I know that seems like a cop out answer, but it really isn't and a quick glance at Google shows that I am far from the first or only photographer to have this revelation. I have close to $20,000 worth of cameras, lenses, strobes and modifiers on my gear shelf. But none of it would have gotten me the three shots attached to this post, because I didn't have any of it with me. Why not? Well, it isn't always convenient to carry around a DSLR, even one as small and light as the D3200. I am still full time Navy, and since I have had things stolen from my stateroom before I don't really like to bring the gear I am hoping to use as a retirement plan in to work with me every day. Also, since I am now doing an Engineering tour, there are days on the ship I never see daylight. But my point and shoot lives in a small, readily accessible strap pocket of the daypack I bring to work with me every day, and without it I would not have been able to capture the sunset image I opened this post with. Would the shot have been better if I had the D4 and the 14-24mm ready to go? Of course it would have. But those were 45 miles away from me at the time. So in that moment, the best camera was the point and shoot (Olympus Stylus Tough 8000, if you must know. It's old and there is a newer and better model, so I probably won't review it, but it's 12mp, waterproof and tough as nails. For documenting aerial classes, snowboarding trips, and fun in the pool or ocean with the family, it is awesome. It always lives in my bag and it takes a beating without having to worry about it.)

    But I don't always have my bag with me. So the point and shoot isn't always the best camera either. Enter the iphone. Nowhere near a top of the line camera. But it's my lifeline to the world, I almost always have my phone with me. So, when my kid is really tired and dad misses the signs in time to get him down for a mid-morning nap before he melts down, and I have to grab the stroller, keys and phone to get him out for a calming walk, chances are I won't be thinking clearly enough to toss one of the DSLRs or even the point and shoot into a pocket, especially if I am still in my sunday pajamas. So the best camera when I saw the morning dew still trapped in a spider web in some bushes next to the sidewalk as I pushed him along, the iPhone camera became the best camera ever. Could I have gotten a much better image if I had the 24mp D3200 with a dedicated macro lens and a ring flash? Of course. But by the time I got my son to sleep and home, and mom got back to stay with him, the morning dew was long gone. 

    Getting the picture? Although I am seriously considering leaving the D3200 in the car 24/7 just in case, it isn't always practical to carry the heavy artillery around. But you never know when life is going to throw something in front of you that you want to try to capture. Maybe it's a moment of beauty that will be gone before you know it. Maybe it's a silhouette of the Flying Spaghetti Monster on a building. 

(All Hail his noodly appendage- RAMEN!)

    Maybe it's your kid doing something silly and/or cute while you both wait for mom to run an errand...


   Yeah, I can take all those shots apart and go on for days about technical ways that they could have been better. In fact, this post coalesced in my mind while I was editing the dew covered spider web trying to make it look as good as I could and mentally kicking my own butt for not grabbing one of the DSLRs before heading out the door. But if I hadn't had the camera I had with me, these moments would have only lived on in my memory, and I wouldn't have been able to share them with people that I knew would enjoy them, like his mom, or other Pastafarians

  Just to end on a slightly different note, sometimes the best camera for the moment is none at all. Don't forget as life goes along that sometimes it is better to put the camera away and just experience the moment, let your eyes and memory be your only camera, because getting the shot would take you out of the moment. That's why I don't have any pictures of my son actually being born. And I don't regret that for a moment. And really, no one needs to see pictures of every salad, burger or other meal you eat, or the aftermath of that bowel movement (yes- that last was a FB post by someone on my friends list. You know who you are) To reinforce that point, I leave you with this video... which is only funny because it's true. 


Saturday, September 14, 2013

Gear Review: Mefoto Backpacker Tripod.

    A few months ago when I found myself in Rhode Island for July 4th and hadn't packed properly, I had to make an emergency tripod purchase. I went to a local camera shop and came out with a MeFoto Backpacker tripod. (of course, as anyone who knows me will have already guessed, I went for the red and black one) Having used it for a bit now, I think I can finally give it a decent review. I will start by saying this isn't ever going to be your main studio tripod. It isn't a heavy duty beast of a tripod. But- spoiler alert- for the price ($139 most places) and more importantly, SIZE (or lack thereof) it simply cannot be beaten.

   This is a travel tripod, pure and simple, so size and weight are key. This thing is small and light, even though it isn't super spiffy carbon fiber. Lots of reviews on this tripod list the stats, but here is a better way to get a feel for it.


   This is the folded Backpacker next to a Nikon 70-200mm/F2.8 VR1 lens. Pretty much the same size, and the tripod is actually lighter by almost a pound. (lens is 3.24lbs, tripod is 2.6lbs) So if you have a slot in your camera bag that can take a 70-200 with the hood on, you can slip this tripod in. If you don't feel like making room for it in your camera bag, that's ok, it comes with its' own pretty convenient carry case.

    I keep the shoulder strap cinched pretty tight and just carabiner it to my bag when I don't have space to slip the tripod in.

    Getting the picture yet? It's small, light and I cannot imagine a more portable tripod setup. Despite being so miniscule, it extends up to a hair over 51 inches tall in the high position. Which brings me to the next feature. The way it gets so small is that the legs fold up 180 degrees in the stow position. There is a small tab that you pop out to unlock for leg rotation, pop it in to lock it in position.


    When you unfold the tripod for use, they lock in one of two positions. There is full height, with a pretty narrow base, and a low/wide position that leaves the head a couple feet off the ground. Good for macro shots or more stability if you need it, but I didn't really use the low position for anything because it never came up (or in this case down).

  The head is another nice surprise. It's Arca-Swiss, so there is a good chance you already have plates on a lot of your gear that will slide into the supplied ball head with no issue. The head alone is worth the price of admission. It isn't a high end head by any means, but a similar level head would set you back close to $200 on its' own, even without the rest of the tripod. (note- I haven't used the RRS BH-30, so maybe it is light years ahead of this head, but this is the closest visual comparison I have seen) It even has a built in level.


  So. Lots of value for the price, really light and portable. But how well does it perform? As long as you use it the way it meant to be used for, it is flawless. It isn't rock solid, but it holds up really well. For a point and shoot it is more than sufficient. I would have no problems throwing any smaller bodied DSLR on it with almost any lens you would be likely to use with a prosumer level body. I didn't even think twice about throwing the D3200 on it with a 17-55mm/2.8 for some remote release family vacation shots (hand in the pocket has remote....)


   But how well does it play with the big boys? The first time I used it, for shooting the fireworks, it held up just fine with the D4 and a 24-70/2.8 mounted on it. The specs say it is rated for 8.8lbs. That really is lightweight when it comes to tripod stats. Pro level tripods are rated more than three times that or greater. So, just for review purposes, I decided to go heavy on the tripod and see what it could hold. The pictures below are pretty much the heaviest configuration I normally shoot with in the wild, the D4 with a 70-200/2.8 with the SB910 mounted on top. When I did the math this combo only comes out to 6.76lbs (that was a surprise to me, it sure feels heavier than that after an 8 hour day of festival shooting...) so would the backpacker take it and hold it? See for yourself.


    No problem. Held the setup just fine, didn't slip, rock, anything.


 Not just level balanced either. Put a tilt in to see if the head would hold, and it did, just fine.

 This isn't a setup I would recommend as a regular use for this tripod. The legs weren't bowing from the weight, but with the full height setup the legs are fairly close together, and a gentle bump would easily overbalance the rig and tip it over. If you had a remote trigger though, this tripod would be stable enough even in moderate winds with this heavy of a load.

    So, there you have it. It won't replace a full size tripod for regular use, or for hard core landscape shooters, or heavy setups in windy or crowded locations. But for those times when you are travelling light and think you may want a tripod but don't feel like carrying your huge Manfrotto around town or through the airport, the backpacker will certainly get you through. Hell, this thing will fit into the water bottle carrier on your backpack without missing a beat.


   Ok, technically that is the tripod pocket on my Think Tank Airport Accelerator, but you get the idea. For the record, until this tripod came along, that pocket only saw use as a water bottle pocket. 
  
   Conclusion- this tripod isn't a replacement for a full size tripod. But for $139 bucks, you can't beat it for a backup or travel tripod. MeFoto also makes two bigger brothers for the backpacker, the Road Trip and the Globe Trotter. Both of those have the cool option of transforming from tripods to monopods in around sixty seconds as well as offering a significantly more robust build. I haven't had the chance to play with them, but when it comes time to replace my main tripod I am definitely going to give the globetrotter a look. But if you are looking for a small, light, portable tripod to throw into your pack for a trip, this is your tripod. Also, for what it's worth, this (and it's slightly larger brother the Road Trip) are the only tripods around that come in something other than your basic, boring black/grey, if you want to throw a little color into your world. 


UPDATE: 

Ok, having used this tripod for a while now, there are a couple more things I have to add. This is still my go to travel tripod, I still love it for what it is, but for full disclosure I have to note a couple of small things I have found after more use:

1- Pay attention when you extend the legs. It is is really easy to get distracted and not tighten the leg segment twist locks all the way down. This isn't a failing of the tripod as much as f the photographer, but it is easy to leave one segment a bit loose and have a leg start to collapse on you if you aren't paying attention. 

2- There is a little play in the ball head. Ironically, it is harder to notice with a massive load like the 70-200 setup pictured above in the review because it actually balances pretty well with the tripod mount on the lens foot. But when you are mounting the camera body onto the tripod, there will be a millimeter or two of sag after you tighten the ball head down. It isn't anything you can't compensate for, it's just a minor droop so you have to remember to lock it a little above the point you want it to ultimately rest at. 

Neither of these factors really changes my conclusions in the initial review. Not the first choice for a main tripod, but the minor issues are more than made up for by the convenience of having this along just in case you need it. If you do decide to buy one- please consider buying from one of the links in this blog, so I can get a little bit back. 

Thursday, September 5, 2013

The Numbers Lie... the agony and ecstasy of contest results, reader counts and Stat Vampires

    First off, let me say a quick and heartfelt THANK YOU! to all three of you who are regular readers of this blog. I say that only half jokingly. I have monitored the stats ever since I started this blog earlier this year. At first, I felt pretty good about the numbers, mostly because I hadn't learned to properly interpret them. Right now, just based on hit count, which was really all I understood at first, nearly four thousand people have at least clicked into a post of mine to see what's up. 4000 people. Small potatoes compared to the total population of the internet, but for someone just starting out with only 207 likes on my FB page I was pretty happy with that number. Then I started looking a little harder. Turns out that almost the second a new post gets blogged, it is picked up by rebloggers and a new form of scam I had not heard of, signified by such wonderful sites we vampirestat. Exactly what it sounds like- it sucks. Apparently the game is to get people who look at their stats to click on the link and wind up with god only knows what, and they also get some financial benefit anytime someone clicks on them. But it definitely bloats the stat count. I have a few regular readers and I get a small but steady stream of hits from various google searches, but nowhere near the massive throng of readership suggested by the initial number.

    So that was my first bit of fun with numbers. The second was finally getting the results back from the first photo competition I entered. I entered 4 images, they scored 73-76 (out of 100). According to the scale on the competition web site, this is the "above average" category. So, pretty stoked that 4 out of 4 images I submitted were judged above average. Maybe the lesson I need to learn is to take the initial good news and not dig deeper, but my inquiring mind wanted to know how far I really was above the average, which meant I needed to know what the average score was. So I scanned all the results. The lowest published score was a 71. So unless they only list scores >70 on the results page, above average doesn't mean quite what you would think it means. Which kinda sucks. On the good side, each image had a multimedia critique from one of the judges that went into very specific detail on what they liked and didn't like about my images. This was a mixed bag. They pointed out a lot of things I didn't even know to look for, and some I should have but missed. There was one common implication in all the critiques that made me really happy. Each of the four shots I submitted was something I shot as found- two of them were scenic shots and two of them were images from live festival performances. The judges all treated them, and therefore seemed to think, that these were all posed shots I had taken a great amount of time and care to set up, control the lighting, pose the models, etc. In other words, what I shot on the fly looked good enough to be mistaken for studio work. That part makes me very happy. On the other hand, there was one criticism common to all four images that really pissed me off a bit. I was told that each of my images would have scored higher and possibly merited if I had added a keyline border to the submission. So- if anyone else is reading this that submits to photo contests, is it an understood thing that digital only submissions still basically need to be framed? News to me. If it is required for the competition, maybe that should be outlined in the image submission guidelines somewhere? 4 out of 4 images getting points taken off for not having it sure makes it seem like it's a requirement......

  Overall, even though the numbers do not really stack up as well after a deep dive as they do on an initial look, I am pretty happy overall with where I am at. Have been at this for roughly a year now, and while I am not wildly successful and gracing magazine covers the world over, I am learning a lot. I have some good images. Maybe even a few great ones. They are getting better overall, and the percentage of good shots coming out each time I pick up the camera is going up. So I am making progress and learning from mistakes. I still have a couple of years before I really need to worry about making this a full time retirement plan, so I may not be where I want to be, but I am where I need to be and moving steadlily in the right direction.

   So again, for those few of you who are actual readers, not just random spam-bots, thanks for playing along with the home game!

Saturday, August 31, 2013

Into the great wide open...... (first shots with a wide angle lens - and what have I been up to this week)


    I love living a block of the beach in Carlsbad, Ca. It's a rough life. Beautiful sunsets are so common it's easy to take them for granted. But tonight I was out playing with a new toy, the 14-24mm/F2.8 Nikon. This lens has an amazing reputation, it's so damn good that Canon shooters invented an adapter so they could use it. And after using it a bit, I can see why. The lens is absolutely phenomenal. There are so many full reviews on this lens out there that I won't bother adding one, but I will say that you shouldn't be afraid of the size of it. Based on all the comments out there, I thought it was going to be some huge beast. Not true at all. Yes, the front element is massive, round and quite ... distinctive, but it is smaller than the 24-70mm and roughly the same size if than my 17-55mm/f2.8 DX.
  What I learned with my initial walk around is that the lens is technically awesome. It will shoot anything. But I have a lot to learn about using a wide angle lens. Lines get weird, perspective gets distorted, things curve at the edges, little changes in camera level and height make huge differences. Not sure yet how I wound up with the tilted horizon in the shot above, the camera was dead level...I am not yet worthy of this lens. I cannot use it to anywhere near its' full effectiveness. But it is going to be fun as hell to learn.
    Also, this should come with a warning label like car side mirrors- "objects in lens may be closer to lens than they appear..."

  He reached out shortly after this frame and was able to tap me in the head. I don't have any pics of the awesome spider web I was going to shoot, because I wound up having to clean it off the front element after not realizing I was that close to it. (note to self.... be careful using this lens at fire performances.....)

    So new lens rocks. I also did a test shoot with Shannon, aka Brass Honey, a fashion blogger who I hopefully will be shooting for on a regular basis. I say hopefully, because even though she seemed anxious to get the pics in time to do an upcoming post, she hasn't used any of them yet and she's posted twice since they were available. I haven't heard anything from her and was hesitant to post any of them so as not to steal her thunder, but now I guess I will post a couple and let the rest of the world (aka- the two actual people who read this and aren't just spammers and link trolls like vampire stat) decide if they are any good. I actually was pretty happy with how they turned out. Bright mid-day sun, nothing but excalibur and an on camera speedlight to work with (didn't have the wide angle to play with in time)


The corporate mascot wound up with the balloons after the shoot, so it was a win in his book. Liberty station was a great venue to shoot around, I was especially happy to notice this wall, that looks better than many expensive studio backdrops I have seen.

Finally, have to end with Labor Day weekend. I mentioned at the start of this post that I have come to take the awesome sunsets here in Carlsbad almost for granted, and that is true most of the time. But  I feel really lucky to live where I do, I get the perfect lab almost every evening that lets me play with the famous "golden hour." Well, tonight it was particularly golden, so I will leave you with a few shots from the beach. These were taken slightly drunk with my water proof point and shoot, but are a pretty good example of how awesome the golden hour is here on a somewhat regular basis, living a block of Tamarack Beach doesn't suck at all, no sir! It's well worth the hellish commute to Coronado every morning. 


Seriously. Those were available light with a vintage 2009 point and shoot. One of these days I need to get Excalibur and the new wide angle down to the sandbox for a sunset shoot, maybe even some actual models. I am spoiled living here. Loving life. In fact, the only way I think it could get any better was if someone actually started paying me to take pictures. Otherwise, life is awesome. Have a great rest of your holiday weekend, more gear reviews and stuff coming soon-ish. 

Tuesday, August 20, 2013

How to photograph waterfalls. Tips, techniques and styles for shooting moving water.

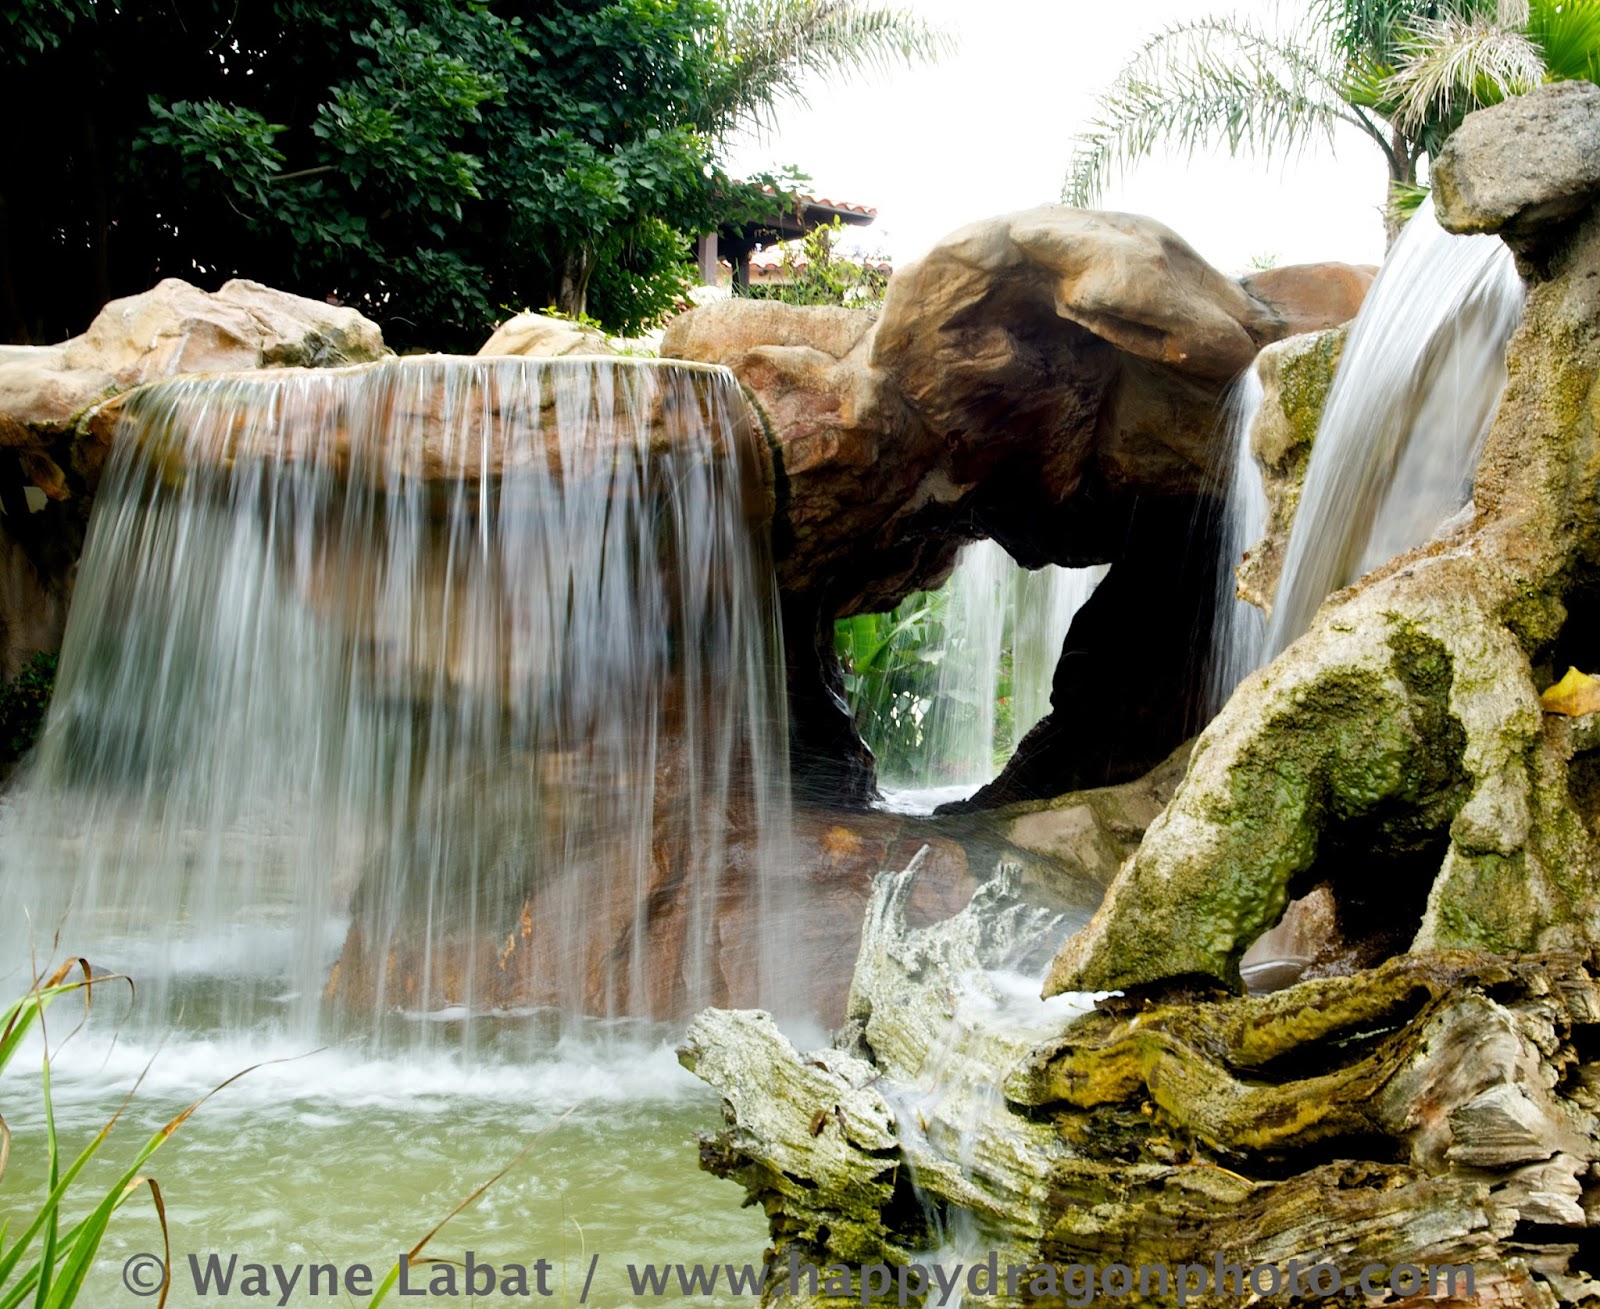
   Went away on a family vacation last weekend and stayed at a beachfront resort in Oxnard, Ca. The hotel pool and spa area had several small waterfalls throughout their landscaping, so when the family took a nap I had some free time to basically play around with shooting moving water in various ways.

(1/10 @ F16 ISO 100)

   There are pretty much three options for shooting moving water. On one side are really fast, hyper realistic shots that capture the stillness of something normally moving, trying to catch the individual droplets that make up the flow. At the other end are the dreamy longer exposures that allow the water to blur into a milky sort of smooth flow that gives the images an otherworldly quality of exaggerated motion. In between these extremes lies the attempt to capture a realistic, natural balance that shows the flow in the same form the eye is used to seeing it. Take a look at these shots of the same waterfall for a general idea of each method.

Dreamy
(1/10 @ F14 ISO 100)

Realistic
(1/125 @ F4.5 ISO 100)

Hyper-realistic
(1/4000 @ F2.8 ISO 800)

    Equipment- what you want to shoot will determine what gear you need, but you don't really need specialized gear to get any of these shots as long as you have good light. For the realistic shots you  don't need anything other than a camera (Oh yeah- and a waterfall or some form of moving water- don't forget that part- I guess that element is pretty vital.) For the extremes, you need a bit more, but not much. As long as you have a camera that you can put into shutter priority mode (think this is called Time Value on Canon, other camera types please feel free to add comments below) you can make experiment with either extreme. To really play at the ends of the spectrum you want a camera that you can take full manual, the higher the max shutter speed the better, the faster your glass the better and the better high ISO capability the better. (but in all fairness, the same can be said for any style of photography) It is the photographer that makes the picture, not the camera, but the better tools you have at your disposal the greater range of options you will have when trying to get the shot you want. You may find yourself wanting either a neutral density filter or strobe depending on the lighting you have to work with. Also, if you want to go deep into the long exposure milky textured side, you need a tripod.
 
    Since I was on vacation and traveling light, Excalibur got to sit this one out. All the images in this series were shot with a Nikon D3200 in full manual mode, 17-55mm F2.8 lens.  All were handheld. I did have a travel tripod with me, but the hotel staff and guests were already giving the lone guy running around the pool/spa with a camera and zoom lens funny looks, so I thought the tripod might have been a bit over the top, and a lot of the places I wanted to shoot from would have required me to put the legs onto someone's beach chair. I did the best I could using anatomical bracing -which limited how slow I could take the shutter. Pixel peepers will see the motion blur on the slow images. So- even though you won't see the result here, let me say again, for the really slow stuff bring a tripod and some form of remote release device. Also, images shown here have minimal post processing, I pulled some of the noise out of the higher ISO shots, added a little bit of definition and edge sharpening to the fast ones, and did some basic exposure adjustments, but nothing major.

    That's the preamble. Now for the actual shooting. I'll start with the middle ground. I thought this would have been the easy one. Find running water. Point camera. Shoot. You can go into manual and to town making the most technically excellent running water shot you want, but you should be able to get something useable just by simply pointing and shooting on auto. I wasn't going to spend a lot of time on the middle ground. Looking at my images as I pick things to post; however, it seems like I may have brushed over this too simply when shooting. It may actually be more difficult to do "natural" shots simply because there is no way to really define the term. What is natural to one person may not be the way another sees it. That's part of what makes the world so beautiful, and capturing it so hard. So I have to play some more with the middle ground next time. For the remainder of this post, when I say natural, assume I mean "as similar as I could get to how it looked in motion to my eyes." Here is my favorite "natural" shot from the group.

(1/200 @ F2.8 ISO 100)

      After the realistic shots, my first instinct was to crank the shutter up and stop time, because I always love the high speed camera footage on shows like myth busters. At first I tried just using a slightly faster shutter speed, didn't get what I wanted, so I kept bumping it up until I did. I found it took a much higher shutter speed than I expected to get something obviously different from the "natural" style.

Not quite there yet
(1/250 @ F2.8 ISO 100)

Still not there but closer
(1/500 F2.8 @ ISO 200)

This is more like it
(1/2000 F2.8@ISO 800)


    So you can see the progression of shutter speeds giving more and more of an impression of stopping the flow of the water. I wound up taking the shutter speed all the way to the maximum, as seen in the earlier hyper-realistic example. So, that is pretty much clockwork photographic science, use a fast shutter speed to freeze action. Not a major ground breaking discovery. I did find two other factors that had a much greater effect on the result of the shot than I expected: The angle from which I shot and the geography of the fall itself. The next images are shots of the same fall, two from the side and finally one straight on.

Realistic speed shot from side 
(1/200 F2.8 ISO 100)

   Note the flowing appearance on the center fall.

High speed shot of same fall
(1/3200 F2.8 @ ISO 800)

Noise reduction was deliberately not applied to this one, didn't want that to seem like it added smoothness to the fall. What surprised me was how little difference there was between the 1/200 and 1/3200 shot. Nowhere near as dramatic as the difference in the other shots. I shot both of these before moving around to the front of this fall.

High speed frontal shot- same fall
(1/4000 F2.8 @ ISO 800)

Notice the flow is clearly frozen, as can be seen in the gaps in flow, but portions of the fall still look smooth and flowy. 

   So, from the side, I was not able to get the same broken, frozen droplet effect I was able to get on the other falls. When I moved to the front, I was definitely able to freeze the flow, but the lip and the top half on the fall were still fairly smooth, unbroken flow. Not the same milky stream of the slow speed shots, but much smoother than the effect I was going for. I think that with the wide, smooth lip of this fall the water flow was almost completely laminar with no breaks, so even if I brought out Excalibur and cranked the speed up to 1/8000 it still would have a great deal of smooth flowiness in the resulting shot. (1/4000 is the fastest shutter on the D3200)

    That wraps up my high speed, hyper realistic shots. Basically, you need to crank up the shutter speed at least into the 4 digit numbers, the faster the better. To do this even in fairly bright light you will need either fast glass or high ISO capabilities, preferably both. And pay attention to the angle you are shooting from and the quality of the particular fall or flow you are shooting to make sure you will be able to get the effect you want. The nice thing about digital is you can shoot as much as you want, experiment with different shutter speed / aperture combos, and get instant review capability to let you get the precise look you want. You can either do this in full manual or set your camera to shutter speed priority and let it pick your aperture if you don't care. As you speed up it will default to the wide end, depending on light, so you may not get the depth of field you want. If that happens go full manual and use ISO to compensate. One other option that would be difficult in the field under most conditions, but definitely viable in the studio, would be to use a bulb or long exposure and use a high speed stobe to freeze the motion of the water. That would allow for even shorter exposures than the 1/8000 sec speed on the D4, depending on your lights, but I don't have the capability to play with that at present. 

   Now for the slow speed dreamy effect. This seems to be by far the current favorite in the water photography arena, at least judging from a quick internet image sample. I am torn, I really cannot decide whether I prefer this or the hyperrealistic approach. Like I said earlier, to really delve down into this area, I should have set up a tripod and remote release so I could go for some really long exposures. for very long exposures, since it was a fairly bright (albeit overcast) day I would have needed to use Neutral Density filters. As it is, I was just able to test the waters a bit. Again, I found this technique devilishly simple in concept but there are myriad ways to execute the technique, so it comes down to personal preference and how you want your images to look. Probably the only real technique point I can give you for these is adjustment. Again, nothing groundbreaking, this will only be a new idea for those unused to dealing with manual exposure, but here goes. Once you find an exposure you like, but if you don't have the effect you want, for each step you slow down your shutter you move an equivalent step higher in aperture and you will keep your exposure. You can also do these with shutter speed priority as well, expect your apertures to shrink and your depth of field to increase as you slow down your shutter. 

Slow.....
(1/30 F8 @ ISO 100)

Slower...
(1/15 F11 @ ISO 100)

And Slowest.... here we are....
(1/6 F18 @ ISO 100)

    
   It is pretty easy to see that the slower the shutter speed, the higher aperture I needed to get a good exposure at my lowest ISO. A few more steps down and I would have needed a to start using either exposure compensation or ND filters. But as you can see if you zoom in and look at the details, 1/6 was too slow for me to handhold even making an anatomical brace out of my knees, camera bag and elbows. The more I look at these, the more I see the attraction to this style. I will end with what turned out to be my favorite shot of the day's work. This is the same fall I discussed in the high speed section. (those really paying attention may notice it's also the same fall as the opening shot, so you can see the difference between 1/10 and 1/6 of a second)

(1/6 F16 @ ISO 100)

   So. There you have it. A quick overview of the three styles of shooting falling or flowing water and some of the bare bones techniques for how to shoot them. The same idea works on waves, rivers, even your bathroom shower or kitchen tap. So play around and see what you like best. Post some links to your results and share!


Tuesday, August 13, 2013

Monarch Butterfly Waystation program

    Some of you may have already seen these pictures, if you follow me on Instagram or 500px, but I decided they needed to get put up here again because I got more of the story behind them this evening, so hope you don't mind seeing them twice (or more for those following on multiple channels).

   We live in a small apartment complex near the beach in Carlsbad, Ca. One of the neighbors has a garden with signs out for the facility gardeners not to spray any pesticides or anything on her plants because she is a Monarch Waystation. At first I thought that this meant that she just put out food or something for the butterflies as they migrated... guess I was wrong. Apparently monarchs are running out of natural habitat and there are few places left where they can transform. So she sets up ideal conditions and pretty much plants the appropriate caterpillars in her garden when it's the right season. I missed all the caterpillars while I was out to sea last month, but when I got back there were plenty of beautiful cocoons all over her shrubs.


    These things were pretty cool, not the image that traditionally pops into my head when I think of Cocoons, I normally imagine something brown and lumpy and ugly. These were almost like little jewels or christmas ornaments. 

    Last weekend they started to hatch. Apparently for quite some time after the newborn monarch emerges, they sit there slowly flapping their wings in the breeze to dry themselves out and get ready to fly. It's almost like they are posing for pictures, really wish I had a handy macro lens, because they didn't seem to notice no matter how close I got, I could get closer than anything I had to shoot with would focus down. 


    Anyway, the neighbor was out this evening as we can home from dinner, and we got to chat. Sometimes they come out and aren't healthy, she will actually take them inside and feed them sugar water from a straw to try and get them healthy and they will follow her around the apartment like pets. 

    Of course, the ones that still don't make it apparently get put into the freezer and turned into jewelry, which is quite morbid and took the conversation in a totally different direction, but still, the waystation program is pretty awesome and I hope it takes off, because I remember seeing these guys all over in summer as a kid and it would be a loss if they disappeared. Glad I got to capture a few for the record either way. 

Sunday, August 11, 2013

First studio shoot, more soccer and a club gig. Marathon shooting week

    Exposure to new things: this can be negative, positive, or usually some combination of the two. Over the past week and change I have had a lot of new experiences and a rehash of some old. 

    Started last Saturday with week two of the Surf Cup soccer tournament I wrote about earlier. This was going to be a marathon day, so of course I drank too much and stayed up way too late the night before. Still managed to get out of bed by 4:30 so I could get some breakfast and get there on time. Parking sucked the first time, so this time I parked a mile and change away and threw my bike in the back of the truck and rode in. The plan was this week to shoot with my 70-200 and a teleconverter provided by the company. Right off the bat with the teleconverter not working. Lens just hunted continually and wouldn't focus on anything. Turns out that after some troubleshooting it is my lens that won't work, even though it should work with the TC. Good thing I found that out because I was thinking of purchasing a TC. Now I either have to get the lens fixed if possible, or upgrade to the VRII version. Will have to see what the repair would run me first and what is actually wrong with it. Anyway, being maxed out at 200mm meant that I wasn't able to get as many good shots over the day, I was only able to shoot on the near end of the field without having to crop way in, which is fine if I am doing the post, but for the download and immediate sale environment I was working in for the company, those were pretty much worthless. But still, shot another 10 hours of soccer. Then I went home, took a quick shower, grabbed some food, kissed the family goodnight, grabbed a red bull and headed to Hillcrest for  an event.

    The mission of the night was to do a fashion show and performance at the Merrow, formerly the Ruby Room. The first thing I noticed was that the beautiful, awesome murals outside and the crazy interior paint in the bathrooms was gone, replaced by a rather ugly off white nothing. This made me a bit sad because the old walls were such a great backdrop to shoot at. The event was organized by Elektrofied SD , a really cool group I have shot with a few times now. I loaned them my black backdrop to set up outside. There was another backdrop inside, but I didn't get a chance to shoot on it. I wasn't really happy with my ability to set up lighting and shots against this backdrop. I couldn't get a good rim light set so that would separate dark hair/clothing from the backdrop without lighting the backdrop itself. Later found out the biggest reason was simply that I was setting the models up too close to the backdrop. But didn't know that at the time. This setup was also right next to the smoke pit, which sucked. But oh well. Although I can't say any of them are great, I was happier with the final results than I thought I would be chimping them in my screen, but I guess the trick really is having models who are hot enough that you stop noticing the technical flaws...


    So that was outside. Then inside for the fashion show piece and the performances. They hadn't really changed any of the lighting setup inside the club, but since they are no longer the Ruby Room, they didn't seem to have the same high percentage of solid red led washes. So nowhere near as challenging as is used to be to shoot in there. Really the only significant factor that was troublesome was the fog. But I managed to get  a lot of shots I really liked, and didn't have to spend anywhere near the time and workload I used to in post to get them useable. So either the lighting was easier to work with or I am getting better. I'd like to think it's a little of both. 


    I also got a few I liked during the fire performances.


    I was probably happiest with the shots I got of this guy spinning the flow staff. It was funny though, before he started this he had some sort of assistant running around pushing the crowd back and trying to get me to move. He made it sound like it was going to be a massive performance on the scale of some of the really good fire staff spinners I know. I kinda laughed and didn't really move at all. Turns out I was right, the guy could spin fast, but did nothing more than a few basic moves. Glad I got some good shots because I was quite underwhelmed by the performance after the buildup.


    Had a lot of people grab cards from me and ask about where to find the pics. This led to my biggest disappointment of the night. Near the end, as I was packing up and heading to the bathroom before getting into the car for the 45min drive home, I saw that someone had dumped one of my cards right into the urinal where the pee-cake normally goes. 


    I know it really shouldn't bother me, but at the end of a 20 hour day of shooting on top of not being happy with the outdoor light setup, it really got to me and pissed me off / discouraged me. 

   So that was the weekend. Things picked up again on Thursday when I went to take an intro to studio photography class at DK3 Studios in Mira Mesa. I had seen lots of pictures of friends from photo shoots at this studio, it's one of a couple of rental facilities in SD. Of all the rental studios I have seen, it has the best rates and comes most well equipped for your money. I got to meet Dave (the D in the name) at a photo expo, and have been planning to go in and play in his space for a while but haven't had the planets align, so when I got the meetup invite for the intro class on a night where my family was already out of town, I took the hint from the universe. Dave covered basic lighting setups for different things, how to make a white wall into a grey or black backdrop, how to do basic headshot lighting setups, etc. He also brought in a makeup artists to talk about various makeup issues. She in turn brought her two daughters to serve as our test models. It was a fun night and really good to take the various concepts I have been reading about and studying and put them into real world practice. I learned that the main reason I wasn't successful is the setup Saturday night was I was keeping the models too close to the backdrop. I needed to pull them farther away and then it would have been easier to get the results I wanted. Anyway, here are a few shots from the workshop.


    Played with high and low key, gels, all sorts of fun stuff, as you can see. I'd say pretty good for a first time in the studio. Overall I was very happy and now feel completely comfortable not only booking studio shoots, but making a decent shopping list when I start buying studio strobes and modifiers for my own uses. 

   Then this Saturday morning I did another sports shoot with a different company. This one I don't have any pics to post, because I was training and sharing a camera with one of their regular photographers. It was not action shooting, it was posed team and individual shots for kids sports. Basically, the company wants to hammer all creativity out of the process and create McSportraits (maybe I should trademark that term) to sell to parents. It's the kids sports version of the school yearbook portraits. Do paperwork. Spend no more than 60 seconds per kid. Use the pop up flash on your camera. Basically shots a trained monkey could take and the goal is to not be able to tell which photographer took which shot, they all should look the same. While I understand that from a sales and corporate perspective, I am not sure that it's a good fit for me, even worse than the soccer tournament from the past two weeks. So now after three weekends shooting for two different companies, I am torn. It is nice to be able to say I am making a little (emphasis on the LITTLE) money from my camera, it definitely isn't the direction I want to go in with my photography. I specifically want my photos to be distinctive, so have my own style and signature. I don't know what that is yet, it is one of those things I need to find. But part of me says it's good to put in my dues on the assembly line, the McSportrait company pretty much has the SD area youth sports market locked up, so it may be good for me to really see how the profitable business side of the it is run. But another part of me doesn't want to give up weekend days away from my family for next to nothing when I am not getting any creative challenge or even something I can put in my portfolio later. 

   I am pretty sure I am not going to continue with the McSportraits, I will just shoot the gigs I have already signed on for, don't want to be a flake, then move on and thank them for the experience. I may do a few more of the action shooting events, especially if they do get set up on a salary plus commission plan like they say they intend to, vice just an hourly wage. But I do need to practice my sports shooting, might as well do it on someone else's dime. Now it's time to come up with some ideas and line up some studio shoots!