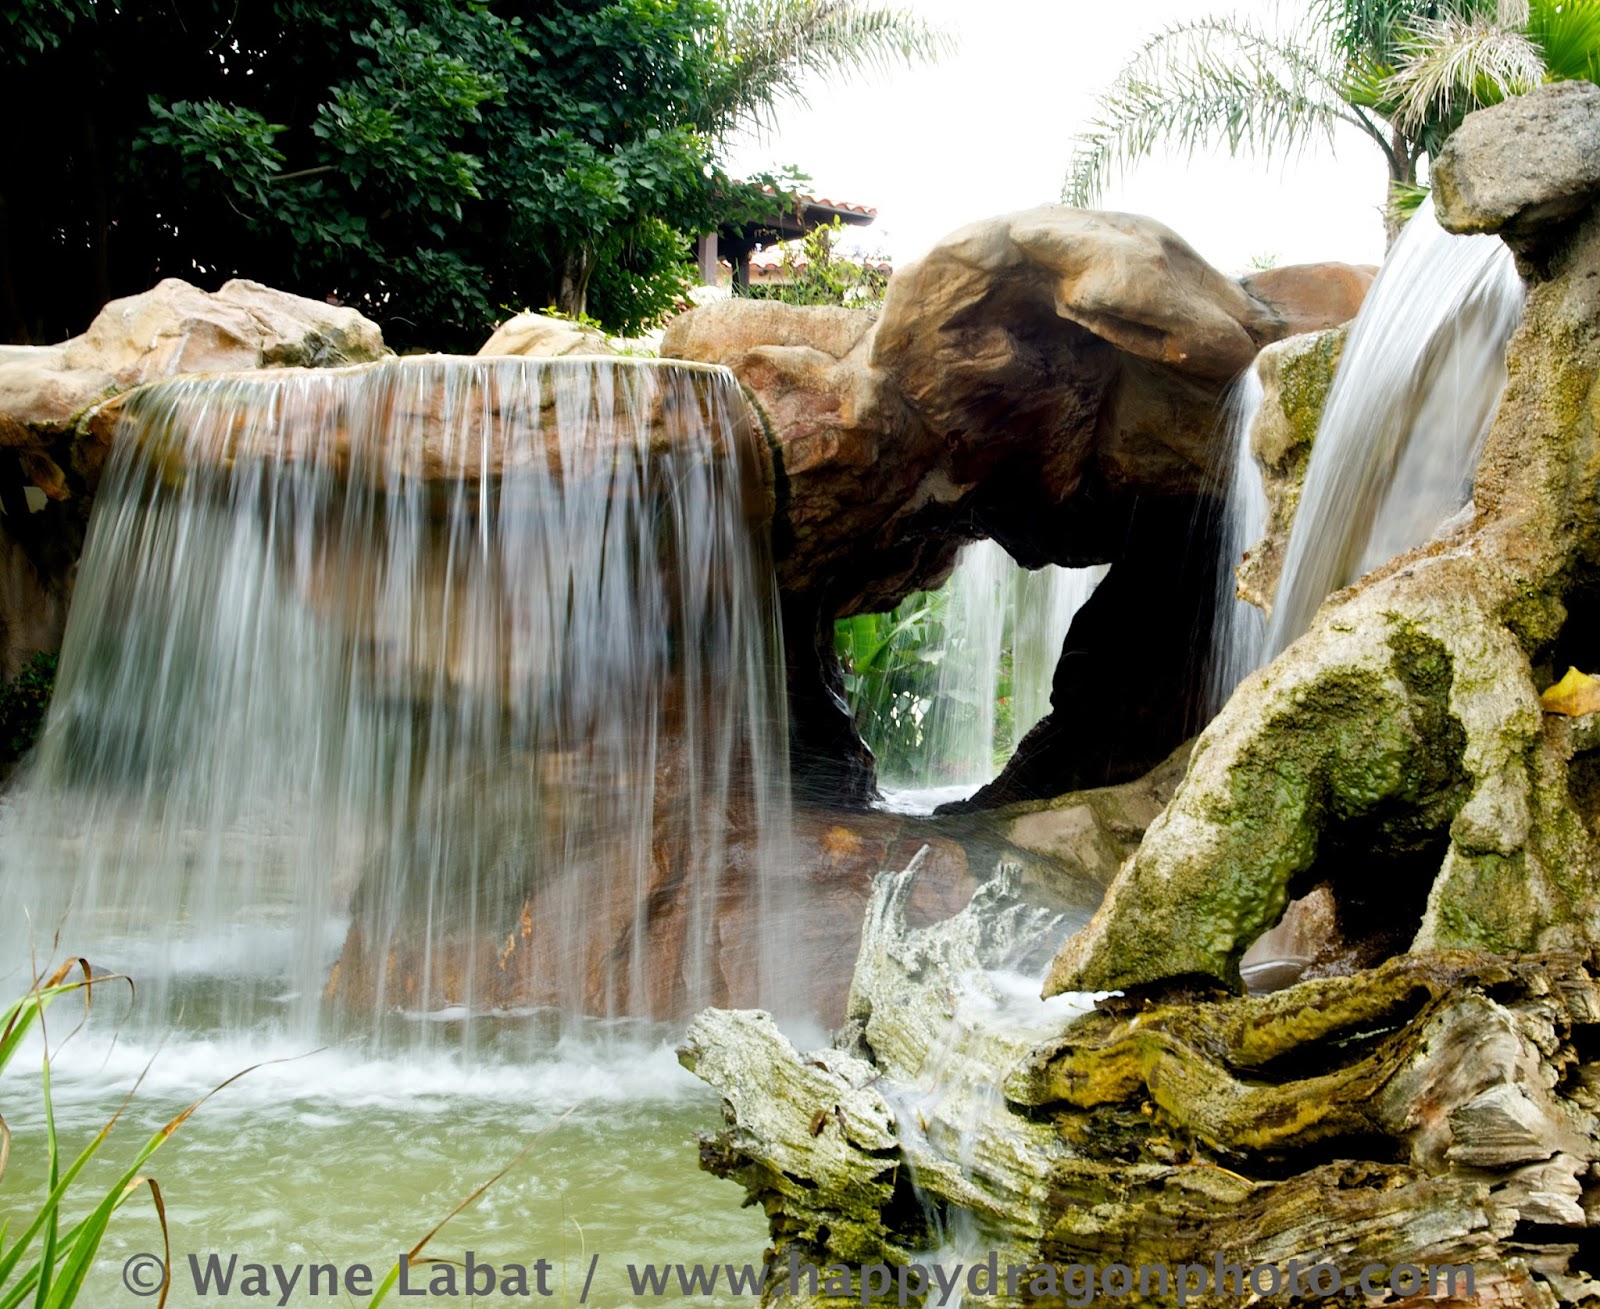
(1/10 @ F16 ISO 100)
Dreamy

(1/10 @ F14 ISO 100)
Realistic

(1/125 @ F4.5 ISO 100)
Hyper-realistic

(1/4000 @ F2.8 ISO 800)
Equipment- what you want to shoot will determine what gear you need, but you don't really need specialized gear to get any of these shots as long as you have good light. For the realistic shots you don't need anything other than a camera (Oh yeah- and a waterfall or some form of moving water- don't forget that part- I guess that element is pretty vital.) For the extremes, you need a bit more, but not much. As long as you have a camera that you can put into shutter priority mode (think this is called Time Value on Canon, other camera types please feel free to add comments below) you can make experiment with either extreme. To really play at the ends of the spectrum you want a camera that you can take full manual, the higher the max shutter speed the better, the faster your glass the better and the better high ISO capability the better. (but in all fairness, the same can be said for any style of photography) It is the photographer that makes the picture, not the camera, but the better tools you have at your disposal the greater range of options you will have when trying to get the shot you want. You may find yourself wanting either a neutral density filter or strobe depending on the lighting you have to work with. Also, if you want to go deep into the long exposure milky textured side, you need a tripod.
Since I was on vacation and traveling light, Excalibur got to sit this one out. All the images in this series were shot with a Nikon D3200 in full manual mode, 17-55mm F2.8 lens. All were handheld. I did have a travel tripod with me, but the hotel staff and guests were already giving the lone guy running around the pool/spa with a camera and zoom lens funny looks, so I thought the tripod might have been a bit over the top, and a lot of the places I wanted to shoot from would have required me to put the legs onto someone's beach chair. I did the best I could using anatomical bracing -which limited how slow I could take the shutter. Pixel peepers will see the motion blur on the slow images. So- even though you won't see the result here, let me say again, for the really slow stuff bring a tripod and some form of remote release device. Also, images shown here have minimal post processing, I pulled some of the noise out of the higher ISO shots, added a little bit of definition and edge sharpening to the fast ones, and did some basic exposure adjustments, but nothing major.
That's the preamble. Now for the actual shooting. I'll start with the middle ground. I thought this would have been the easy one. Find running water. Point camera. Shoot. You can go into manual and to town making the most technically excellent running water shot you want, but you should be able to get something useable just by simply pointing and shooting on auto. I wasn't going to spend a lot of time on the middle ground. Looking at my images as I pick things to post; however, it seems like I may have brushed over this too simply when shooting. It may actually be more difficult to do "natural" shots simply because there is no way to really define the term. What is natural to one person may not be the way another sees it. That's part of what makes the world so beautiful, and capturing it so hard. So I have to play some more with the middle ground next time. For the remainder of this post, when I say natural, assume I mean "as similar as I could get to how it looked in motion to my eyes." Here is my favorite "natural" shot from the group.

(1/200 @ F2.8 ISO 100)
After the realistic shots, my first instinct was to crank the shutter up and stop time, because I always love the high speed camera footage on shows like myth busters. At first I tried just using a slightly faster shutter speed, didn't get what I wanted, so I kept bumping it up until I did. I found it took a much higher shutter speed than I expected to get something obviously different from the "natural" style.
Not quite there yet

(1/250 @ F2.8 ISO 100)
Still not there but closer

(1/500 F2.8 @ ISO 200)
This is more like it

(1/2000 F2.8@ISO 800)
Realistic speed shot from side

(1/200 F2.8 ISO 100)
Note the flowing appearance on the center fall.
High speed shot of same fall

(1/3200 F2.8 @ ISO 800)
Noise reduction was deliberately not applied to this one, didn't want that to seem like it added smoothness to the fall. What surprised me was how little difference there was between the 1/200 and 1/3200 shot. Nowhere near as dramatic as the difference in the other shots. I shot both of these before moving around to the front of this fall.
High speed frontal shot- same fall

(1/4000 F2.8 @ ISO 800)
Notice the flow is clearly frozen, as can be seen in the gaps in flow, but portions of the fall still look smooth and flowy.
So, from the side, I was not able to get the same broken, frozen droplet effect I was able to get on the other falls. When I moved to the front, I was definitely able to freeze the flow, but the lip and the top half on the fall were still fairly smooth, unbroken flow. Not the same milky stream of the slow speed shots, but much smoother than the effect I was going for. I think that with the wide, smooth lip of this fall the water flow was almost completely laminar with no breaks, so even if I brought out Excalibur and cranked the speed up to 1/8000 it still would have a great deal of smooth flowiness in the resulting shot. (1/4000 is the fastest shutter on the D3200)
That wraps up my high speed, hyper realistic shots. Basically, you need to crank up the shutter speed at least into the 4 digit numbers, the faster the better. To do this even in fairly bright light you will need either fast glass or high ISO capabilities, preferably both. And pay attention to the angle you are shooting from and the quality of the particular fall or flow you are shooting to make sure you will be able to get the effect you want. The nice thing about digital is you can shoot as much as you want, experiment with different shutter speed / aperture combos, and get instant review capability to let you get the precise look you want. You can either do this in full manual or set your camera to shutter speed priority and let it pick your aperture if you don't care. As you speed up it will default to the wide end, depending on light, so you may not get the depth of field you want. If that happens go full manual and use ISO to compensate. One other option that would be difficult in the field under most conditions, but definitely viable in the studio, would be to use a bulb or long exposure and use a high speed stobe to freeze the motion of the water. That would allow for even shorter exposures than the 1/8000 sec speed on the D4, depending on your lights, but I don't have the capability to play with that at present.
Now for the slow speed dreamy effect. This seems to be by far the current favorite in the water photography arena, at least judging from a quick internet image sample. I am torn, I really cannot decide whether I prefer this or the hyperrealistic approach. Like I said earlier, to really delve down into this area, I should have set up a tripod and remote release so I could go for some really long exposures. for very long exposures, since it was a fairly bright (albeit overcast) day I would have needed to use Neutral Density filters. As it is, I was just able to test the waters a bit. Again, I found this technique devilishly simple in concept but there are myriad ways to execute the technique, so it comes down to personal preference and how you want your images to look. Probably the only real technique point I can give you for these is adjustment. Again, nothing groundbreaking, this will only be a new idea for those unused to dealing with manual exposure, but here goes. Once you find an exposure you like, but if you don't have the effect you want, for each step you slow down your shutter you move an equivalent step higher in aperture and you will keep your exposure. You can also do these with shutter speed priority as well, expect your apertures to shrink and your depth of field to increase as you slow down your shutter.
Slow.....

(1/30 F8 @ ISO 100)
Slower...

(1/15 F11 @ ISO 100)
And Slowest.... here we are....

(1/6 F18 @ ISO 100)
It is pretty easy to see that the slower the shutter speed, the higher aperture I needed to get a good exposure at my lowest ISO. A few more steps down and I would have needed a to start using either exposure compensation or ND filters. But as you can see if you zoom in and look at the details, 1/6 was too slow for me to handhold even making an anatomical brace out of my knees, camera bag and elbows. The more I look at these, the more I see the attraction to this style. I will end with what turned out to be my favorite shot of the day's work. This is the same fall I discussed in the high speed section. (those really paying attention may notice it's also the same fall as the opening shot, so you can see the difference between 1/10 and 1/6 of a second)

(1/6 F16 @ ISO 100)
So. There you have it. A quick overview of the three styles of shooting falling or flowing water and some of the bare bones techniques for how to shoot them. The same idea works on waves, rivers, even your bathroom shower or kitchen tap. So play around and see what you like best. Post some links to your results and share!
No comments:
Post a Comment