Friday, December 26, 2014
Switching from Aperture to Lightroom, and a few other updates.
Here comes another photography blog with no pictures in it. A while back now, Apple announced that Aperture was effectively dead. This made me sad, since I have come to use it quite heavily and had something on the order of 20,000 images between my personal and professional aperture libraries. I initially tried Lightroom, but the interface and organization wasn't as intuitive or easy for me as Aperture. So I went with Aperture. I spend a bit of money on plug ins, and a lot of time on learning to use the software. While I may not have reached ultimate ninja warrior status, I think I certainly was approaching a black belt level workflow. So it kinda felt like a betrayal and sting of death when I got the news. But, as annoying as it seemed, it is pretty useless to rail against what you can't control, so I decided to figure out how to make the transition and when. The end of the year seemed like a good time for a clean break.
Since I had been using aperture as a managed library, this was going to mean pretty much a complete reorganization of everything, so I decided it would also be good time to make a few other changes. I was almost out of storage space on my main drives and my computer was old and slow. I decided why not fix all of that at once, I mean, if you're cliff jumping there's no halfway right? The only issue was money. I really didn't have the cash flow to upgrade the computer. Enter a conversation with another photographer and friend who also works off a macbook, who suggested I upgrade to a solid state hard drive, which would seriously up the performance on my current macbook. I did some research and found out that would cost just a fraction of my most conservative computer upgrade plans, so I ordered a 1tb SSD and had it installed. At the same time I ordered some larger external drives to use as my workhorses.
He was right, the performance increase is insane. Before the upgrade, for example, it took 7-10 minutes for my laptop to boot up. Now it takes approximately 90 seconds. Photoshop work is almost instantaneous, even working with full resolution images from the D800. This will definitely hold me over for a while. Drive wise I am now using a La Cie 4TB external drive as my main professional drive. My only off site backup is the images I upload to my website, which is driven by photo shelter, so I am sort of paranoid about my backups at home. So for my backup drive, I went with the IoSafe Solo. This will be my second Solo. I using a partitioned 3gb solo drive to backup both my personal hard drive and my 2gb pro drive. I still use 1gb of that one for backup of my personal hard drive and images (as well as an encrypted cloud backup, but that is too expensive and slow to use for my working files) and the remaining 2gb will be my archive storage for my old aperture library. While I have (luckily) not had to test the resilience of these drives, they give all the appearances of being the tanks they are marketed as. The drives are basically water and fire resistant safes with USB ports, and even pretty likely that house burglars would leave them alone, since they weigh about as much as a small car and are bolted to my desk.
So, upgraded computer, new drives ready to go. It was time to figure out how the hell to move from aperture to lightroom. First off I decided migrating my whole professional catalogue was a non-starter, I would be using up almost half of the space in my new drive before I even started, so the 2014 and earlier Happy Dragon photo images will remain an aperture library. I did decide to switch them from managed to referenced masters so it will be easier to retrieve the raw files later if I need to. But my personal images I wanted to move with me since I do go back all the time and look at those. Adobe did add an Import from Aperture function in the most recent 5.7 lightroom update, but importing using that would have put all my files into folders organized by date only, which is not how I organized everything. So I decided to do it the hard way. I first switched my whole personal library from managed to referenced, which preserved at least the higher level folder structure for my images. Then I imported that framework into my new lightroom catalogue. The sub-folder hierarchy, alas, did not translate. I am not sure if I could have fixed this somehow, but I didn't and now it's done, so I am about halfway through rebuilding the subfolder hierarchy in my new personal LR catalogue.
Then it was time to start slowly learning the new interface and developing a new workflow. Am I there yet? Hell no, it took me two years to get to a decent level of proficiency with Aperture, it's been two months roughly with Lightroom. But already I can see that most of my real issue with the program was just that "this is different....." and change isn't easy for me, I get pretty set in my ways and attached to things and processes. Now that I have used it for a bit, although I still struggle with some of the differences, and I am still not really a fan of navigating the library folder panel, there are quite a few advantages to LR I have found, and I am quickly becoming a convert. I can't really geek out and use numbers to back this up, but I think Apple gave up on Aperture long before the announcement and stopped developing it. Adobe, on the other hand, has kept the press on. It's totally subjective, but I feel like the adjustment sliders in LR have a lot more range and power than the aperture equivalents. Aperture had better adjustment brushes, but the LR gradients are awesome.
Another huge change is the file management system. While it isn't as easy to navigate for me as Aperture's project setup was, it is more flexible and provides me with a new setup I am really liking. Instead of a library for my personal images and a second library for my professional images, I now have one catalogue, since LR makes it easy to spread images from a single catalogue over multiple drives. While I could have done the same thing in aperture using referenced files vice mastered, I don't think moving images around in aperture would have moved them around externally the way moving them in LR does. (maybe it would have, but oh well, that wasn't the way I had my aperture system set up). Another way this really helps me is that when I first shoot a set of work images, now when I import them initially from the camera I put them into a working folder that resides on my internal SDD (which is now big enough to be used for this purpose) and backed up onto my external drive. That way, while I am working on those images, I get the full speed advantage of the solid state drive, and I also don't have to cart around an external drive to work on my files. When the images are done, it's quick, easy and seamless to move them within lightroom onto my external drive. If that gets too unwieldy, I can even still put the images on my external drive, and just keep smart previews on my internal drive to work on while I am away from home. This really makes life easier when I can just grab my laptop and wacom tablet and bring them on the ship with me to work on images without carting around a whole external drive.
There's another thing that I just found that makes it even better. Lightroom Mobile! This is freaking awesome, and may be the sole forcing factor in getting me to move to the creative cloud subscription after all. Now, when I get home late and dump my images from a show onto my working folder, I also put them into a collection which automatically syncs with LR mobile. While I get dressed in the AM, I sync my iPad and make sure those images are downloaded into LR mobile for offline work. Then, when I am stuck in horribly boring and pointless meetings at work, or stop of at a bar on the way home, I can pull out the iPad and sort through the images, do my initial reviews, rating and selection process, and make some simple, initial edits. Then, when I get home, all that work automatically updates and when I fire up the laptop, the culling process is mostly done and I am ready to start the edits. This is awesome. Also, the other main reason I was staying away from the creative cloud is that it wouldn't work if I was on deployment and out to sea for longer than a month (or 3 with annual subscription) without the software being able to phone home. Since it looks like I probably only have two more months out to sea in my naval career, that roadblock seems to no longer be the issue it was. Which brings me to my final point.
This process of switching over to Lightroom was a reminder that was perfectly timed. It reminded me that although it is easy for me to get stuck in a certain process and way of doing things and become very resistant to change, it isn't necessarily the horrible catastrophe I initially fear it to be. Change and upheaval will seldom be easy, learning new ways of doing things and developing new processes is hard. But if you stick with it, it can definitely be worth it and can actually open amazing new doors and opportunities. I definitely learned that when I went through my divorce, but I guess I was starting to forget, and it's nice to have a reminder right about now, because a couple of weeks ago I found out that my navy career is pretty much over. I got passed over for command, which means that I statistically have a better chance of getting struck by lightening while purchasing a winning lottery ticket than I do of promoting again, and if I don't promote again I will be retired in 3 years whether I want to be or not. There are many bright sides to this, namely I won't have to worry about long stretches away from my family and friends anymore. But it's also scary, because I am nowhere near financially ready for it. I was hoping to make a little off of my book, but that was pretty much dead on arrival, and other than a few little gigs, I haven't cracked the code of how to earn anything from photography. I still have a load of debt from the divorce and am in no way ready financially to retire and still provide for the family.
But, as life seems to be reminding me, painful change and learning a new way to proceed can be very rewarding. More to follow. In conclusion, I hereby recant all the foul things I may have said in the past about lightroom and the adobe creative cloud. It will take a while to get as proficient with LR as I was with aperture, but it will be worth it and I think I will find even more new features and tricks to make life easier. The rest will take care of itself somehow, I have 3 years to figure it out.
Wednesday, December 17, 2014
Buy Local.... a review and shoutout to 858 Graphics in San Diego, Ca.
Like so many of my posts, this episode starts out with me perusing the local Craigslist boards looking for photography jobs and anything else that catches my eye... speaking of which, if anyone knows an albino midget someone is looking to hire one.... but I digress. I came across an add looking for bloggers willing to receive free items and services in exchange for reviews. Let's see... do I have blog? Yes- although I probably don't have to point that out since you are reading it right now). Do I like free stuff? Yes. Seems like I was a good fit for this one. So I shot them an email and didn't expect anything really to come from it.
Flash forward a couple of weeks, and to my surprise I find a message in my inbox from 858 Graphics here in San Diego asking if I would like to send them a photo and get a free 16x24 acrylic print in return for a review. (looks like normally costs $80) Well, as it turns out, I would like that very much. So I picked out an image to send their way from a recent shoot of my family.

Turnaround time was negligible, very quick turnaround. Print was ready in a couple of days, and it looks absolutely awesome. The main holdup in my posting this review has been my unsuccessful attempts to get a picture of the print ( I know, very meta right?) but seriously, when they say "ultra high gloss finish" they aren't kidding. I finally came to the conclusion that to get a picture of the print that didn't show you a reflection of some random feature of my apartment or me, I would need to built a black box set and set up some serious product style lighting. I tried to do that this evening, but my son decided he could destroy faster than I could build, so I gave up. Here is the best image I could get without you seeing too many incriminating reflections:

Print came with the mounting hardware, pretty easy to attach and it sits about an inch off the wall with the supplied mounts.
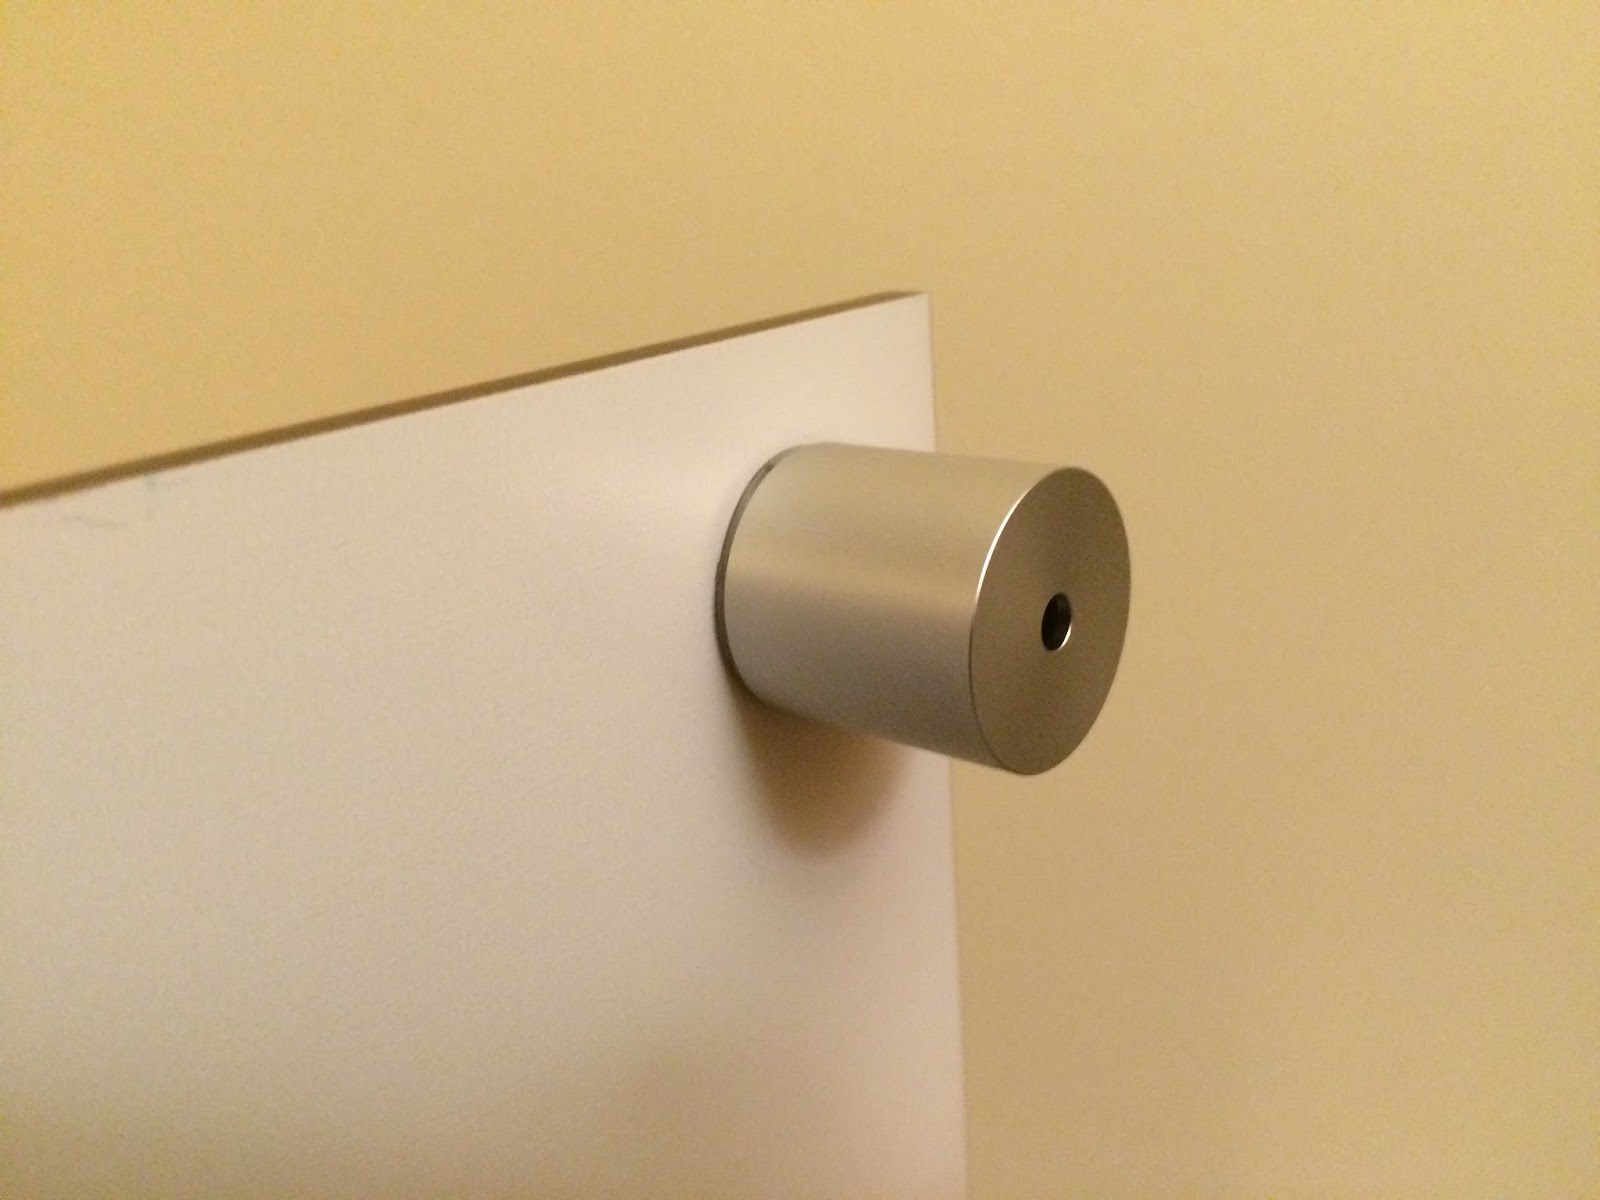


As you can see, installing the mounts is pretty simple. Overall I am very happy with the service and quality of the product. My point of contact was very easy to deal with throughout the whole order and made getting the print a simple and even fun process.
But, despite the free stuff and my overall happiness with the print, I would be remiss if I did not mention two small issues (neither of which will likely effect paying customers at all)
The first issue was image submission, there was no simple way to provide a high resolution image to 858 to print. I think this was due to the fact that I was getting the print outside of their normal ordering system, it looks like with the normal ordering system you can upload up to a 500mb file, so that shouldn't be an issue when you order from them, unless you are shooting something seriously massive. A single full resolution raw image from my D800 comes in under 100mb.
The second issue I had with the print was banding in the dark sky areas of the image. I won't hold this against 858 either, because I have had the same issue in prints I have ordered from other printers, so I think I must be doing something wrong when I export my files for printing. I don't print a lot or on a frequent basis, so I am more than willing to assume the error lies more in my print preparation than in 858s printing process. And unless you look really closely, you wouldn't notice it.
So, the only two issues I had were both fairly minor, and I have a feeling that neither would have come up in the process of a normal paid order. Also, judging from my interactions with the staff, I have a feeling that if I had mentioned the banding issue to them they would have probably offered to work with me on the file I submitted and reprint the job for me. But I didn't mention it, because that would have been a total dick move on my part (hey- this awesome thing you gave me for free isn't quite awesome enough, how about a redo? Not my style. I may be a beer snob, but you buy me a Corona I'll say thank you and drink it)
To sum it up, awesome service, amazing products. Next time I need something printed up I will definitely give 858 Graphics a call, and not just because the bribed me with free stuff. I also like that they are local and I can go in and talk to a real person, not just some faceless internet order service from a distant land. (although they do offer faceless distant land service as well, if you aren't lucky enough to live in or near San Diego.) Look them up, and give them some business because they rock and will work to earn it!
Flash forward a couple of weeks, and to my surprise I find a message in my inbox from 858 Graphics here in San Diego asking if I would like to send them a photo and get a free 16x24 acrylic print in return for a review. (looks like normally costs $80) Well, as it turns out, I would like that very much. So I picked out an image to send their way from a recent shoot of my family.
Turnaround time was negligible, very quick turnaround. Print was ready in a couple of days, and it looks absolutely awesome. The main holdup in my posting this review has been my unsuccessful attempts to get a picture of the print ( I know, very meta right?) but seriously, when they say "ultra high gloss finish" they aren't kidding. I finally came to the conclusion that to get a picture of the print that didn't show you a reflection of some random feature of my apartment or me, I would need to built a black box set and set up some serious product style lighting. I tried to do that this evening, but my son decided he could destroy faster than I could build, so I gave up. Here is the best image I could get without you seeing too many incriminating reflections:
Print came with the mounting hardware, pretty easy to attach and it sits about an inch off the wall with the supplied mounts.
As you can see, installing the mounts is pretty simple. Overall I am very happy with the service and quality of the product. My point of contact was very easy to deal with throughout the whole order and made getting the print a simple and even fun process.
But, despite the free stuff and my overall happiness with the print, I would be remiss if I did not mention two small issues (neither of which will likely effect paying customers at all)
The first issue was image submission, there was no simple way to provide a high resolution image to 858 to print. I think this was due to the fact that I was getting the print outside of their normal ordering system, it looks like with the normal ordering system you can upload up to a 500mb file, so that shouldn't be an issue when you order from them, unless you are shooting something seriously massive. A single full resolution raw image from my D800 comes in under 100mb.
The second issue I had with the print was banding in the dark sky areas of the image. I won't hold this against 858 either, because I have had the same issue in prints I have ordered from other printers, so I think I must be doing something wrong when I export my files for printing. I don't print a lot or on a frequent basis, so I am more than willing to assume the error lies more in my print preparation than in 858s printing process. And unless you look really closely, you wouldn't notice it.
So, the only two issues I had were both fairly minor, and I have a feeling that neither would have come up in the process of a normal paid order. Also, judging from my interactions with the staff, I have a feeling that if I had mentioned the banding issue to them they would have probably offered to work with me on the file I submitted and reprint the job for me. But I didn't mention it, because that would have been a total dick move on my part (hey- this awesome thing you gave me for free isn't quite awesome enough, how about a redo? Not my style. I may be a beer snob, but you buy me a Corona I'll say thank you and drink it)
To sum it up, awesome service, amazing products. Next time I need something printed up I will definitely give 858 Graphics a call, and not just because the bribed me with free stuff. I also like that they are local and I can go in and talk to a real person, not just some faceless internet order service from a distant land. (although they do offer faceless distant land service as well, if you aren't lucky enough to live in or near San Diego.) Look them up, and give them some business because they rock and will work to earn it!
Tuesday, December 2, 2014
Christmas shopping for the photographer in your life. (how to buy presents for a photographer)
Just in case you hadn't been able to tell from the flurry of advertisements, ugly sweater party invites, and the endless repetition of "Baby it's cold outside," Christmahannakwanzika is upon us once again. This means, if you happen to have a photographer in your life that you may be totally stumped when it comes to what to get us when it's time to be getting presents.
I admit it, we're a pretty finicky lot. Most of us are very particular about our gear, we know what we want, and that is exactly what we want. You may not even know what camera we use, let alone what accessories work with it or what is already in our camera bag. So how do you go about getting us something you know we'll use and love? It isn't easy, so I will try to give you a few options:
Option 1: Go simple. Stick to the tried and true basics, things that are pretty much universal. Problem is there aren't many of these out there anymore, and the ones that are still there are pretty much at the stocking stuffer level. Some quick examples are handy lens cleaning cloths, you can never have enough, or cases for the standard items everyone needs, like memory cards and batteries.
Option 2b: Do a little research. What camera system does your photographer use? What gear is in their camera bag already? With a little poking around you can get an idea of what they already have, and hopefully you know what sort of images they like to shoot- landscapes, macro, portraits, sports, etc. Write down a few things then head to your local camera shop. Make sure it's your actual local camera shop, not just the camera section at Best Buy or Fry's. I don't want to disparage those stores, but the sales people there are probably not photographers and even with the best of intentions may lead you astray. But your local camera shop is staffed by photography geeks just like the one you are shopping for. If you can tell them what is already in your shooter's bag and what they primarily shoot, these pros will most likely be able to give you some great suggestions. Ask first, but these shops will also probably be more than willing to do credit/refunds/exchanges in the event that your gift didn't quite fit the bill.
Option 2b: Do a little sneakier research- aka snooping. Look over your photographer's shoulder while they browse camera sites and see what they seem to like. Look through their browser history and see what pages they visited at big photo retailers (Adorama, B&H, Keh, etc). This method is rather risky on several levels and could lead very bad relationship consequences, so only use it if you are very comfortable with your person and you have a shared computer or something that should reasonably not be expected to be private. Also, be prepared to potentially ruin your surprise if you stumble across the sites they were using to shop for your gift, or to learn way more than you ever wanted to know about your person if you stumble across some other sites they may have visited for.... umm.... research. Ok, really, I don't recommend this one. Forget I said anything, it's a bad idea.
Option 3: Accessorize. Yeah. Most of us have the same old boring black cameras and lenses. Maybe white if your photographer shoots canon. You may not know what gear they shoot with, but you probably have a good idea of their personality. Maybe you can help them set themselves apart a bit from the crowd. Do they shoot children's portraits? How about a Shutter Hugger to help make those little smiles come out. Do they shoot rock concerts or just want to stand out from the crowd a little bit? How about a Lens Skin you think fits their image? (you have to do a little research to know what lenses they use for that one.)
Even better, what if your photographer is into steampunk fashion, or just really, really wants to stand out. What if you want to support a small business instead of a major online retailer? In this case, you should definitely take a look at CameraPunk. Unlike the other links to amazon items in the rest of this post, I don't earn a cent if you buy something from CameraPunk. But if your photographer really wants to stand out and look awesome, this is a great place to shop. You can go from subtle to over the top steampunk as you like. If you go back and look at a few of my posts where you can see my 24-70 or 70-200, you may notice that each one has a lens cuff from CP. While I don't earn anything from recommending you check CP out, the artist is a friend of mine and is just an amazing person as well as an awesome photographer herself, so I would be remiss if I didn't suggest you check out her shop for some stuff you won't find anywhere else.
Option 4a: Make it personal- give the gift of yourself. Give a gift certificate for your services as a photo assistant on a shoot or two. Spend some time with your photographer and help them out while they are doing what they love.
Option 4b: Make it really personal. This one only works if your photographer is your significant other, or is someone you are considering for a closer relationship. Slip on something fancy (or naughty) and walk up and seductively ask if they would like you to model for them sometime....
So, there you go, some really non-specific options to hopefully spur your creativity and help you pick out a gift for the photographer on your list. Before I go, just in case I happen to be the photographer on your list, or if Santa happens to be following my blog, here's some suggestions for me:
Phantom 2 Vision+ Drone!
Nikon 135mm F2.0 DC Lens
Sigma 150-600 F5.6-6.3 DG OS HSM S Lens
Zeiss Otus 85mm
Then there are studio lights, medium format cameras, a studio space.... see, we're easy to shop for as long as you happen to be loaded!
Merry New Year and Happy Christmas to all- or whatever Holiday greeting floats your boat, I am pretty equal opportunity when it comes to time to get presents!
I admit it, we're a pretty finicky lot. Most of us are very particular about our gear, we know what we want, and that is exactly what we want. You may not even know what camera we use, let alone what accessories work with it or what is already in our camera bag. So how do you go about getting us something you know we'll use and love? It isn't easy, so I will try to give you a few options:
Option 1: Go simple. Stick to the tried and true basics, things that are pretty much universal. Problem is there aren't many of these out there anymore, and the ones that are still there are pretty much at the stocking stuffer level. Some quick examples are handy lens cleaning cloths, you can never have enough, or cases for the standard items everyone needs, like memory cards and batteries.
Option 2b: Do a little research. What camera system does your photographer use? What gear is in their camera bag already? With a little poking around you can get an idea of what they already have, and hopefully you know what sort of images they like to shoot- landscapes, macro, portraits, sports, etc. Write down a few things then head to your local camera shop. Make sure it's your actual local camera shop, not just the camera section at Best Buy or Fry's. I don't want to disparage those stores, but the sales people there are probably not photographers and even with the best of intentions may lead you astray. But your local camera shop is staffed by photography geeks just like the one you are shopping for. If you can tell them what is already in your shooter's bag and what they primarily shoot, these pros will most likely be able to give you some great suggestions. Ask first, but these shops will also probably be more than willing to do credit/refunds/exchanges in the event that your gift didn't quite fit the bill.
Option 3: Accessorize. Yeah. Most of us have the same old boring black cameras and lenses. Maybe white if your photographer shoots canon. You may not know what gear they shoot with, but you probably have a good idea of their personality. Maybe you can help them set themselves apart a bit from the crowd. Do they shoot children's portraits? How about a Shutter Hugger to help make those little smiles come out. Do they shoot rock concerts or just want to stand out from the crowd a little bit? How about a Lens Skin you think fits their image? (you have to do a little research to know what lenses they use for that one.)
Even better, what if your photographer is into steampunk fashion, or just really, really wants to stand out. What if you want to support a small business instead of a major online retailer? In this case, you should definitely take a look at CameraPunk. Unlike the other links to amazon items in the rest of this post, I don't earn a cent if you buy something from CameraPunk. But if your photographer really wants to stand out and look awesome, this is a great place to shop. You can go from subtle to over the top steampunk as you like. If you go back and look at a few of my posts where you can see my 24-70 or 70-200, you may notice that each one has a lens cuff from CP. While I don't earn anything from recommending you check CP out, the artist is a friend of mine and is just an amazing person as well as an awesome photographer herself, so I would be remiss if I didn't suggest you check out her shop for some stuff you won't find anywhere else.
Option 4a: Make it personal- give the gift of yourself. Give a gift certificate for your services as a photo assistant on a shoot or two. Spend some time with your photographer and help them out while they are doing what they love.
Option 4b: Make it really personal. This one only works if your photographer is your significant other, or is someone you are considering for a closer relationship. Slip on something fancy (or naughty) and walk up and seductively ask if they would like you to model for them sometime....
So, there you go, some really non-specific options to hopefully spur your creativity and help you pick out a gift for the photographer on your list. Before I go, just in case I happen to be the photographer on your list, or if Santa happens to be following my blog, here's some suggestions for me:
Phantom 2 Vision+ Drone!
Nikon 135mm F2.0 DC Lens
Sigma 150-600 F5.6-6.3 DG OS HSM S Lens
Zeiss Otus 85mm
Then there are studio lights, medium format cameras, a studio space.... see, we're easy to shop for as long as you happen to be loaded!
Merry New Year and Happy Christmas to all- or whatever Holiday greeting floats your boat, I am pretty equal opportunity when it comes to time to get presents!
Saturday, November 15, 2014
Best App for iPhone HDR - TruHDR Camera

Simply put, the best app I have found for doing HDR on the iPhone is TrueHDR from Pictional. I know what you are going to say... why would I pay for an HDR app when the native iPhone Camera does HDR on its' own? Two reasons: Control and Results. The native iPhone camera does HDR automatically and tries to make the most seamless blend possible. From what I have found it uses only two frames in rapid succession (although I could be wrong, maybe it does three) but however many it shoots, the iPhone control the blending and the result and does it all on autopilot. For realistic HDR that you won't even notice ever, it's pretty nice.
So why is TrueHDR better? You take control. You can go completely manual for your three captures, or do an auto capture series, but once the captures are done you get to adjust things, and even have the ability to save multiple versions of the same image set. And more control gives better results.
Here's an example of the difference:
 |
| Native iPhone 5s Camera HDR shot |
 |
| Same shot using TrueHDR |
If you follow me on FB to G+ and see shots I have posted from out to sea on the aircraft carrier, most of them were taken using the TrueHDR app, it's my go-to camera app for shooting sunsets with the iPhone.


Really, about the only case I can think of for using the native app is when trying to get HDR shots with people. TrueHDR pauses for a moment between frames, the native app shoots the brackets so fast there is almost no discernible break, so ghosting seems to be much less of a factor on the native app, but is pretty obvious when trying to shoot people with TrueHDR.


You may have to enlarge that image to see it, but there was only one plane taking off in this image. That should also give you an idea of the interval between bracket shots. Guess by the third frame it was lost in the clouds.
Anyway, been meaning to post something about this app for a while, since I use it so much. If you are at all interested in shooting HDR, landscapes, sunsets, etc with your phone, it's well worth the 2.99 price to have it handy.
Thursday, November 13, 2014
Gear Review: Westcott 43in Apollo Orb and 26in RapidBox

As promised in the last post, here is a quick review of my two favorite lighting modifiers. Both are from Westcott; the 26 inch RapidBox Octobox and the 43 inch Apollo Orb softbox. As you can see from the opening image, they are pretty similar in appearance once set up, one is just slightly larger than the other. The 26in is on the left, the 43in on the right. Other than size, though, there are some major differences between the two.

The 26in Rapid Box is a multi-part setup with a rear, external flash mount. The bracket that the flash is attached two separates from the umbrella section, and is very adjustable for various combinations of speed lights and remote receivers. (seen here is my phottix mitros + unit with built in receiver). The flash can shoot straight through and there is an option to have a beauty dish reflector with or instead of the diffusion panel. The Diffusion Panel does not use velcro or anything light at to attach, it has a ridge and is held on entirely by tension with the umbrella ribs.

In the shot above you can see the inside of the RapidBox with the beauty dish reflector in place and the diffusion panel removed. Although the multiple part flash mount does take a little bit longer to set up, the Rapid Box breaks down much smaller than the Apollo. More importantly, it just feels like a much sturdier piece of equipment. I have had the rapid box for a while now, and used it for several shoots as well as travelled with it quite a bit. It's taken a fall or two on a light stand and come away unscathed. The Rapid Box is designed for portability, it comes in a pretty nice carry bag and is really quick and easy to set up. Take it out of the case, pop it open. If you want to add the reflector, screw it onto the center post. Place your flash/remote onto the bracket, place the bracket onto the light stand and slide it back to the rear. Position the rapid box at the right height for your flash and screw it into the bracket, then slide your flash forward into the opening and tighten down. If you want the diffuser, attach it around the outer edge of the box and start shooting.
That's the technical on the Rapid Box, before we move to the Apollo, let's take a quick look at their broken down size comparison, using my standard of reference, the 70-200mm F2.8 lens.

On the left you see the complete RapidBox setup. In the (included) bag are the Rapid Box, flash mount bracket, beauty dish reflector (separate purchase) and the diffusion panel .See what I mean about it being easy to pack? On the right you see the Apollo Orb collapsed in it's plastic sock (there is no velcro or strap to hold it shut otherwise, a distinct oversight I believe, although when the plastic bag dies I will just use one of my flash gel attachment velcro straps to hold it shut. You also see the wadded up diffusion panel and the included flash bracket/umbrella holder.
The Apollo takes a somewhat different approach. It is obviously a larger modifier, quite similar to a standard umbrella. It collapses like an umbrella, and mounts to the flash using a standard umbrella holder. The main difference between the Orb and a standard umbrella is the depth. The flash slides through a set of zippers to sit deeper into the Orb that a standard umbrella would mount.

Once in position, the diffusion panel (if you choose to use it) attaches to the rim via velcro. While the larger Apollo Orb definitely gives more diffusion and a larger light source, it isn't as readily portable as the Rapid Box, and is more a of pain to adjust once it's put together. The only way to adjust it without removing the diffusion panel is to reach up through the zippers and try to adjust the flash bracket by touch.
Otherwise, the Apollo just doesn't seem to be as sturdy and well constructed as the Rapid Box. I have only used the Apollo on two field shoots so far, and I can already see slight bends in the umbrella ribs, and the stitching on the velcro diffusion panel attachment points is starting to pull out. I have dropped the Rapid Box a couple of times and it pretty much bounced, protected the flash, and was right back in business each time. I have a feeling that if the Orb goes down, it may just crunch and stay crunched for good. Travel wise, it isn't nearly as portable as the Rapid Box, all I can say is that it fits into the bag with my light stands. One final note on the Orb: You can get a grid attachment for it, if you need one. I have not picked one up yet so can't discuss it, just thought I should mention the option is out there.
So, that's the overview and the feel for both, but the really important question is, how do they light? If you saw my last post covering the Veteran's Day portraits, you got to see both used in a real world setting, the Orb was my main and the RB was my fill. Used together they were awesome, nice, soft even light. But to really see how they perform, I decided a more scientific test was in order, so I called in my stunt monkey to do a little modeling. For all of the shots you are about to see, the flash was just off camera left, about 45 degrees above and camera left of the "model," about three feet away. To keep it as equal as possible, I was shooting full manual mode, ISO 100, 1/250sec shutter, F5.6, I left the flash in TTL which theoretically would try to make each exposure as similar as possible. All of these images are straight out of camera JPEG images. (Nikon D800 standard preset). Flash was the Mitros+. I started from bare flash for comparison.
 |
| Bare flash |
 |
| Flash with built in diffuser |
 |
| Bounce Flash (unedited so you see color cast from off white walls) |
 |
| Rapid Box with Diffuser panel but no reflector |
 |
| Rapid Box with reflector but no diffuser panel |
 |
| Rapid Box with diffuser and reflector |
 |
| Apollo Orb with no diffuser panel |
 |
| Apollo Orb with diffuser panel |
As you can see, the results were pretty predictable, as the modifier got bigger, the shadows got less distinct and the light got softer, neither modifier gave as smooth a result as the bounce flash. That being said, Mr. Monkey the supermodel doesn't give good catch lights, since his eyes are all pupil. Both modifiers give nice, octagonal catchlights that the bounce doesn't and you can't always find a convenient wall.
.jpg)
Both modifiers work pretty well, I like having both in my kit to use as appropriate for the situation. If it's a nice, safe, static setup and I had to pick one, I would do with the Apollo Orb, Better diffusion and a larger light source make for softer, better wrap around light and more flattering images. But for outdoor shoots where there is wind, situations where things need to get moved a lot, durability and portability are issues, or you have to pick just one modifier to put in your kit, I would go with the RapidBox without hesitation. The light is almost as good fully diffused, it is MUCH sturdier, and you have more options for looks- including a pseudo beauty dish.
So if you have to pick one, just get the rapid box. If you want a portrait studio that fits into a single bag, grab them both and add a collapsible backdrop kit, and you're set for a quick, on the fly setup that will give great results.
EDIT- got some new information, apparently despite my orb being a recent purchase, I seem to have received an older version with metal ribs. It seems westcott has redesigned the orb with fiberglass ribs and addressed the durability. Not sure when I'll be able to get my hands on an updated version to compare but felt like I needed to at least put this new info out in fairness.
EDIT 2- After some use, I feel it's only fair to add that you really need to figure out all settings on your flashes and the tilt you want your mount to be on the Apollo orb before you velcro on the diffuser panel, because adjusting anything inside the orb once the panel is on the front requires reaching in through the zippers and doing everything by feel, and is a royal PITA!
Monday, November 10, 2014
Veteran's Day Tribute (and a how to fit a portrait studio into a Mini Cooper)
.jpg)
Like so many of my stories, this one starts on Craigslist, browsing around for gigs. I saw a post asking for a local rehab facility looking for a volunteer photographer to shoot portraits of some of the Veterans they work with for a Veterans' Day tribute wall they were creating. While I am getting really tired of shooting and not making any money, as a current active duty officer with 17 years of service, I figured this would be a good chance to give something back and get something different for my portfolio at the same time.
.jpg)
Of course, reading the post, what I saw in my head was younger vets who had been injured in recent conflicts, instead of older veterans in a retirement facility. This presented several unexpected challenges. First and foremost were my own hangups. I spent some time working as an EMT in LA while I was in college, and spent lots of time in various retirement homes. I am not sure if it is the certain distinct smell they all have, or being forced to face my own mortality and contemplate my future, but all I can say for certain is that they make me very uncomfortable.
.jpg)
That was the psychological difficulty, but in addition there were a few practical problems I wasn't prepared for. The main one was that there was quite a range of responsiveness between the subjects. Most of them were in wheel chairs, so the posing options were pretty limited, and there was quite a range of how open they were to direction.
.jpg)
As I start to add more portraiture into my repertoire and do more posed shoots vice just shooting live events, I am learning how to pose my subjects in order to present them at their best, but I am still new at it, and over the course of this afternoon there were many times I felt that I really wasn't up to the task in this environment.
.jpg)
I also wish that I would have had more time to hear some of their stories and maybe learn a little bit about who they were, because connecting with my subjects makes it easier to get good shots, but it seems I was smack in between lunch and movie time, so everyone wanted to get in and get out before the movie started. So I did the best I could.
.jpg)
At the end of the day I wound up shooting about a dozen of the vets, and a few members of the staff. It was a challenge, and although I don't really think I did the best job possible, I think I got some decent shots of them for their wall.
The day also gives me photographic evidence that everyone I shoot isn't a young, fit, flexible yoga model or circus performer. It isn't always about attractive naked women. It goes back to my goal of trying to find and showcase the beauty in everyone. If I can't do that, it means I failed. I think I at least broke even on this one.
On a technical note, I got to break in what I calling my portable portrait studio on this shoot. It isn't easy to fit a portrait studio into a Mini Cooper, but this one makes it easy. For large scale shoots I have a full size backdrop setup that can hold standard seamless paper rolls, muslins, whatever. But this is overkill for a quick portrait setup like I needed for this one, and it takes more time to set up and break down than I generally spend shooting a single subject. I figured I would try something new, and picked up a collapsible/reversible backdrop kit from Savage studios. It's what you see in each of the images attached to this post. It folds up like a pop-up sun shade and clips into it's own stand. Takes about 1 minute to set up or break down, it's around 5x6ft when open, and can easily be swapped between horizontal and vertical. The one I went with has the mixed shade I used in these images on one side and is dark grey on the reverse, although there are more color combinations you can pick. It's everything I like in a photography accessory: simple, versatile and quite effective.
Lighting wise, I did this with a two speed light setup, my main light was my Phottix Mitros + (which I reviewed in my previous post) with a wescott 43in Apollo Orb . My fill light was a regular Mitros with a westscott 26in rapid box with the beauty dish reflector. I will be posting a more thorough review of those two modifiers in an upcoming edition, so stay tuned, but as you can see above they provided some nice, soft light.
Other than being very quick to set up and break down, as well as easy to fit into my tiny car, this setup made the day go a lot smoother than it would have otherwise. If I had a full size backdrop and heavy duty strobes with either wires or battery packs, it would have been a pain to maneuver all the wheelchair bound vets around into position. As it was, I could just quickly move my lights out of the way, let the chairs roll in and out, and quickly move the backdrop and lights around my subjects as necessary, which I found much more efficient (not to mention less rude) than grabbing and re-adjusting their chairs if they were not on the mark.
So, I got to test some new gear, deal with some fears and psychological issues, shoot something besides gorgeous young women in spandex, meet some interesting people and give a little something back to my military community for Veterans day, all before it was actually Veterans Day, so that while you read this, I can kick back on the beach and enjoy my holiday with a tasty beverage or three. Happy Veterans' Day to all who served and well as those who are still serving, and to the care givers that provide for the Veterans who are no longer able to provide for themselves.
.jpg)
.jpg)
.jpg)
Thursday, November 6, 2014
UPDATED: Gear Review: Phottix Odin trigger system and Mittros Flash (for Nikon)
When it comes to wireless trigger systems, there are more options on the market than I can count. For Nikon users the simplest is just to use the built in IR functionality of the CLS system, either with a built in commander function on your camera's pop up flash (like the D800), using a hotshoe mounted speedlight as a commander, or using the SU800 as a dedicated commander unit. This system is very capable, but there are some distinct limitations of the IR basis. Range is much less than radio (RF) trigger systems, you need to have a line of sight between the commander and the slaves, and the signal can get washed out if there is bright sunlght or other competing light sources in the space (bright stage or DJ club lights seem to kill my IR setups fairly regularly) so if you do a lot of off camera flash work, you will quicly find you want to move to an RF trigger system. Once you go RF, there are a lot of cheap systems that are perfectly functional in a competely manual mode, but then you lose all the advantages of your TTL system and you also will still need to manually set and change each speedlight in your system, which sucks if you have to mount them in hard to reach places like the ceiling of a Roller Derby arena over the tracks. This leads to the big guns of the RF trigger world, which for a while meant Pocket Wizard and PW only. Then came Phottix.
Phottix has been making accessories for a while, and has had various previous RF trigger systems, but their relatively new Odin system came as a direct competitor to PW. In addition they also released the Mitros flash as a direct competitor to Nikon's SB910 flagship speedlight. More recently they introduced a new version of the flash, the Mitros Plus, which incorporates the functionality of the Odin Transmitter and Reciever system into the flash itself, which is awesome because if removes the need to set up a separate trigger for each remote flash, you just pop it on the stand and you're ready to rock.
Obviously, given the title of this review, I decided to go with the Odin system instead of a PW setup when I chose to go to an RF system. I did this mainly for a two reasons. The first was High Speed Sync. I find myself quite often in situations where HSS is handy, and it seemed like the Odin system was designed to make using HSS simple. The other reason was simplicity overall. Part of my problem with the PW system is that they have been around so long and have so many options out there that getting what I wanted seemed to be a daunting project. There were compatibility charts and all sorts of things like that, but my brain hurt trying to figure out what transmitters worked with what receivers while allowing the functionality I wanted. With the Odin system it seemed simple. Here's the transmitter, get one receiver for each flash you need (until the Mitros+ made that redundant) and no more thought required. So I went with the Odin system when it was time to drop the coin.
Around the same time I went RF, I also decided to expand my lighting capabilities. I already had an SB910 and SB700. Thus far I have been on a continuously constrained budget, so while I would have liked to just keep buying SB910s, that wasn't really viable, so I was thinking of buying more SB700s when I came across the Mitros. For about the same price as a new SB700, the Mitros offered pretty close to the same capability of the SB910. So I decided to take a chance here as well.
So- two chances on relatively new systems, and so far I have not regretted either purchase at all. With one exception I will get into below, both the trigger system`and my mitros have performed flawlessly, going above and beyond expectation. The only major detractors I will mention right off the bat are customer service (which I will also cover later) and instructions. While, in general, both the flash unit and the Odin system are easy to set up and use in the basic functionality, for anything beyond the basics you must be prepared to do a lot of research and web crawling beyond just a basic reading of the manual. The manual that comes with each part of the system is very bare bones and lacking details on some indicators and any sort of troubleshooting. One good common feature to all is that each unit comes with a USB cable to connect to your computer for updates as well as a flash drive with the manuals.
I'll start with the Odin setup. The main transmitter unit slaps onto the hotshoe of your camera. It is a transmitter only, there is no flash or focus assist light, or any other feature associated with the transmitter. It has a bright, easy to read LCD display which tells you everything you need to know at a glance, and a few obviously labeled buttons. From the transmitter you have full control of each flash in the system. (obviously the availability of features and modes I will describe here will depend on the capabilities of the speedlights you have attached to the other end). With four channels and three groups (a coming update is reportedly going to expand this to 5 groups in the next Odin generation) You can control the flash modes (either manual, TTL or off), zoom settings of your flash heads, power levels of each group (either manually or via exposure compensation in TTL mode) and even set the system up to automatically manage lighting rations for you. The unit also allows for test and modeling light functions as well. Basically anything you could do with your flash if it was attached directly to your camera is very easy to do remotely via the Odin transmitter.
 |
| Odin transmitter and receiver |
The recievers are even simpler. A hot shoe mount (you also get a short pc sync cable included for use with studio strobes), a cold mount to attach to flash stands, a threaded connector for attachment to mounting posts, an on-off switch, and selector switches for channel and group. There is also a status LED. That's it. Put the batteries in, slide in the flash, set your channel and group, mount it and forget it. You're ready to rock.
 |
| Transmitted in Ratio Mode |
 |
| Transmitter in Manual Mode |
Not much else to say about the TX/RX system, it's simple, it works. I haven't found the limits of its' range yet, I think my longest test has been the DollHouse shooting roller derby, and from that I can say that my most remote flash fired consistently on command from around 100ft away, so the range it at least that, probably considerably farther but I have not had an occasion to test the limits yet.
The Mitros flash unit has also been a consistently flawless performer. On paper, it has slightly less power than the SB910 and the zoom head isn't as capable. For the shooting I do; however, I have seen no noticable functional or performance difference between my Mitros and my SB910. I dont really even diffferentiate between them, when I need a flash I reach into my bag and am happy with whichever one I grab first. The only major differences between the two in my eye are the accessories. The SB910 comes with a diffuser as well as filters for Tunsten and Flourescent balancing (and these filters are automatically recognizde by the flash unit when attached) but the Mitros only includes a diffuser and there is no auto recognition. Size wise there isn't much difference between the two units either.


What the Mitros comes with that the SB910 doesnt is one of the most awesome pouches I have seen. The main pocket will hold the flash and still have room for an extra set of batteries. There is a pocket on each side which can hold another set of batteries, filters, or other small accessories. The case has a belt loop as well as rings for attachment to a shoulder strap, or in my case, for clipping to my Think Tank Prospeed belt with a carabiner.


I actually keep meaning to ask phottix if I can just purchase the cases separately so I can have a couple for my other flashes, I like them better than even the Think Tank flash pouches I have seen, and that is saying a lot. Functionally the LCD screen on the flash is as good as that on the SB910 and the controls are just as intuitive and easy to figure out. The flash will function as a master or slave and will run the Nikon CLS system just as well as the Nikon flashes, and also has an optical slave mode if you need it.
When I originally sat down to start writing this review a few weeks back, in addition to my general satisfaction with both the Odin and the Mitros, I was going to rave uncontrollably about the durability of these things. During a shoot on the beach while I was in Hawaii last summer, a rougue wave came up a bit higher on the beach than anything else had all day, and my Mitros got swept out to sea along with the odin receiver controlling it. I dove in and was able to grab it within about 10 seconds, but apparently that was long enough to make things interesting because grabbing the combined unit was literally a shocking experience, the saltwater had obviously penetrated the battery compartment and the whole unit was electrified. Luckily, the AA batteries didn't do more than just tickle me, I was able to wrap it in a towel, get the power switch off and get the batteries removed. Since I had just dunked the unit in saltwater and the whole thing had been electrified, I figured it was dead and I was going to have to come up with a good story about a dog eating it for my insurance company, but I knew I was going to have a few weeks of sea travel before I had any more shoots, so I said what the hell, let's see if I can save it. I got a bucket full of distilled water, dunked the flash and reciever a few times, let them drain, stuck them both in a freezer bag full of rice, and left them in my locker until my ship got back to San Diego. When I got home, I took them out to test. Other than rattling from some grains of rice that must have gotten inside, the reciever worked perfectly. The flash powered up and fired, the only remaining issue was that the LCD was dead, so I had no way to tell what modes were set on it. Figured until I could afford to replace it, I would just use it as is and not put it anywhere critical, just a background light or such. But to my surprise, a couple of weeks later when I pulled it out for a shoot, the LCD was back and ever since then both the mitros and that receiver have performed flawlessly, good as new. So this system can take a hit and is much more durable than I would have expected. Usually anything electronic that falls into the ocean can be written off, but these two just keep kicking.
That being said, now we get to what held up this review for a few weeks, and makes me question things. On a shoot right before I was going to post this review, one of my receivers simply stopped working mid shoot. My first thought was batteries, changed those out, nope. Maybe settings, although how they would have changed themselves from working ones to non working ones mid shoot with no one near the unit was a mystery, but no, all settings were verified and were correct. I tried a few things, switching flash units, turning everrything off and completely resetting my whole setup, nothing worked. I had to just write than unit off, which stunk because that meant I was down a light for a long day of shooting where I could have used every bit of light I had available. I would have understood if this had been the same unit that took the ocean bath finally failing, but it wasn't. That one is still going strong, this one has had no unfortunate occurances that I am aware of. It just quit with no indication of why, and from all outward appearances it still works fine. The LED status light blinks away green as green can be, just the same as all the other receivers. (As an example of my earlier hit on the included documentation- I have been unable to find anwhere provided by phottix an explanation of what the colors and blink frequencies of the status light mean). So I decided to hold my review until I contacted Phottix customer service. The flashes have a year warranty, but the Odin system only has a 1 year warranty and my unit was just outside of that. I emailed their customer service with my story and waited. When I got a response, they said they would repair/replace the unit for $55, but to do that I had to not only ship the unit to Hong Kong myself but coordinate directly with the HK office. So I emailed the provided contact asking for details on where to ship and how to actually make payment. That was two weeks ago and I still have not gotten any response. I haven't decided yet if it's worth the PITA of trying to contact the HK office by phone. As for the unit, I decided that after $55 for repair plus shipping to China with an unknown turnaround time, it was just easier to spend $136 for new unit and probably would come up about the same price wise.
When I ordered the new unit, I also decided to take the plunge and add a Mitros + to my order. The plus is the same flash unit as the mitros, with the TX/RX capability of the odin system built in. I have only used it for one shoot so far, but it also functioned flawlessly. Various reviews of the plus I saw mentioned cycle time issues shooting at full power, so for this shoot I used it as a simple background light and not a key, but it was firing at full power the whole time. Granted, this was a quick shoot and didn't really stress the system, it fired flawlessly for about 30 minutes of nearly continuous use at full power with no issues, I will update in the future if any problems occur but for now it appears to be a good purchase.
So- overall I have been extremely happy with the functionality and durability of both my Odins and my Mitros units. Although the unexplained death of one of my receivers has taken a bit of the shine off and gives me a little pause, I would still recommend this setup for anyone looking for a wireless TTL system. Just don't expect to find everything you need to know in the manual, and don't expect easy repair/return if something does go wrong with your stuff. I guess reliability is a toss up, yours could either survive an ocean dunking or suddenly stop working with neither rhyme nor reason. But I will still use the system, and keep adding Mitros + units when I need more speedlights, and am eagerly awaiting the next version with additional group capabilities.
UPDATE:
A second receiver just died, mid shoot, exactly the same as the last one. Now I really can't say I recommend this system anymore. I need reliable gear. I am making another attempt at working with Phottix's customer service, but unless I get a much better response this time and some sort of actual explanation of what went wrong with these two units, it might be time to move on to Pocket Wizard.
UPDATE to the UPDATE:
Contacting Phottix's customer service was an entirely pointless endeavor. However; contacting their US distributor, Omegabrandess, although it took a while, has resulted in them replacing the broken units an no charge to me other than shipping the broken ones back to them. Turns out one was able to be repaired by reflashing the firmware load, but the second was unable to be restored so they are replacing it for me. So, while the international corporation seems to not give a rip about customer service, the US distributor does.
Since it is a real pain the ass, not to mention expensive, to get the same functionality the Odin's offer, guess I will stick with them for now.
Subscribe to:
Posts (Atom)