So it's only been a couple on months since I switched my workflow out completely and started using Lightroom instead of Aperture. I am just getting the hang of LR and my new way of working. So why would I want to screw my workflow up completely again? Quite simply: SPEED!
When it comes to editing, faster is better. This isn't as important when I am working up a personal project and have no deadline, but when I am shooting event gigs, even if there is no specified deadline, speed is important. Getting the images up as soon as possible after an event is key, the longer it takes me to put images up following an event, the less traction those image sets get me, so I am always looking for ways to improve my turnaround time without sacrificing quality and attention to detail. Sure, it would be really fast just to post all the in camera JPEG conversions from a shoot, but that isn't my style. I want to at least present my best and do some workup even if there is a tight timeline.
Lightroom and LR mobile was a step in the right direction, and a great timesaver because I could cull images on my iPad the next day at work while I was bored sick in meetings. But I kept hearing about this speed demon of a program that photojournalists swear by, and even got a great word from Joe McNally; Photo Mechanic.
Photo Mechanic isn't an image editor, it's an image sorter and image culler. This quick review won't even touch a portion of the capabilities resident in this freaking awesome too. So, what the hell is it? Quite simply it's the fastest, most useful import and sorting tool I have ever seen. And I have only used the free trial version so far.
Basically, Photo Mechanic destroys any other image handling program I have seen when it comes to importing, sorting, categorizing and adding meta data to your image files. Shot five cards worth of images? No problem, PM can ingest (what it calls the import function) as many cards simultaneously as you have card readers.
Meta Data control is simply unbelievable. Yeah, most programs like LR or aperture let you set up IPTC presets to apply on import, just like PM. But photomechanical ads variables. You can build a presets that let you automatically build dynamically changing captions, titles, file names.... etc. You can even build cheat sheets for your captions so that you can use shortcuts to make your captions specific to each image.
Even if you aren't a photojournalist with a tight deadline, Photo Mechanic still offers the advantage of speed. Unless you build full resolution previews of all your images on import, either LR or Aperture can still be slow as hell to work with when you just want to view your images and go through them quickly for culling. Even if you have a really fast processor and lots of RAM, if you are shooting with a high resolution sensor (heaven forbid the D800 and its' 36mp 14 bit raw files) you will be waiting forever each time you scroll forward and the preview has to render. It isn't a long wait for each file, but it adds up, and is really frustrating when you are in a hurry and trying to get an image set edited fast.
Rumor had it that Photo Mechanic eliminated this issue. It uses the built in JPEG preview contained within the raw file and lets you blast through the culling process. Or so they say. Camera Bits (who makes PM) offers a 30 day free trial, so I decided to see how PM could work for me. I was pretty skeptical, since LR mobile was already shortening my workflow significantly.
Downloaded and installed the trial, and got set to test it out. I was initially not that impressed. Turns out this was my fault. When I do my imports into LR, I convert my raw files into DNGs. For my initial tests of PhotoMechanic I was using it to work on folders of already imported/converted images.
This was a mistake. Photo Mechanic does not seem to play well with DNGs. When I tried to go through a contact sheet (PM's term for a folder full of images, throwback to old school negative editing days) of DNGs, it was horribly slow to render images, and if I attempted to change any meta data, PM would lock up and pretty much die. So I was initially underwhelmed, to say the least. But everyone was talking about how fast it was... figured I had to be missing something. And I was.
My next shoot, instead on importing images using LR and converting to DNG, I just copied the .nef files directly from my camera card to a holding folder on my drive, then used PM to go through those files. DAMN! This was what everyone was talking about. PM ate the nef files like they were candy and would respond almost faster than I could click the scrolling arrows or change any meta data settings. Just to double check, I then took the culled image set and imported them to LR and converted them to DNGs and then re-opened them in PM... and found that the same slowdown and crash happened.
I am not a coder, not sure what is going on under the hood, but my theory is that when LR converts a raw file into a DNG, it either throws out the built in jpeg preview that PM runs on, or puts in into a format that PM can't recognize, this preventing Photo Mechanic from being able to speed render and work with those files.
So- here is my new workflow. When I am done with a shoot, I do the initial import using Photo Mechanic's Ingest function. I take advantage of the meta data functionality in PM, which seems to me light years ahead of what I can do in LR. I then cull the images and make my initial selections and put them into a sub folder all within PM. Last thing is that I crop all the images in PM- it is light years faster and easier than in LR. Once I have done all the initial bulk work in PM, I go into LR and run an import/convert to DNG on just the files that survived the initial cull. Once this set is imported into LR, I take the rejects and toss them onto a scratch drive, just in case. As that drive fills up the oldest rejects will get deleted completely. I figure if no one has asked for them by then, they never will. Then I proceed to edit the survivors using my normal LR and Photoshop workflow.
You would think that adding an additional layer of software and basically doing a double import would add time to the workflow, but it actually creates a significant time savings. The closest equivalent example I can make is the difference between using just PhotoShop or adding Lightroom to PS in your workflow. Before LR, you had to convert each images from raw to another format, then open each image in PS one at a time and do all your edits, then move on to the next image. Adding LR let you look at multiple images simultaneously, do basic editing a hell of a lot faster, and even apply batch settings to a group of images.
Photo Mechanic does add another layer, but just like batch adjusting exposure or WB in LR is faster than doing it individually to each image in PS, Photo Mechanic lets you caption, rate, select and crop images significantly faster, easier and more powerfully than LR does.
For a personal shoot with a model where I may only wind up with a couple hundred images and no particular timeline to get them edited and shipped out, I may skip the photomechanic step and just use LR. But for a conference like I shot this week where I wound up with 1400 images to sort through, caption, cull, edit and post I definitely appreciate the speed and power Photo Mechanic offers. It helps me win the speed race and get quality images back to the clients as fast as possible; fast enough that the event is still fresh in the minds of the audience, and my high quality, well edited and curated images can actually get out and posted in time to compete head to head with the crappy cell phone shots that were on Facebook and instagram 30 seconds after the event. And that may just prove to be worth its' wait in gold.
Even if nothing else, not having to wait on the dan skinny beach ball is worth the price of admission. If you have all the time in the world to edit and deliver images from your shoots, save the $150 and don't pick up Photo Mechanic. But if you are shooting lots of images and operating on deadlines, or just appreciate every second you can spend playing with your family instead of waiting on images to load so you can get through the aftermath of a shoot, then photo mechanic will prove to be well worth what you spend on because you will get back the only thing in life you can never get more of- TIME. It's the only thing that matters, and photo mechanic lets you use yours more efficiently. If you're not sure if it will help you or not, they give you a month free to try it out, so you may as well give it a shot. I did, and there's no going back. It's awesome!
UPDATE: The people at Camera Bits (who make Photomechanic) apparently read this review. They have reached out to me and said PM should not be any slower with the DNG files than it is with the NEF version. I just sent them a couple of sets of files and all my system info, so maybe my issue with the dngs will get resolved, but even if not I am really impressed with their customer service and dedication to their product.
UPDATE 2: Camera bits took a look at my files and sent me an answer. Turns out I was close to correct in my theory. My DNG files did not have the embedded jpeg preview that PM uses. But this was because I had lightroom set to not built and include jpeg previews into my DNG files. I changed that setting, did a test conversion with the previews embedded, and PM eats those and spits them out just as fast as the unconverted raw files. So, awesome program and beyond stellar customer service and support. Definitely worth the money for both time saved and user experience.
Friday, February 27, 2015

Saturday, February 14, 2015
Gear Review: iCoffee Opus K-Cup brewer
Ok. This is a photography blog, but I am about to review a coffee pot. If you fail to see the connection between massive amounts of readily available caffeine and photography, you have obviously never gotten home from a shoot at 2am, downloaded your images, left your backup running and fallen over asleep only to have your toddler ....er.... alarm clock.... wake you up at 6am so you can play.... or start editing.
Needless to say, good coffee is pretty important to my workflow, and I will hazard a guess that many photographers can say the same thing. I am really the only coffee drinker in my household; my fiancee prefers tea and the idea of my already hyper speed toddler becoming caffinated is truly terrifying, so brewing pots at a time is overkill. I decided a while back that the k-cup setup was the way to go, especially with an adapter to let me use whatever coffee I want in the system. It's quick, easy, and I don't wind up reheating the same pot all day for a new cup.
I had a machine that served me well for a few years, but it started acting up, I think it developed a wormhole into another dimension. Seriously, I would hit the go button, water would disappear from the tank, noises were made, no coffee came out. No leaked water on the counter, or anywhere else I could find, it just disappeared. I can only assume somewhere in an alternate universe there was a repeated random appearance of coffee or at least hot water every time I pushed the button.
I needed reliable coffee, so it was off to replace the machine. Went to Costco first, they only had one machine, a Kuerig 2.0. Luckily I googled that for reviews before grabbing it, in the immortal words of Admiral Akbar, "IT"S A TRAP!" The new Keurig machines will ONLY brew new Keurig cups with a special sensor thing in them. WTF? If I am paying $200 for a coffee pot I want to be able to choose what coffee I make in it dammit. So that was out. Off to Bed Bath and Beyond.... no real store commendation here, that just happened to be the next closest place that I knew had coffee makers.
There I found my new Hero, and subject of this review, the iCoffee Opus! It was on sale, it had good reviews... and it was in stock.
I will start by saying it makes coffee. Therefore it meets the basic requirement. My water no longer vanishes into an alternate dimension, instead it comes out coffee flavored and goes into my mug. But this pot goes beyond mere survival. It brews in style, with a spiffy Blue LED lighting scheme that also serves as a handy kitchen night light, this making it possible to brew the first cup of morning coffee without having to deal with blinding myself before I am sufficiently caffinated to deal with brightness.
It also has a selector dial to adjust the output to your cup size, as long as your cup happens to be between 4 and 12 oz, adjustable in 1/2 cup increments. That's handy when you want to go from your favorite small desk mug to the large road trip car mug. Water reservoir holds enough to get me through an average weekend without a reload. It heats up pretty quick, and has an energy saver mode where it will keep the water warm enough that it's near instantly ready to brew. Once the water is heated it takes around a minute to brew a 12oz cup.
That's all pretty standard. But what makes this different as a pot is a mystical think they call Spin brew. Not sure what it actually is, but they say that it "steams, spins and stirs inside the K-style cup to virtually eliminate acidic and bitter aftertaste." I can't say how it manages that, but it does actually work. With my old pot, I found most of the bulk purchase pods from Costco or even most of the high end pods were really not that good. That didn't stop me from drinking them, but it was more for utility than enjoyment. This thing really makes the pod coffee smoother than the old machine.
It may not be on par with handcrafted brews from a Chemex, but it's quick, it's easy, and it makes the cheap stuff taste great. So it's a win all around and it gives me steam to keep going for long days of editing, or early wake ups on the morning after the all nighter shoots I am too old to keep doing but still do anyway.
So, if coffee is your life, and mandatory for your workflow, when it's time for a new pot this is definitely one to look at. (of course, it also may be the reason I am still up after midnight writing blog posts.... but can't hold that against it.... twitch... twitch... twitch......)
Needless to say, good coffee is pretty important to my workflow, and I will hazard a guess that many photographers can say the same thing. I am really the only coffee drinker in my household; my fiancee prefers tea and the idea of my already hyper speed toddler becoming caffinated is truly terrifying, so brewing pots at a time is overkill. I decided a while back that the k-cup setup was the way to go, especially with an adapter to let me use whatever coffee I want in the system. It's quick, easy, and I don't wind up reheating the same pot all day for a new cup.
I had a machine that served me well for a few years, but it started acting up, I think it developed a wormhole into another dimension. Seriously, I would hit the go button, water would disappear from the tank, noises were made, no coffee came out. No leaked water on the counter, or anywhere else I could find, it just disappeared. I can only assume somewhere in an alternate universe there was a repeated random appearance of coffee or at least hot water every time I pushed the button.
I needed reliable coffee, so it was off to replace the machine. Went to Costco first, they only had one machine, a Kuerig 2.0. Luckily I googled that for reviews before grabbing it, in the immortal words of Admiral Akbar, "IT"S A TRAP!" The new Keurig machines will ONLY brew new Keurig cups with a special sensor thing in them. WTF? If I am paying $200 for a coffee pot I want to be able to choose what coffee I make in it dammit. So that was out. Off to Bed Bath and Beyond.... no real store commendation here, that just happened to be the next closest place that I knew had coffee makers.
There I found my new Hero, and subject of this review, the iCoffee Opus! It was on sale, it had good reviews... and it was in stock.
I will start by saying it makes coffee. Therefore it meets the basic requirement. My water no longer vanishes into an alternate dimension, instead it comes out coffee flavored and goes into my mug. But this pot goes beyond mere survival. It brews in style, with a spiffy Blue LED lighting scheme that also serves as a handy kitchen night light, this making it possible to brew the first cup of morning coffee without having to deal with blinding myself before I am sufficiently caffinated to deal with brightness.
It also has a selector dial to adjust the output to your cup size, as long as your cup happens to be between 4 and 12 oz, adjustable in 1/2 cup increments. That's handy when you want to go from your favorite small desk mug to the large road trip car mug. Water reservoir holds enough to get me through an average weekend without a reload. It heats up pretty quick, and has an energy saver mode where it will keep the water warm enough that it's near instantly ready to brew. Once the water is heated it takes around a minute to brew a 12oz cup.
That's all pretty standard. But what makes this different as a pot is a mystical think they call Spin brew. Not sure what it actually is, but they say that it "steams, spins and stirs inside the K-style cup to virtually eliminate acidic and bitter aftertaste." I can't say how it manages that, but it does actually work. With my old pot, I found most of the bulk purchase pods from Costco or even most of the high end pods were really not that good. That didn't stop me from drinking them, but it was more for utility than enjoyment. This thing really makes the pod coffee smoother than the old machine.
It may not be on par with handcrafted brews from a Chemex, but it's quick, it's easy, and it makes the cheap stuff taste great. So it's a win all around and it gives me steam to keep going for long days of editing, or early wake ups on the morning after the all nighter shoots I am too old to keep doing but still do anyway.
So, if coffee is your life, and mandatory for your workflow, when it's time for a new pot this is definitely one to look at. (of course, it also may be the reason I am still up after midnight writing blog posts.... but can't hold that against it.... twitch... twitch... twitch......)
Wednesday, February 4, 2015
Gear Review: Tenba DNA 11 Messenger Bag

Ok, I have had my Tenba DNA 11 Messenger style camera bag for a couple of months now, and it's seen daily use in that time, so finally ready to give it a review. Spoiler alert, it's awesome and I love it.
I picked up this bag as a companion to my Fuji X-T1. I got that camera because I wanted something to carry around with me on a daily basis so I would always be ready to shoot, and my big Nikons were not suited to that task. I was using a Timbuk2 small messenger as my man purse, but I couldn't fit the X-T1 into it along with my other daily carry items, and all my camera bags were sized for the big nikons. I liked the messenger style, so I looked around. Timbuk2 makes camera inserts, and Think Tank, one of my all time favorite camera bag makers also has a line of messenger style bags that I love. But none of these fit the bill, so I grabbed all of my toys and headed to the local camera store to test fit things. The DNA 11 caught my eye initially because I liked the size and the way it looked, so I pulled one off the wall and opened it up. I had to remove and reconfigure the internal dividers, but I was able to set it up to carry all my usual stuff as well as the X-T1 comfortably and easily.

As you can see, the X-T1 with the 18-135 pretty much perfectly fits in. This isn't a bag for full size DSLRs, it's aimed at the mirrorless crowd. A smaller DSLR like the D3300 would fit in with a kit lens, and in a pinch I could put my D800 in with the 24-70/2.8 mounted and lens hood reversed, but that would be a very tight fit. A gripped DSLR wouldn't fit with a lens attached. But that isn't what it was designed for. It will fit quite a bit of compact system gear. To get the configuration I wanted I actually pulled out all the included dividers except for just 1 in the center. With all the dividers in you could carry a body with lens attached along with several spare lenses or flashes.
I recently took a trip to Vegas for the weekend, and decided that I would only bring the X-T1. I will write that up later, but I also thought I might want more than just the pop up flash, so I really tested the capacity of the bag. Should have taken a shot of that, but was too busy having fun. What I was able to pack in easily for the trip was the X-T1 with the 18-135 attached, two Nikon Speedlights, the SB700 and the SB910, a set of Yonguo remotes, (note- the canon version needs to be on the camera to work unless you feel like rewiring it, the nikon version on the nikon speed lights, but the cannon transmitter will trigger the nikon receivers), spare batteries for the flashes, spare batteries and charger for the camera, the EF-X8 flash unit, a rogue grid setup with a set of gels, a second set of gels for the second flash, a lumiquest 80-20 system, two joby gorilla pods to use as flash stands, a small LED flashlight for light painting, a water bottle, my iPad mini and several other travel odds and ends. All I really had to take out to get this load out was my journal and sketch book. Strangely, with those two out the bag was lighter than it usually is for my daily carry even with all that gear.
So the bag carries a lot. One of the things that makes this possible is that there are a seemingly infinite set of pockets all over the bag. Seriously, there are more pockets than I can count because I ran out of fingers and toes. The main cavity includes a tablet pocket with a velcro securing strap, and a flap at the front with a large zippered pocket, a couple smaller pockets and several pen holders. The camera portion is actually a padded insert, which can be configured as needed with the included velcro dividers. On the outside of this inset there are two more accessory pockets.
 |
| Main compartment with insert removed |
 |
| Large zipper pocket and pen pockets |
 |
| large zipper pocket opened |
 |
| my sketch book lives in the tablet compartment |
 |
| removed insert |
 |
| external pockets on insert |
 |
| empty insert |
Moving to the outside of the bag, there are two more pen pockets, and 4 large, flat accessory pockets, two are slightly shorter and in front of two taller ones. These pockets are under the flap when it is closed.
|
| Top view of the 4 external pockets |
Speaking of the flap- it has one zippered pocket that covers slightly more than half the flap and one smaller non-zippered pocket that seems designed for glasses or possibly a phone. My iPhone 5s fits snugly with a slim case, anything larger might not.
 |
| Larger pocket is on left in this picture, smaller pocket is on right. |
 |
| Zipper access through flap into main compartment |
The flap also has a gusset on each side to prevent water from running down into the bag from the flap if you were out in the rain.
 |
| rain gussets |
There is also an included rain cover for really heavy inclement weather, if you had to be out in a hard core storm you would want to use that because eventually the top zipper might let water in (even though it is covered with a small flap and is designed to be water resistant. I live in San Diego, so the rain cover pretty much lives in a drawer in my closet.
The zipper pulls are a nice touch that just goes to show the overall thought and care Tenba put into designing this bag. They each have a moulded section that holds the tab open and makes it easy to grab with a finger and pull open or shut.

Ok, enough digression, back to the pockets. Each end of the bag has an elastisized mesh water bottle pocket (that will also hold small collapsible tripods, a speed light, or other accessories)

As you can also see from this picture, the hardware is all metal and pretty sturdy and there is also a grab handle on the top of the bag, in case you didn't want to grab it by the shoulder strap. Speaking of which, the shoulder strap is really easy to adjust and has a pretty comfortable (removable) pad with rubberized non-slip patches on the bottom which hold the strap in place quite comfortably. There is also an additional cross body strap that you can attach if using the bag on a bike or while really moving, traditional messenger style.
Ok, back to the pockets. Seriously, told you there were a lot. The back of the bag has a large, flat zippered pocket as well as a strap designed to let the bag slide over the handle of a roller bag. Inside of the large pocket is... guess what... two more flat pockets and some additional pen holders.


Ok. I think that's it for the pockets. Maybe. I keep finding more. It's also pretty much the end of the review. The bag is light, built and sewed very sturdily, and the layout of all the myriad of pockets is very utilitarian. Filling one pocket doesn't prevent using another, even when they are stacked on each other. It hold the X-T1 and everything I need to carry around on a daily basis, and is quickly reconfigurable if I need to add more gear for a trip.
If you are shopping for a full size camera system, this isn't your bag (although Tenba does make larger versions, which will also let you carry a laptop) but if you are looking for a bag for a mirrorless system, this is definitely a contender that you should check out.
Monday, January 5, 2015
Gear Review: Fuji X-T1 with XF18-135mmF3.5-5.6 R LM OIS WR lens
First off, why did I get this camera when I already have an extensive set of nikon gear for every situation I shoot? I will use a Samurai metaphor for this, because it's my blog, it's a new year, and I can darn it! I mean, what american child (at least who grew up in the 80s) didn't want to be a Ninja or Samurai at some point? Samurai were more than warriors, they were also artists and poets, and didn't at all find this duality confusing, in fact they embraced one as necessary to the other. As I wind down a multiple decade military career and transition back into the artistic side of my life, I find this idea resonates. Anyway, back to photography. The D4 and D800 combo are my katana and wakazashi, the short and long swords of the samurai. Those two weapons were their life blood, getting them through battles and challenges. However, for daily mundane tasks, the also carried another blade, the tanto. A smaller, more utilitarian blade. I needed something similar.
The D4 is amazing for low light, high speed action when I am shooting live performances or events. The D800 has massive resolution for portrait or studio shoots with plenty of controlled light. In a professional scenario I will reach for whichever of these two beasts is appropriate for the situation. But two convergent factors made me realize I needed a third niche specialist. First off, I commute daily between Carlsbad and Coronado Island in Southern California, driving along some fantastic beaches and scenery. Far too many times I have driven past amazing sunrises and sunsets and cursed because I knew that my iPhone and my waterproof P&S I carry around just weren't up to the task of properly capturing the shot, and I wasn't comfortable carrying around one of my primary cameras and leaving it in my car all day every day. Second, a couple of all day amusement park visits with family and friends demonstrated how much of a pita it was to use even the smaller of the two, the D800, as a walk around camera. Time to look for something more capable than the phone or my Stylus Tough 800, which is a great camera but a little old and lacks zoom range. Enter the X-T1.
There are three ways to purchase the X-T1; body only, kitted with a 18-55mm lens, or the one I chose with the 18-135mm. The 18-55 is a bit smaller and faster, but it would have given me roughly the same range as a 24-70 on my full frames, which is fine, but often not quite long enough for what I wanted. The 18-135 on the other hand, was roughly equivalent to a 27-206mm range on my big guns, thus it would be like I was carrying around both the 24-70 and 70-200s. That would get me through anything I would imagine myself wanting on a walk around, so the loss of a couple stops was more than worth the trade for me. Pictures say it all:

There you can see the X-T1 with both the 18-135 lens and external flash attached, compared to the equivalent amount of full frame gear it replaces as a walk around. (the camera itself has no built in flash, but comes with the small external one shown in the image) Weight is a small fraction as well. It fits quite easily into a man purse with all my other daily odds and ends, for this I use a Tenba DNA-11, which will be reviewed later.

For another size comparison, next to the camera you can see my iPad mini and a moleskin journal. So, now that the why is answered, how well does the camera handle and perform?
Well, it definitely is a learning curve, the interface is somewhat different from Nikon's, but it isn't too tough a learning curve for the basics. There are physical controls for the major shooting functions and it is rather quick and easy to take full manual control over the camera and change ISO, Shutter Speed or Aperture. Back button focus is also possible to set up on the camera. The menu system is pretty easy to navigate and there are even five programmable function buttons you can set up however you want. If you want to use some of the more advanced functions like off camera flash or fill flash to balance a bright background, be prepared to spend both a lot of time in the manual and possibly a little time on google. There are a few gotchas, like enabling mode "x" completely disables all options for setting "y" even when there is no obvious connection between the two, which can be frustrating until you learn all the ins and outs.
This is a small camera, again, that is its' reason d'être. I have I guess medium size hands, I wear a size 10 glove, or Large in the S-M-L-XL-XXL world. It isn't as easy to manipulate the controls with the camera at my eye as it is on my big Nikons, but it also isn't terribly difficult. The main problem comes with the fact that some of the dials are stacked, and it can be easy to accidentally move one along with the one you are trying to adjust. You have hard dial control for the following items: ISO, Shutter Speed, Exposure Compensation (camera, not flash) Metering Mode, Shutter Drive Mode, and Focus Mode. There are two sub dials that change function depending on which mode you are adjusting, giving you more granularity in selecting shutter speeds and apertures. The camera and lens combo actually feel pretty good in my hands, not really all that different from one of my older film SLRs like the Canon AE-1P that I started out with. It's also roughly similar size wise.
One of the best features of this camera by far is the EVF, the Electronic Viewfinder. I am starting to actually like the EVF better than the OVF (optical viewfinder) on my big guns. It has greater magnification than the nikons, is illuminated so you can see better in low light, and there is even an exposure preview mode, so that when you are shooting in something besides auto mode you can actually see the exposure you are going to get in your viewfinder as you change your settings. You can select to use the rear LCD only, EVF only, or have the camera automatically switch between the two when you put your eye to the viewfinder. You can also set the EVF to only turn on when your eye is on the viewfinder, to conserve battery. The LCD screen tilts vertically for holding the camera down low or up high, but does not swivel side to side.
Another nice thing about the EVF is if you have the camera up to your eye and need to get to any of the deeper menu items (or anything in the quick menus that gives you simple access to some of the more frequently needed settings) those menus are visible in the EVF, so once you get the hang of the buttonology you can get to ANY setting and menu on the camera without taking your eye off the viewfinder.
As I mentioned above, there are several programmable buttons on the camera. There is a 4 way rocker on the back, similar to one you would use to adjust the focus points of a DSLR, I have this set up as quick access to flash exposure compensation, focal point selection, Auto ISO controls and switching in/out of macro mode. But you can set it up however you want.
The camera does not come with a popup flash built in, but it ships with a small hotshoe flash, that folds up/down on the hot show, so it becomes a quasi-popup flash.


When the flash is in the down position it's off, flipping it up activates it in whatever mode you have set on the camera. This flash also can serve as a Commander for optically slaved off camera flashes. If you are coming from another system, or have other flashes, they may or may not work with the X-T1 in manual mode. My Nikon flashes did, but my Phottix units didn't, nor did the Odin transmitter unit. It isn't strikingly powerful, but it's definitely good enough to do daylight fill or to get some good shots in the dark, and the ability to take full manual control of it lets you do decent balanced fill in daylight or night.
 |
| ISO 800, 1/60sec, F/8 TTL fill flash |
 |
| ISO 800, 1/35Sec, F4.3 TTL fill flash |
 |
| ISO 200, 1/160sec, F5.6 Manual fill flash |
So that's flash. Autofocus is great. It isn't nearly as fast as the big guns, but I was actually surprised at how capable it was. (one note- make sure you update your camera and lens to the latest firmware. When I first took it out I wasn't that impressed, then I discovered I was still on body version 1.0, so i upgraded to 3.0 and the difference was night and day!) The Auto face detection function worked really well for keeping track of a running 2 year old in a park, and using the 8FPS burst mode it was still able to track said speeding toddler and his mom playing on a swingset.


In case that isn't enough, it was also able to easily keep up with a flyer on the traveling rings.

The last shot I will use to illustrate the AF capabilities of this setup also leads into a look at its' high ISO performance. I casually zoomed in on a bird in flight around sunset on the beach, and here are the results:
 |
| ISO 800, 1/500sec F4.3, straight out of camera. |
 |
| Same image, no corrections, zoomed into 100% and cropped |
 |
| Same image, Luminance NR set to 50 in LR5.7 |
I found that while there is definitely some noise at higher ISOs, anything below 800 was fine for most purposes straight out of camera (coincidentally, this is the default max setting for Auto ISO) but anything up to 3200 was pretty good and could be easily corrected in Lightroom.
 |
| ISO 3200, 1/125sec F3.5 Straight out of Camera |
 |
| 100% crop no post processing |
 |
| 100% crop, luminance NR set to 35 in LR5.7 |
The last thing I will mention is the battery. Reviews mentioned that the battery doesn't last too long, so I also ordered a set of backup batteries and a charger from Wasabi Power. Wasabi Power is another great name to remember, if you aren't already familiar with them. I found out about them when I was looking for spare GoPro Batteries and a charger. Just like with the GoPro, the batteries are just as awesome as OEM, cheaper, and the charger is smaller, more portable, and better designed. But I digress. The book figure for the battery is roughly 400 shots. I am too lazy to sit and shoot that many frames in a row, even at 8FPS, so I haven't tested that limit, but I carried it around for a whole day of shooting my family, about 6 hours and 200 frames, and was only down to 3/4 power on the indicator, so battery life is totally good for my purposes. I do turn the camera off when I am not shooting, it powers on and is ready to go really quickly. I also keep the LCD off and set the EVF to eye sensor mode, both of which help with battery life. If I notice anything adverse I will update this review later on.
That's the basics. If I find anything overwhelmingly new I will update this post, but I have only been using this camera for a couple of weeks now. I do like the silent mode, good for taking pics of sleeping toddlers looking cute, but it is a little random that you can't have silent mode and force fill flash. There are features that I haven't touched yet, like the different film imitations (I shoot raw, so these don't apply to my shots). There is an option to use an electronic shutter either in combination with or in place of the physical shutter, which should add stability to long exposures. In electronic shutter you can also shoot at up to 1/32000sec. I haven't found anything really to require that high a shutter speed, but if that hummingbird flock ever comes back, I am ready. The Image Stabilization also is great, I can shoot handheld at much lower shutter speeds than I can with the 70-200 VRI Nikon.
So far I have been very pleased with the camera, it's definitely more than an adequate replacement for the D800 as a walking around, day to day carry camera. It's just fun to shoot with, and brings the retro feel from my first camera back along with the convenience of modern technology. It would even suffice as a third string backup if I had to use it for an event. It's a great purchase and I am sure as I get used to it and more fluid with using it I will be even happier with it. One thing I did add was a screen protector, this one is awesome in case you are looking for one yourself.
Friday, December 26, 2014
Switching from Aperture to Lightroom, and a few other updates.
Here comes another photography blog with no pictures in it. A while back now, Apple announced that Aperture was effectively dead. This made me sad, since I have come to use it quite heavily and had something on the order of 20,000 images between my personal and professional aperture libraries. I initially tried Lightroom, but the interface and organization wasn't as intuitive or easy for me as Aperture. So I went with Aperture. I spend a bit of money on plug ins, and a lot of time on learning to use the software. While I may not have reached ultimate ninja warrior status, I think I certainly was approaching a black belt level workflow. So it kinda felt like a betrayal and sting of death when I got the news. But, as annoying as it seemed, it is pretty useless to rail against what you can't control, so I decided to figure out how to make the transition and when. The end of the year seemed like a good time for a clean break.
Since I had been using aperture as a managed library, this was going to mean pretty much a complete reorganization of everything, so I decided it would also be good time to make a few other changes. I was almost out of storage space on my main drives and my computer was old and slow. I decided why not fix all of that at once, I mean, if you're cliff jumping there's no halfway right? The only issue was money. I really didn't have the cash flow to upgrade the computer. Enter a conversation with another photographer and friend who also works off a macbook, who suggested I upgrade to a solid state hard drive, which would seriously up the performance on my current macbook. I did some research and found out that would cost just a fraction of my most conservative computer upgrade plans, so I ordered a 1tb SSD and had it installed. At the same time I ordered some larger external drives to use as my workhorses.
He was right, the performance increase is insane. Before the upgrade, for example, it took 7-10 minutes for my laptop to boot up. Now it takes approximately 90 seconds. Photoshop work is almost instantaneous, even working with full resolution images from the D800. This will definitely hold me over for a while. Drive wise I am now using a La Cie 4TB external drive as my main professional drive. My only off site backup is the images I upload to my website, which is driven by photo shelter, so I am sort of paranoid about my backups at home. So for my backup drive, I went with the IoSafe Solo. This will be my second Solo. I using a partitioned 3gb solo drive to backup both my personal hard drive and my 2gb pro drive. I still use 1gb of that one for backup of my personal hard drive and images (as well as an encrypted cloud backup, but that is too expensive and slow to use for my working files) and the remaining 2gb will be my archive storage for my old aperture library. While I have (luckily) not had to test the resilience of these drives, they give all the appearances of being the tanks they are marketed as. The drives are basically water and fire resistant safes with USB ports, and even pretty likely that house burglars would leave them alone, since they weigh about as much as a small car and are bolted to my desk.
So, upgraded computer, new drives ready to go. It was time to figure out how the hell to move from aperture to lightroom. First off I decided migrating my whole professional catalogue was a non-starter, I would be using up almost half of the space in my new drive before I even started, so the 2014 and earlier Happy Dragon photo images will remain an aperture library. I did decide to switch them from managed to referenced masters so it will be easier to retrieve the raw files later if I need to. But my personal images I wanted to move with me since I do go back all the time and look at those. Adobe did add an Import from Aperture function in the most recent 5.7 lightroom update, but importing using that would have put all my files into folders organized by date only, which is not how I organized everything. So I decided to do it the hard way. I first switched my whole personal library from managed to referenced, which preserved at least the higher level folder structure for my images. Then I imported that framework into my new lightroom catalogue. The sub-folder hierarchy, alas, did not translate. I am not sure if I could have fixed this somehow, but I didn't and now it's done, so I am about halfway through rebuilding the subfolder hierarchy in my new personal LR catalogue.
Then it was time to start slowly learning the new interface and developing a new workflow. Am I there yet? Hell no, it took me two years to get to a decent level of proficiency with Aperture, it's been two months roughly with Lightroom. But already I can see that most of my real issue with the program was just that "this is different....." and change isn't easy for me, I get pretty set in my ways and attached to things and processes. Now that I have used it for a bit, although I still struggle with some of the differences, and I am still not really a fan of navigating the library folder panel, there are quite a few advantages to LR I have found, and I am quickly becoming a convert. I can't really geek out and use numbers to back this up, but I think Apple gave up on Aperture long before the announcement and stopped developing it. Adobe, on the other hand, has kept the press on. It's totally subjective, but I feel like the adjustment sliders in LR have a lot more range and power than the aperture equivalents. Aperture had better adjustment brushes, but the LR gradients are awesome.
Another huge change is the file management system. While it isn't as easy to navigate for me as Aperture's project setup was, it is more flexible and provides me with a new setup I am really liking. Instead of a library for my personal images and a second library for my professional images, I now have one catalogue, since LR makes it easy to spread images from a single catalogue over multiple drives. While I could have done the same thing in aperture using referenced files vice mastered, I don't think moving images around in aperture would have moved them around externally the way moving them in LR does. (maybe it would have, but oh well, that wasn't the way I had my aperture system set up). Another way this really helps me is that when I first shoot a set of work images, now when I import them initially from the camera I put them into a working folder that resides on my internal SDD (which is now big enough to be used for this purpose) and backed up onto my external drive. That way, while I am working on those images, I get the full speed advantage of the solid state drive, and I also don't have to cart around an external drive to work on my files. When the images are done, it's quick, easy and seamless to move them within lightroom onto my external drive. If that gets too unwieldy, I can even still put the images on my external drive, and just keep smart previews on my internal drive to work on while I am away from home. This really makes life easier when I can just grab my laptop and wacom tablet and bring them on the ship with me to work on images without carting around a whole external drive.
There's another thing that I just found that makes it even better. Lightroom Mobile! This is freaking awesome, and may be the sole forcing factor in getting me to move to the creative cloud subscription after all. Now, when I get home late and dump my images from a show onto my working folder, I also put them into a collection which automatically syncs with LR mobile. While I get dressed in the AM, I sync my iPad and make sure those images are downloaded into LR mobile for offline work. Then, when I am stuck in horribly boring and pointless meetings at work, or stop of at a bar on the way home, I can pull out the iPad and sort through the images, do my initial reviews, rating and selection process, and make some simple, initial edits. Then, when I get home, all that work automatically updates and when I fire up the laptop, the culling process is mostly done and I am ready to start the edits. This is awesome. Also, the other main reason I was staying away from the creative cloud is that it wouldn't work if I was on deployment and out to sea for longer than a month (or 3 with annual subscription) without the software being able to phone home. Since it looks like I probably only have two more months out to sea in my naval career, that roadblock seems to no longer be the issue it was. Which brings me to my final point.
This process of switching over to Lightroom was a reminder that was perfectly timed. It reminded me that although it is easy for me to get stuck in a certain process and way of doing things and become very resistant to change, it isn't necessarily the horrible catastrophe I initially fear it to be. Change and upheaval will seldom be easy, learning new ways of doing things and developing new processes is hard. But if you stick with it, it can definitely be worth it and can actually open amazing new doors and opportunities. I definitely learned that when I went through my divorce, but I guess I was starting to forget, and it's nice to have a reminder right about now, because a couple of weeks ago I found out that my navy career is pretty much over. I got passed over for command, which means that I statistically have a better chance of getting struck by lightening while purchasing a winning lottery ticket than I do of promoting again, and if I don't promote again I will be retired in 3 years whether I want to be or not. There are many bright sides to this, namely I won't have to worry about long stretches away from my family and friends anymore. But it's also scary, because I am nowhere near financially ready for it. I was hoping to make a little off of my book, but that was pretty much dead on arrival, and other than a few little gigs, I haven't cracked the code of how to earn anything from photography. I still have a load of debt from the divorce and am in no way ready financially to retire and still provide for the family.
But, as life seems to be reminding me, painful change and learning a new way to proceed can be very rewarding. More to follow. In conclusion, I hereby recant all the foul things I may have said in the past about lightroom and the adobe creative cloud. It will take a while to get as proficient with LR as I was with aperture, but it will be worth it and I think I will find even more new features and tricks to make life easier. The rest will take care of itself somehow, I have 3 years to figure it out.
Wednesday, December 17, 2014
Buy Local.... a review and shoutout to 858 Graphics in San Diego, Ca.
Like so many of my posts, this episode starts out with me perusing the local Craigslist boards looking for photography jobs and anything else that catches my eye... speaking of which, if anyone knows an albino midget someone is looking to hire one.... but I digress. I came across an add looking for bloggers willing to receive free items and services in exchange for reviews. Let's see... do I have blog? Yes- although I probably don't have to point that out since you are reading it right now). Do I like free stuff? Yes. Seems like I was a good fit for this one. So I shot them an email and didn't expect anything really to come from it.
Flash forward a couple of weeks, and to my surprise I find a message in my inbox from 858 Graphics here in San Diego asking if I would like to send them a photo and get a free 16x24 acrylic print in return for a review. (looks like normally costs $80) Well, as it turns out, I would like that very much. So I picked out an image to send their way from a recent shoot of my family.

Turnaround time was negligible, very quick turnaround. Print was ready in a couple of days, and it looks absolutely awesome. The main holdup in my posting this review has been my unsuccessful attempts to get a picture of the print ( I know, very meta right?) but seriously, when they say "ultra high gloss finish" they aren't kidding. I finally came to the conclusion that to get a picture of the print that didn't show you a reflection of some random feature of my apartment or me, I would need to built a black box set and set up some serious product style lighting. I tried to do that this evening, but my son decided he could destroy faster than I could build, so I gave up. Here is the best image I could get without you seeing too many incriminating reflections:

Print came with the mounting hardware, pretty easy to attach and it sits about an inch off the wall with the supplied mounts.
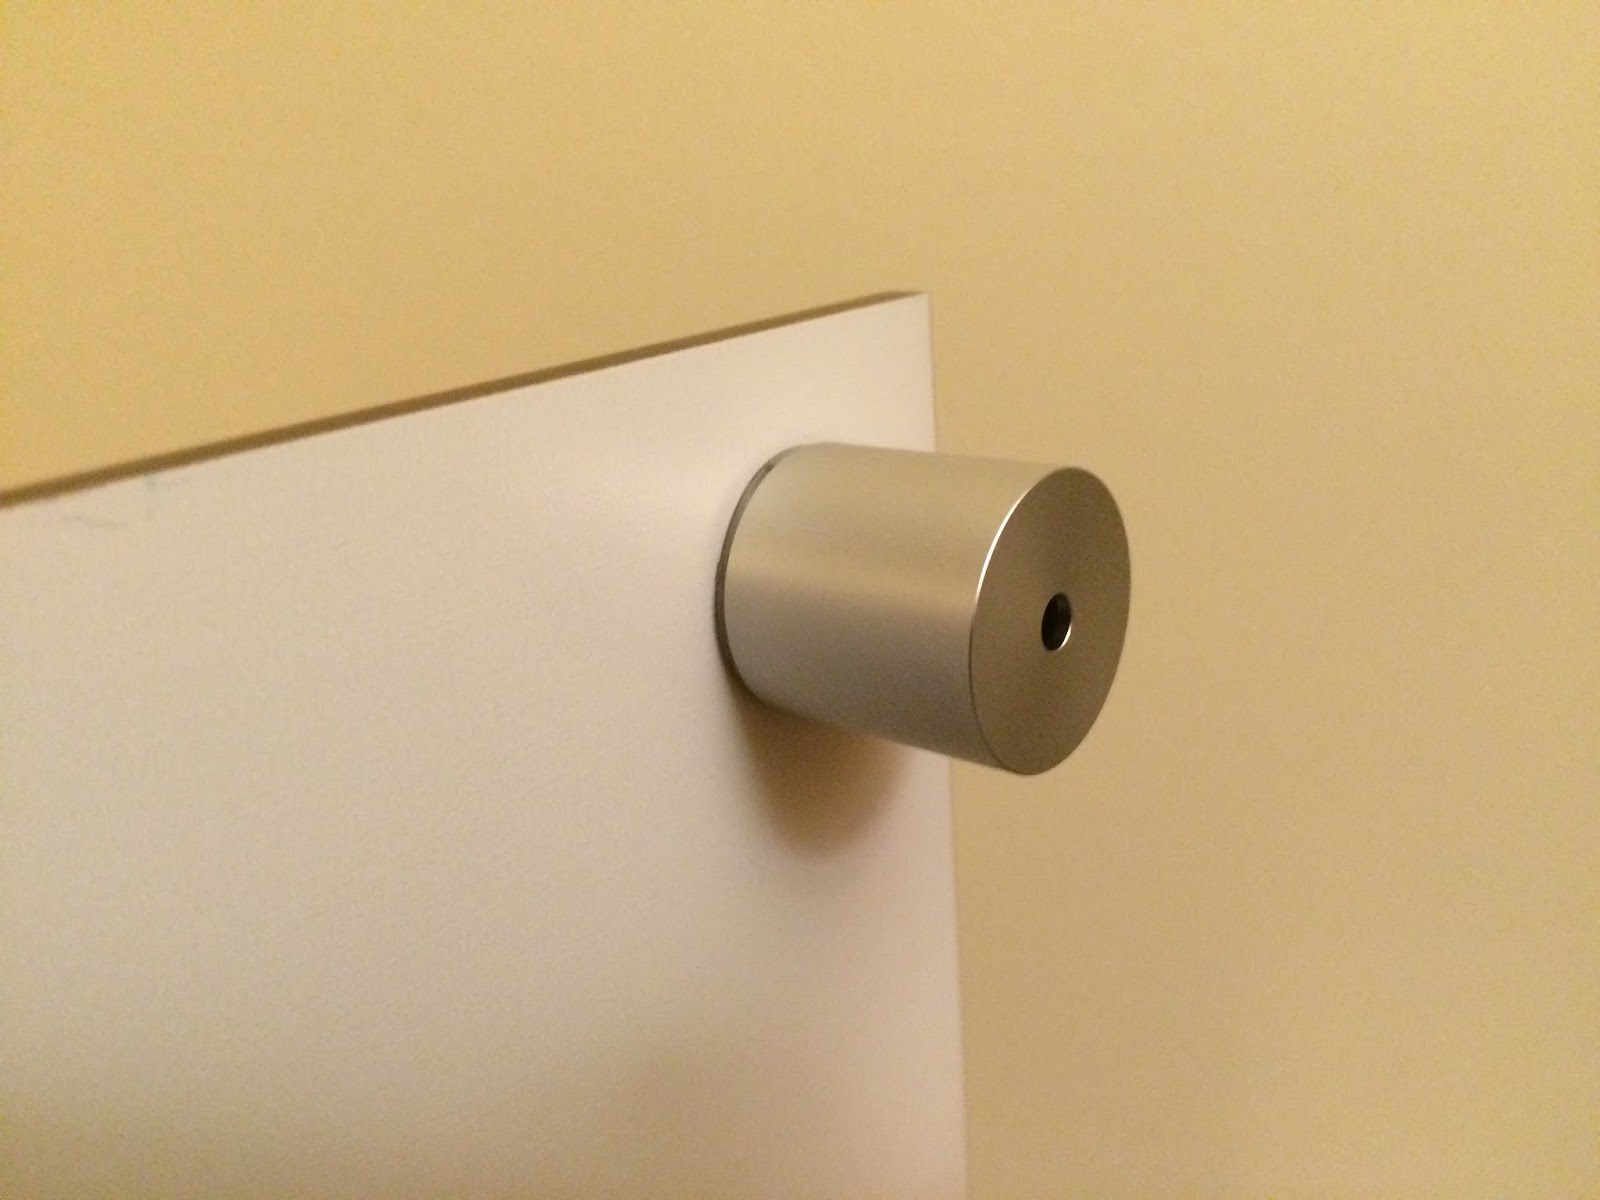


As you can see, installing the mounts is pretty simple. Overall I am very happy with the service and quality of the product. My point of contact was very easy to deal with throughout the whole order and made getting the print a simple and even fun process.
But, despite the free stuff and my overall happiness with the print, I would be remiss if I did not mention two small issues (neither of which will likely effect paying customers at all)
The first issue was image submission, there was no simple way to provide a high resolution image to 858 to print. I think this was due to the fact that I was getting the print outside of their normal ordering system, it looks like with the normal ordering system you can upload up to a 500mb file, so that shouldn't be an issue when you order from them, unless you are shooting something seriously massive. A single full resolution raw image from my D800 comes in under 100mb.
The second issue I had with the print was banding in the dark sky areas of the image. I won't hold this against 858 either, because I have had the same issue in prints I have ordered from other printers, so I think I must be doing something wrong when I export my files for printing. I don't print a lot or on a frequent basis, so I am more than willing to assume the error lies more in my print preparation than in 858s printing process. And unless you look really closely, you wouldn't notice it.
So, the only two issues I had were both fairly minor, and I have a feeling that neither would have come up in the process of a normal paid order. Also, judging from my interactions with the staff, I have a feeling that if I had mentioned the banding issue to them they would have probably offered to work with me on the file I submitted and reprint the job for me. But I didn't mention it, because that would have been a total dick move on my part (hey- this awesome thing you gave me for free isn't quite awesome enough, how about a redo? Not my style. I may be a beer snob, but you buy me a Corona I'll say thank you and drink it)
To sum it up, awesome service, amazing products. Next time I need something printed up I will definitely give 858 Graphics a call, and not just because the bribed me with free stuff. I also like that they are local and I can go in and talk to a real person, not just some faceless internet order service from a distant land. (although they do offer faceless distant land service as well, if you aren't lucky enough to live in or near San Diego.) Look them up, and give them some business because they rock and will work to earn it!
Flash forward a couple of weeks, and to my surprise I find a message in my inbox from 858 Graphics here in San Diego asking if I would like to send them a photo and get a free 16x24 acrylic print in return for a review. (looks like normally costs $80) Well, as it turns out, I would like that very much. So I picked out an image to send their way from a recent shoot of my family.
Turnaround time was negligible, very quick turnaround. Print was ready in a couple of days, and it looks absolutely awesome. The main holdup in my posting this review has been my unsuccessful attempts to get a picture of the print ( I know, very meta right?) but seriously, when they say "ultra high gloss finish" they aren't kidding. I finally came to the conclusion that to get a picture of the print that didn't show you a reflection of some random feature of my apartment or me, I would need to built a black box set and set up some serious product style lighting. I tried to do that this evening, but my son decided he could destroy faster than I could build, so I gave up. Here is the best image I could get without you seeing too many incriminating reflections:
Print came with the mounting hardware, pretty easy to attach and it sits about an inch off the wall with the supplied mounts.
As you can see, installing the mounts is pretty simple. Overall I am very happy with the service and quality of the product. My point of contact was very easy to deal with throughout the whole order and made getting the print a simple and even fun process.
But, despite the free stuff and my overall happiness with the print, I would be remiss if I did not mention two small issues (neither of which will likely effect paying customers at all)
The first issue was image submission, there was no simple way to provide a high resolution image to 858 to print. I think this was due to the fact that I was getting the print outside of their normal ordering system, it looks like with the normal ordering system you can upload up to a 500mb file, so that shouldn't be an issue when you order from them, unless you are shooting something seriously massive. A single full resolution raw image from my D800 comes in under 100mb.
The second issue I had with the print was banding in the dark sky areas of the image. I won't hold this against 858 either, because I have had the same issue in prints I have ordered from other printers, so I think I must be doing something wrong when I export my files for printing. I don't print a lot or on a frequent basis, so I am more than willing to assume the error lies more in my print preparation than in 858s printing process. And unless you look really closely, you wouldn't notice it.
So, the only two issues I had were both fairly minor, and I have a feeling that neither would have come up in the process of a normal paid order. Also, judging from my interactions with the staff, I have a feeling that if I had mentioned the banding issue to them they would have probably offered to work with me on the file I submitted and reprint the job for me. But I didn't mention it, because that would have been a total dick move on my part (hey- this awesome thing you gave me for free isn't quite awesome enough, how about a redo? Not my style. I may be a beer snob, but you buy me a Corona I'll say thank you and drink it)
To sum it up, awesome service, amazing products. Next time I need something printed up I will definitely give 858 Graphics a call, and not just because the bribed me with free stuff. I also like that they are local and I can go in and talk to a real person, not just some faceless internet order service from a distant land. (although they do offer faceless distant land service as well, if you aren't lucky enough to live in or near San Diego.) Look them up, and give them some business because they rock and will work to earn it!
Tuesday, December 2, 2014
Christmas shopping for the photographer in your life. (how to buy presents for a photographer)
Just in case you hadn't been able to tell from the flurry of advertisements, ugly sweater party invites, and the endless repetition of "Baby it's cold outside," Christmahannakwanzika is upon us once again. This means, if you happen to have a photographer in your life that you may be totally stumped when it comes to what to get us when it's time to be getting presents.
I admit it, we're a pretty finicky lot. Most of us are very particular about our gear, we know what we want, and that is exactly what we want. You may not even know what camera we use, let alone what accessories work with it or what is already in our camera bag. So how do you go about getting us something you know we'll use and love? It isn't easy, so I will try to give you a few options:
Option 1: Go simple. Stick to the tried and true basics, things that are pretty much universal. Problem is there aren't many of these out there anymore, and the ones that are still there are pretty much at the stocking stuffer level. Some quick examples are handy lens cleaning cloths, you can never have enough, or cases for the standard items everyone needs, like memory cards and batteries.
Option 2b: Do a little research. What camera system does your photographer use? What gear is in their camera bag already? With a little poking around you can get an idea of what they already have, and hopefully you know what sort of images they like to shoot- landscapes, macro, portraits, sports, etc. Write down a few things then head to your local camera shop. Make sure it's your actual local camera shop, not just the camera section at Best Buy or Fry's. I don't want to disparage those stores, but the sales people there are probably not photographers and even with the best of intentions may lead you astray. But your local camera shop is staffed by photography geeks just like the one you are shopping for. If you can tell them what is already in your shooter's bag and what they primarily shoot, these pros will most likely be able to give you some great suggestions. Ask first, but these shops will also probably be more than willing to do credit/refunds/exchanges in the event that your gift didn't quite fit the bill.
Option 2b: Do a little sneakier research- aka snooping. Look over your photographer's shoulder while they browse camera sites and see what they seem to like. Look through their browser history and see what pages they visited at big photo retailers (Adorama, B&H, Keh, etc). This method is rather risky on several levels and could lead very bad relationship consequences, so only use it if you are very comfortable with your person and you have a shared computer or something that should reasonably not be expected to be private. Also, be prepared to potentially ruin your surprise if you stumble across the sites they were using to shop for your gift, or to learn way more than you ever wanted to know about your person if you stumble across some other sites they may have visited for.... umm.... research. Ok, really, I don't recommend this one. Forget I said anything, it's a bad idea.
Option 3: Accessorize. Yeah. Most of us have the same old boring black cameras and lenses. Maybe white if your photographer shoots canon. You may not know what gear they shoot with, but you probably have a good idea of their personality. Maybe you can help them set themselves apart a bit from the crowd. Do they shoot children's portraits? How about a Shutter Hugger to help make those little smiles come out. Do they shoot rock concerts or just want to stand out from the crowd a little bit? How about a Lens Skin you think fits their image? (you have to do a little research to know what lenses they use for that one.)
Even better, what if your photographer is into steampunk fashion, or just really, really wants to stand out. What if you want to support a small business instead of a major online retailer? In this case, you should definitely take a look at CameraPunk. Unlike the other links to amazon items in the rest of this post, I don't earn a cent if you buy something from CameraPunk. But if your photographer really wants to stand out and look awesome, this is a great place to shop. You can go from subtle to over the top steampunk as you like. If you go back and look at a few of my posts where you can see my 24-70 or 70-200, you may notice that each one has a lens cuff from CP. While I don't earn anything from recommending you check CP out, the artist is a friend of mine and is just an amazing person as well as an awesome photographer herself, so I would be remiss if I didn't suggest you check out her shop for some stuff you won't find anywhere else.
Option 4a: Make it personal- give the gift of yourself. Give a gift certificate for your services as a photo assistant on a shoot or two. Spend some time with your photographer and help them out while they are doing what they love.
Option 4b: Make it really personal. This one only works if your photographer is your significant other, or is someone you are considering for a closer relationship. Slip on something fancy (or naughty) and walk up and seductively ask if they would like you to model for them sometime....
So, there you go, some really non-specific options to hopefully spur your creativity and help you pick out a gift for the photographer on your list. Before I go, just in case I happen to be the photographer on your list, or if Santa happens to be following my blog, here's some suggestions for me:
Phantom 2 Vision+ Drone!
Nikon 135mm F2.0 DC Lens
Sigma 150-600 F5.6-6.3 DG OS HSM S Lens
Zeiss Otus 85mm
Then there are studio lights, medium format cameras, a studio space.... see, we're easy to shop for as long as you happen to be loaded!
Merry New Year and Happy Christmas to all- or whatever Holiday greeting floats your boat, I am pretty equal opportunity when it comes to time to get presents!
I admit it, we're a pretty finicky lot. Most of us are very particular about our gear, we know what we want, and that is exactly what we want. You may not even know what camera we use, let alone what accessories work with it or what is already in our camera bag. So how do you go about getting us something you know we'll use and love? It isn't easy, so I will try to give you a few options:
Option 1: Go simple. Stick to the tried and true basics, things that are pretty much universal. Problem is there aren't many of these out there anymore, and the ones that are still there are pretty much at the stocking stuffer level. Some quick examples are handy lens cleaning cloths, you can never have enough, or cases for the standard items everyone needs, like memory cards and batteries.
Option 2b: Do a little research. What camera system does your photographer use? What gear is in their camera bag already? With a little poking around you can get an idea of what they already have, and hopefully you know what sort of images they like to shoot- landscapes, macro, portraits, sports, etc. Write down a few things then head to your local camera shop. Make sure it's your actual local camera shop, not just the camera section at Best Buy or Fry's. I don't want to disparage those stores, but the sales people there are probably not photographers and even with the best of intentions may lead you astray. But your local camera shop is staffed by photography geeks just like the one you are shopping for. If you can tell them what is already in your shooter's bag and what they primarily shoot, these pros will most likely be able to give you some great suggestions. Ask first, but these shops will also probably be more than willing to do credit/refunds/exchanges in the event that your gift didn't quite fit the bill.
Option 3: Accessorize. Yeah. Most of us have the same old boring black cameras and lenses. Maybe white if your photographer shoots canon. You may not know what gear they shoot with, but you probably have a good idea of their personality. Maybe you can help them set themselves apart a bit from the crowd. Do they shoot children's portraits? How about a Shutter Hugger to help make those little smiles come out. Do they shoot rock concerts or just want to stand out from the crowd a little bit? How about a Lens Skin you think fits their image? (you have to do a little research to know what lenses they use for that one.)
Even better, what if your photographer is into steampunk fashion, or just really, really wants to stand out. What if you want to support a small business instead of a major online retailer? In this case, you should definitely take a look at CameraPunk. Unlike the other links to amazon items in the rest of this post, I don't earn a cent if you buy something from CameraPunk. But if your photographer really wants to stand out and look awesome, this is a great place to shop. You can go from subtle to over the top steampunk as you like. If you go back and look at a few of my posts where you can see my 24-70 or 70-200, you may notice that each one has a lens cuff from CP. While I don't earn anything from recommending you check CP out, the artist is a friend of mine and is just an amazing person as well as an awesome photographer herself, so I would be remiss if I didn't suggest you check out her shop for some stuff you won't find anywhere else.
Option 4a: Make it personal- give the gift of yourself. Give a gift certificate for your services as a photo assistant on a shoot or two. Spend some time with your photographer and help them out while they are doing what they love.
Option 4b: Make it really personal. This one only works if your photographer is your significant other, or is someone you are considering for a closer relationship. Slip on something fancy (or naughty) and walk up and seductively ask if they would like you to model for them sometime....
So, there you go, some really non-specific options to hopefully spur your creativity and help you pick out a gift for the photographer on your list. Before I go, just in case I happen to be the photographer on your list, or if Santa happens to be following my blog, here's some suggestions for me:
Phantom 2 Vision+ Drone!
Nikon 135mm F2.0 DC Lens
Sigma 150-600 F5.6-6.3 DG OS HSM S Lens
Zeiss Otus 85mm
Then there are studio lights, medium format cameras, a studio space.... see, we're easy to shop for as long as you happen to be loaded!
Merry New Year and Happy Christmas to all- or whatever Holiday greeting floats your boat, I am pretty equal opportunity when it comes to time to get presents!
Subscribe to:
Posts (Atom)