Saturday, October 18, 2014

Gear Review: Spider Pro Holster and Think Tank Pro Speed Belt


    For as long as I have been a photographer, I have been on a quest for the perfect way to carry my cameras and gear. I have never really liked the classic camera strap, around the neck and hanging in front of your chest from two points on the camera. My Carry Speed straps are a significant upgrade from the traditional strap, but still less than optimal. The camera still swings around a lot, even with the strap tightened down. Since I tend to climb around a lot in general and see no reason to alter this behavior during shoots, cameras swinging around too much leads to broken gear, much sadness and a slimmer, lighter wallet. In a studio, or other contained shoot where I never need to move far, I find myself not using a strap at all. I just hand carry the camera and set it down somewhere when I am not shooting. This is the most comfortable way for me to work, so I have been looking for something that lets me get that same feeling yet still have some way to attach the camera to myself when I needed both hands or just wanted to take a break.

    Enter the Spider Pro system. I had been researching various clip systems for a while, and there are several out there to choose from. I can't say that the Spider is better than any of those because I haven't tried them, but three primary factors put the spider system above the others when it was time to purchase. First- it is metal instead of plastic. If I am going to be running around and hanging upside down while trusting a small device to hold $10k worth of camera gear onto my hip I want it to be built bombproof, and the spider just looked tougher than the rest. Second, anyone who has followed me for any length of time knows I am a huge fan of Think Tank bags and gear. I am pretty sure that one of these days I am going to break down and get one of their modular belt systems. I wasn't sure that the belt that comes with the standard spider would be compatible with the think tank system, but Spider also offers a clip kit designed to attach to a Think Tank belt. So, by going with the Spider Pro think tank belt system I gave myself confidence in the ability to add more gear later on. The third and final point that made the decision easy was that, while Spider does offer Arca Swiss compatible plates, the Arca Swiss plates and pins on the carry speed mounts I already had on all my cameras would work with the Spider Clips. This meant that not only would I not I have to buy additional plates for each camera, but also that I would be able to go back and forth between the strap and the belt without changing out plates in case I didn't always want to use the belt system.

   So, as the magic 8 ball says, "all signs pointed to yes," for the combo, so I ordered and waited. Everything came in and it was a snap to set up. First thing I did was adjust the belt for size and figured out where I wanted the camera to sit on my hip- because once the clip is attached to the belt it does not slide or move. The buckle only has the two side pushes for release, but it was very secure. Adjustment was made at the buckle with metal tabs which prevented the belt from inadvertently loosening.


    Attaching the clip was easy- undo a couple of screws, pull off one piece, put belt in the middle, place a piece over the belt, tighten screws down. Done. There is also a pad, but it added a lot of bulk to the belt so I decided to try it without the pad first and add the pad in later if I needed it.


    Then it was off to Burning Man for the system's first real test. I already gave you a brief teaser of how this worked out in my earlier Burning Man post, but just to recap, the system worked perfectly. I carried around the D4 with the 24-70mm attached for a solid week, in just about the worst conditions you could come up with. I ran, jumped, chased a toddler, climbed, swung and rode bikes around all with the camera clipped in, and most of the time not even locked in place. I never worried about losing the camera, even when not locked the clip was very secure.

    The clip does have a locking device, for when you need extra security. I clicked it on ahead of time if I knew I was going to wind up going upside down. The lock does make camera removal a two handed operation, so when I didn't need it I kept it disengaged. You can see the lock tab function in the two images below.

Lock Engaged- ou can barely see the lock tab point in the track, but it traps the ball completely. Wheel on right side locks/releases. 

Lock disengaged, channel is clear. 


    After a day or so of getting used to the position and motion of clipping in and out, I could grab the camera, shoot, and re-holster it one handed without looking, very handy for shots from a bike or while climbing.

   I know what some of you are thinking, I am insane to pull out what becomes a completely untethered camera while climbing or biking, and you are right, but I feel pretty comfortable handholding, and besides, that is what equipment insurance is for, right? But if that thought scares you, you can still use a strap that mounts from one side of the camera or a tab that secures into the tripod socket of the Spider Plate (or CS plate in my case) and that way the camera is still strapped to you while you are shooting, but when it is clipped into the holster it won't swing around while you are moving/climbing, etc. So the option for double security is there, I just didn't use it since one of the big goals for me was to get away from the strap in the first place.

   One of the reviews I read on this system mentioned how obvious it made you look as a professional photographer, and while this may be true if you wear it on top of everything, add two cameras and a shoulder harness, if you want you can use it to almost be undercover.


    That's me at a Sukkot celebration last weekend. On my right hip I have the D800 with the 24-70 attached (by the end of the day there was also an SB910 on there. On my left there is the SB910 in a pouch along with a water bottle. These were both just attached to the belt's gear loops with carabiners. At one point I wanted to get a shot of a friend while in the beer tent, and although we had been talking for about 10 minutes prior, he hadn't even noticed the camera and was shocked when I reached down and came up with it. (flash was mounted at this point)

   Since Burning Man I have used the belt for every shoot I have been on, and it has performed well. My overall conclusion is I LOVE THE SPIDER PRO and I LOVE MY PROSPEED BELT!!!!! I am kicking myself for not getting this setup sooner. In fact, I am thinking about how long to wait before I expand. While at Burning Man I had the addition of a Digital Holster 40 V2 on the opposite side from the clip, I won't talk about that much here since I mentioned it in the BM post and plan to review it separately later on, but while it will work somewhat to hold a second camera, it isn't really ideal to use as a dual camera setup, so at some point I want to add a second spider clip. I think that if I will be using it to carry two full setups, I am going to want a shoulder harness as well. The single camera setup, even with a D4/70-200/sb910 rig on it, carried very easily and quite comfortably, and I will try it without the harness first with a dual camera setup, I have a feeling the harness will come in handy, even more so if I wind up going with the full modular or skin sets.

    Another awesome thing about this setup is how flexible it is. From one camera to a whole boatload of gear, as much or as little as you need, limited only by how big your waistline is. (not kidding, this is common issue for skinny cops or soldiers who run out or room to put stuff on their belts simply because they don't have enough real estate). The belt has accessory loops running all around it. With the think tank products which are designed to match up with this belt, they give you the choice of having your pouches either slide freely around the belt, or remain fixed in a set place (remember, the spider clips are locked where you install them). But they also allow you to attach anything you can hook a carabiner to, like my water bottle in mentioned above, or my Kata PL-18 bag, or anything else you may want to carry.


   So, if you haven't figured it out yet, I totally love this setup and recommend it to anyone! That being said, there are a couple of downers I would be remiss if I didn't mention. First, if you already are wearing a belt, it will be uncomfortable to wear the spider rig over the top of it, since they both will want to sit on your hips the same way, and the weight of the camera belt will pull your regular belt down and cause it to dig into you. I tried wearing the camera belt underneath the regular belt, but that wasn't comfortable either. So, if you depend on your belt to hold up your pants, you will have to carefully position the camera belt. If you're really worried, maybe carabiner to a couple of your belt loops? Second, if it's at all warm, you will sweat under the belt, and when you take it off you will have a sweat ring wherever you wore it. (at least I did, your sweat rates may differ from mine). The final downside is that it makes you wider, especially if you have something on either hip. If you have the camera hanging from a side strap and you gently bump it against something as you walk, the camera can swing and dissipate the force of the impact, but if the camera is clipped in and can't move, it takes the whole hit. It takes a bit of time to get used to having a few extra inches on either side of your hips.

     I did find one more problem, but it was with the Carry Speed plates/pins, the spider clamp just revealed it. Apparently the frequent rotation as the pins slide in and out of the clip can cause the CS pins to loosen. I caught it before anything catastrophic happened, and just made sure to tighten the pin each time I pulled out the camera until I could get some loc-tite and set them in a little more securely.

   That's pretty much the ups and downs. This is an awesome system. If you are looking for a system besides the strap that lets you pick and choose how much you want to carry and when, change configurations quickly and easily, as well as make it much simpler to carry two cameras and swap between them at will, the Spider Pro Holster on the Think Tank Prospeed Belt is an effective, awesome combination. If you agree and want to grab any of this gear yourself, please use the links above and show me a little love!

Wednesday, October 8, 2014

That's it, I'm Selling Out.....

Ok- not really, but I need to explain myself, and since I am a blogger, that means another blog post. The cliff notes version of this lengthy disclaimer is that I am going to start using affiliate marketing links in my posts. I am also going to go back and retrofit them into past posts. There, my naughty little secret is out of the way. But before I explain in detail, I will say this: I am not sponsored by anyone (note- if anyone does want to sponsor me, drop me a line, I am totally ok with getting sponsored... hint hint- Nikon, Think Tank, Kata, anyone......) Anything I review will be something I have used. If I like it, I will tell you why. If I don't, I will tell you why I didn't. Reviews will be honest, and come from my own experience and opinions. But it would be nice to make a little bit if something I write makes you decide to get something for yourself, and it doesn't cost me anything to so, so I am going to give it a shot. Now for the why.

     Why? Because I want to make a little money, that's why. So far I haven't been able to crack the nut of making photography pay, the book has been pretty much dead on arrival so far, and I have only made a whopping $13 off stock photos. Right now I have the luxury of a full time job to support my photography habit, but this will not always be the case. When I am done with the Navy, I will have a decent retirement check, so I won't starve if my images don't sell, but I want to be able to take care of my family and do more than survive. So, while it is nice to have a cushion that lets me focus on trying to shoot what I want to shoot, it would really be nice to get something back. So I have been trying to build foundation out of small steps.

    Step one- never stop getting better behind the camera. I am consistently getting decent images. I am occasionally getting good or even great images. But I am definitely not yet a master of the craft, I have a long way to go and a lot to learn. This will be a lifelong process and goal. But I want to put art out into the world, not crap. I may need to phrase that a little differently before I incorporate it into my mission statement, but there you have it.

    Step two- figure out how to market myself and my images better. I'd love to say that all the marketing savvy in the world won't let you sell a bad picture, but when I look at what's out there and who is actually making money, it's easy to tell that's not true. There are a lot of people apparently making money off of mediocre snapshots and calling it photography. The opposite is also true, there are some people out there making amazing images that probably aren't earning a living at it. The key must be marketing. I am not good at it yet. I think the book also would have done better if I had any idea how to market it. This step may take a while as well.

    Step three- Figure out little ways to make income. Slow and steady is the key here. I have time, I need to take advantage of it. So, starting to try and build up the little things. It reminds me of one of my favorite Demotivational Posters, "A few harmless flakes working together can unleash an avalanche of destruction." Except in this case, I hope a few small channels can build up over time into at least a small snowball of steady income. So, I keep adding photos to the stock portfolio, and looking for other ways to add revenue streams while staying true to what I want to do. 

    Step three is where I obviously hope the affiliate program will come in. If there is one thing photographers are known for, it's going gear crazy. Although I try to control myself, the need is sometimes strong, and sometimes even legitimate. So I will continue to acquire new gear. I will continue to use the hell out of it. Things I like, I will talk about here. If I can get a little money because people want to take my recommendations and use the stuff I like to use, everybody wins, so I don't think it really is selling out after all. But I did think it was something I needed to put out before I went back and swapped all the links, and started posting some more gear reviews that I am working on right now. 

   Finally- Step 4. Keep trudging along. Look for opportunities to get my name out there. Try new things, see what works and what doesn't. Say YES to opportunities even if I am not sure if I am ready for them. Put in the time and the effort and just keep going. 

Monday, September 29, 2014

Roller Derby Redux- an enlightening experience.


    I was finally able to make it back to shoot the San Diego Derby Dolls again, after roughly a year of not being able to make it to bouts.You can read about where I left off last time in this post. I said back then that I intended to try setting up some remote speed lights, and this time I did. I also pushed Excalibur up to ISO 25,600 for a few shots without flash just to keep playing with expanding what I thought (mistakenly, it seems) were the limits of the D4.

   While it is totally awesome to be able to get good shots at such a high ISO,


   I have to say that adding the flash worked much better than I ever expected it to.


  A while back I attending a speed light workshop, and one of the instructors talked about his wedding  reception setup, which basically was a triangle of remote lights to cover the dance floor, and how it gave his images depth and made them stand out. Guess he knew what he was talking about. The difference between the lit images and the ambient, high ISO ones is astounding, and I wasn't even really good with my light placement, since this was a first effort.


  I got in early before the start of the first bout, and placed a couple of lights where I thought would work, and used the dolls warm up time to test things out. Since the distance between the skaters and the lights would be different each time, I started out trying TTL, but I never seemed to get it quite dialed in, even when I bumped the ISO up high the lights were still working too hard and I was only getting single shots. So I decided to go manual. I wound up settling on ISO 3200, which let me get away with shooting at 1/640sec at F5.6 and still only needing 1/4 - 1/8 power on the speed lights, which meant I could get 4-8 shots per pass with flash.


  During the break between the bouts, I repositioned the lights because I didn't like the coverage I got on the first bout, and the second setup worked much better. I was limited to two lights because I only had two super clamps to attach to ceiling piping, and didn't want to restrict anyone's view by trying to set up light stands. Next time I will grab more super clamps and set up additional speed lights, because I didn't like being restricted to a small area while I was shooting. I think with 4 lights I could get decent coverage on the whole track, if I had 8 I could get excellent coverage of the track. One of these days I may actually have a gear budget, if I can ever figure out how to get someone to pay me for this stuff! (speaking of which, if you want to help me out ever, you can still go fund me!)


   So how did I set up at the end? If you think of the track as a clock with the start line at the 9pm position and the Dolls skating counter clockwise, I put one light at the 1 o'clock position shooting down the straight towards 6pm, you can see that one in the last image above, and the other at 10pm shooting across towards 2 o'clock to cover the curve. I did most of my shooting between 9 and 12 O'clock. Overall I was very happy with the images, the dolls and their fans loved them, and their comments on the images and how amazing they looked definitely made the extra time and effort of trying the flash setup out worth it. Can't wait until I get another chance to try again, until then, you can see the full gallery from the night here and let me know what you think.

    And finally, the more observant and dedicated readers might have noticed the new water mark, a friend of mine designed a logo for me, as well as an updated cover image for the book, still making progress!

Tuesday, September 23, 2014

Nuts and Bolts of Shooting at Burning Man...


    This was my third trip to Burning Man, but it was my first taking anything except for a point and shoot camera. It was also my first time with a toddler. These both made it quite a different Burn than my prior experiences but, even different it was still Burning Man and still awesome.


    The biggest difference having a toddler along made was that I spent a lot more time out and about during the daytime than I did at night. If you haven't been to Burning Man before, day/night are almost two separate worlds joined by a common theme. We did get a couple of late nights as a Family, starting with a Kidsville Art Car tour of the deep Playa for kids and their families. My little dude rallied and made it almost to the end before crashing just as the tour rolled back into Kidsville. It was awesome being in an environment where the first answer for him was yes, instead of no. He pretty much could climb and play on anything he wanted, and there were spaces where we could just let him run and see where he led without having to worry too much. I think he really got a lot out of it as well, all the early childhood stuff I read to prepare for being a dad said that the best thing you can do for a child's developement is put them into an environment with lots of stimulation and variation. Mission accomplished, and he came away with all sorts of new words, like "art car, fireworks, hopper (trampolines- which he loved)" and really seemed to open up.


    Ok, enough gushing fatherhood- what about bringing my camera and shooting? For those of you who aren't familiar, Burning Man is both wonderful and dangerous for photographers. It is a wonderful and amazing place that offers more fantast shots in a minute than most shooters would otherwise see in years. On the on other hand, the fine, pervasive alkali dust gets in everything no matter how much you try to protect your gear, and has quite a reputation for gear destruction.

    I did a lot of research beforehand, and the consensus seemed to be that unless you were willing to put your camera into a full underwater housing and not take it out for a week, you just had to accept that you were probably going to need to spring for (or if you were so technically inclined- spend the time) after the event to do a sensor cleaning and a full cleanout of the body and lenses you used. There is lots of advice floating around about putting gaffers tape over card slots, battery compartments, etc and other practical steps such as not changing lenses at all, or if you have to change, doing it inside an enclosed space, and even using prime lenses vice zooms to keep the zoom action from sucking in the dust. Ultimately, I chose to go with a mid-range set of precautions. I went with the D4, since it is supposed to be highly weather sealed and very resilient. (I also had a paying shoot right after I was supposed to get back that I was going to use the D800 on, so if one camera had to go into the shop for cleaning it was better it be the D4) The D4 also is better in the dark and I definitely wanted to do lots of night time shooting. I didn't do any extra taping, but I did decide to stick with a single lens, my 24-70mm, and not do any lens changes on playa. I also made sure I had large enough memory cards to shoot all week and not have to change out or open anything except to swap batteries.

    The next issue I had was how to carry the camera. I like my Carry Speed strap, but I knew I was going to be doing a lot of climbing, running around being silly , and biking everywhere all week. With all that, having the camera swinging around on a strap was going to suck. I had been thinking about getting a SpiderPro belt system for a while, and this seemed like the perfect time to make that happen. I also wanted to make sure I had a more robust protection plan for when the dust got bad, so instead of going with the full spider pro belt system, I got the spider clip, which I put on a Think Tank ProSpeed Belt (with the spiderpro adapter kit) and also added a Think Tank Digital Holster 40V2 bag on my off hip.


     I will write a full review of this setup and these pieces of gear later, but I wound up very happy with this setup. The camera spent most of the Burn in the clip on my hip, ready to draw and shoot almost instantly. I was even able to draw, shoot and return one handed while riding the captain's seat in a tandem bike / sidecar combo we used to roll around as a family. (even when trying to chase down said family while the little dragon ran wild)


    When I wanted a little more security for the camera or I knew I wasn't going to be shooting for a bit, it went into the bag and got sealed up.

    So how did the camera do? Well, I have to start with a disclaimer- with the epic rains Monday morning to hold the dust down, this was a very mild year, I think the least dusty of the three Burns I have attended. The dust really didn't even start blowing until Thursday, and even then it was mostly localized to the middle of the clock face, once you got into the side streets, at least on the 6-10pm side, the dust quickly subsided for all but a couple of hours, so my setup never really got much stress testing, even though I did pull the camera out and get some shots during the worst of the dust, because I thought they were worth it. One other thing I learned was that I had been limiting Excalibur by at least a full stop. Based on some test shots I took to mess around while researching for my book, I decided I was being conservative and could easily shoot up to ISO 25,600 with noise reduction afterwards. There is still some noise, but damn, I can shoot confidently at ISO 25,600! WOOHOO! And I did, a lot, when I made it out at night.


    Gear wise, in the aftermath, everything survived well. There was some obvious dust covering the camera, and the holster bag.


    Going through the images, I did see occasional dust spots, but they were gone in subsequent images, so the self cleaning sensor function on the camera seems to have done its' job well. When I got home, I blew off the exterior of the camera with a low pressure fan, then wiped down all the camera and lens exterior surfaces off with cleaning wipes and cleaned the lens and U/V filter off with a puffer brush and lens cloth. Then I took the lens off, and was pleasantly surprised to find almost no dust visible inside the camera or the rear element of the lens. In the final analysis the D4 and the 24-70 came through with flying colors, emerging from the dust unscathed...... almost. The only casualty was a crack on the upper LCD display, that I think happened when I was crawling through a very narrow tunnel inside the Embrace art sculpture. I think the crack may only be on the plastic cover I have on the LCD (this wasn't for BM, I put covers on both LCDs on all my cameras just as a general precaution, like always having the UV filter on my lenses) but since the screen still works fine, I haven't bothered to try and remove the cover and check, since it is adhesive enough to make any deeper cracking worse while pulling it off.


    What about the shooting? Well, it was both easy and hard. Easy in that there were wonderful shots everywhere, hard for the same reason. I had to remind myself that photography was just a side line, my main purpose was to experience the Burn with my family and friends, most of the rest of who were experiencing their virgin burn. (not that you would have been able to tell that from the uber-yurt palaces they constructed....) It was also difficult because, starting even before my first Burn, I have spent years looking at awesome images from Burning Man, taken by some really amazing shooters, and I had the feeling that mine wouldn't hold up against that standard. In fact, I felt like for most of the week I was mostly just shooting standard snapshots instead of trying to set up and compose great images. I didn't have a theme, I didn't have experience shooting the Burn, and to make it worse, the only times I really had to go out on dedicated photo safaris were during the little Dragon's nap time... ie in the middle of the afternoon and the worst possible light of the day. (they say the best time to shoot is Dawn, but for those of you who know me, you know that wasn't likely to happen... even when I wanted to get up to see the embrace burn) Although, I have to say, the light was pretty damn awesome at sunset as well.


    I was also hampered by my decision to stick with one lens, that meant I wasn't always able to get the composition I wanted from where I was, and wasn't always given the chance to zoom with my feet before the shot went away. I also missed one shot that I really wanted because I was too short. I really wanted to get a shot of the Man framed by the two lovers of the Embrace, maybe even with a sunset in the background, but I needed to be taller to get that one. By which I mean I would have had to get a scissor lift truck and around 50feet of elevation, which is probably why I haven't seen that shot on anyone else's portfolio yet either.

    Ultimately, I decided I didn't have the time to try and get great shots of the art, that would have taken too much time away from my family, so I chose to focus on trying to capture the people around me, and get good portraits of my fellow Burners. I think I managed to get a few that transcended the mere snapshop level, and captured a bit of the soul of the Burn.


    You can see the rest of those in my "US in the dUSt" series.

    I did manage to get a couple that I think were worthy of the Man, the Temple, and the Embrace.


    You can see all my shots of the various art works I managed to get to here.

    At some point, I think around Wednesday afternoon, I figured out I had seen enough mirrored shades to want to do something with them, so I came up with the idea of "Reflections of home," and started trying to get good reflected images in mostly mirror shades, but also any good mirror or reflective surface I could find.


   You can see the rest of "Reflections of Home," here.

    So those became my two driving artistic themes for the rest of the week. I also put the camera on a tripod and did some long exposures on Burn Night, as well as some experiments with light painting back at our campsite.


    So, ultimately, although I don't think my work will wind up being compared to the greats, I did get a lot of shots I was happy with, and a collection of decent portraits to gift to fellow burners. I also got a lot of awesome shots of both my close and extended family. I found a new gear carry system that I totally love and didn't have any major gear issues, damage or loss. I've already been able to give at least one good image to someone who lost her own camera on the Playa and otherwise would have had no images of her burn, so all in all, it was a great experience and I can't wait until I get back home again. Until then, you can see all my shots on my web galleries! 


Friday, August 1, 2014

Epic Hawaii Weekend Redux


    Whew. Been a long month since I left Hawaii to go sailing in circles for RIMPAC 2014. A lot has happened during that month, but I have a quick couple of days in port with connectivity before I head back home, so here is the quick update.


   Shortly after heading out to sea, I got an email via my web site  wanting to book me for a wedding. I responded that I had no wedding experience, she said it was ok, she was willing to take a chance on a new photographer based on the images she and her finance saw on my site. So I was mostly totally stoked, with a side of nervous. I started re-reading and researching and doing everything I could to prepare to shoot my first wedding right after I got back to SD. But as the emails went back and forth I started to get a bad feeling. First off, when I asked about a rehearsal the reply was basically, "what rehearsal?" It went downhill fast from there and now it looks like this was simply someone attempting to catch me with the standard overpayment scam... sure, your uncle is paying and sent me a check for twice the deposit... don't worry, I'll happily deposit it then send the difference on to your florist before it clears.... NOT! I'm not sure what feels worse, how excited I was that someone actually wanted to hire me for a wedding based on looking at my work, and finding out it was just a scammer,  or the fact that someone actually thought I was gullible enough to fall for something that obvious? It would have been great to have my first wedding gig, but oh well. Guess I will have to keep waiting for that one.

    Next, I finally published my first book. During the free trial period I set up for the first week, just over 200 people downloaded it, so I started to let myself hope that was going somewhere, but in the week since the free trial ended a whopping 1 person has purchased it. I guess I should be stoked that I actually sold one copy, but even though I told myself I was prepared for the book to flop, I find I had let my hopes build up a little bit so it still hurts to face reality.

    Navy wise, took a big hit as well, but that has nothing to do with photography so won't go into details here, let's just say it added to all the ups and downs and I was definitely ready for a break when we pulled back into Pearl Harbor.

    Mostly I wanted to turtle into my shell and just hide all weekend from the world, but I knew that I couldn't give into that feeling, I had to at least try to keep moving forward and see what would happen, so I threw some feelers out and connected with a couple more models from Model Mayhem and planned a pair of shoots. Really glad I did, because both models were absolutely amazing. Beautiful, fun, easy to work with, really a reminder that it is worth it to stick with things and keep shooting. The first shoot was just for trade with a model looking to build her fitness portfolio. We met up in a park, then took a couple of field trips because we were just having fun shooting so we decided to keep it going. Here are a few unedited teasers from that one just to give you an idea of what we got:


  The next day I was back to Makapuu'u beach for a yoga shoot. I first wound up at this beach last January when a couple of friends had a wedding there, and have been wanting to do a yoga shoot with waves crashing ever since. Tried last time I was here but it didn't pan out. This time I had a great model, the weather cooperated wonderfully, and we got some awesome shots. Again, some unedited teasers:


   Only downside to this shoot was I may have lost a flash and a remote to a rogue wave... I managed to catch the flash and trigger before they were pulled out to sea, but when I pulled it out of the water, I actually got a shock from touching it, so I know the battery compartment flooded, and who knows what else. I am trying them out right now, will have to see what the final damage is in a day or so. But I think the shots were worth it.

   Didn't make it to the fire spinning jam session or to the fireworks, there was too much beer and hot tub to distract me. Now it's time to head back to the ship and get ready to head home, back to San Diego, then on to Burning Man. Lots of editing to catch up on, and need to post some more stuff to the Arcanum to continue my journey there. Just wanted to drop a quick update here with some actual photos, while I had connectivity and was able to do so.

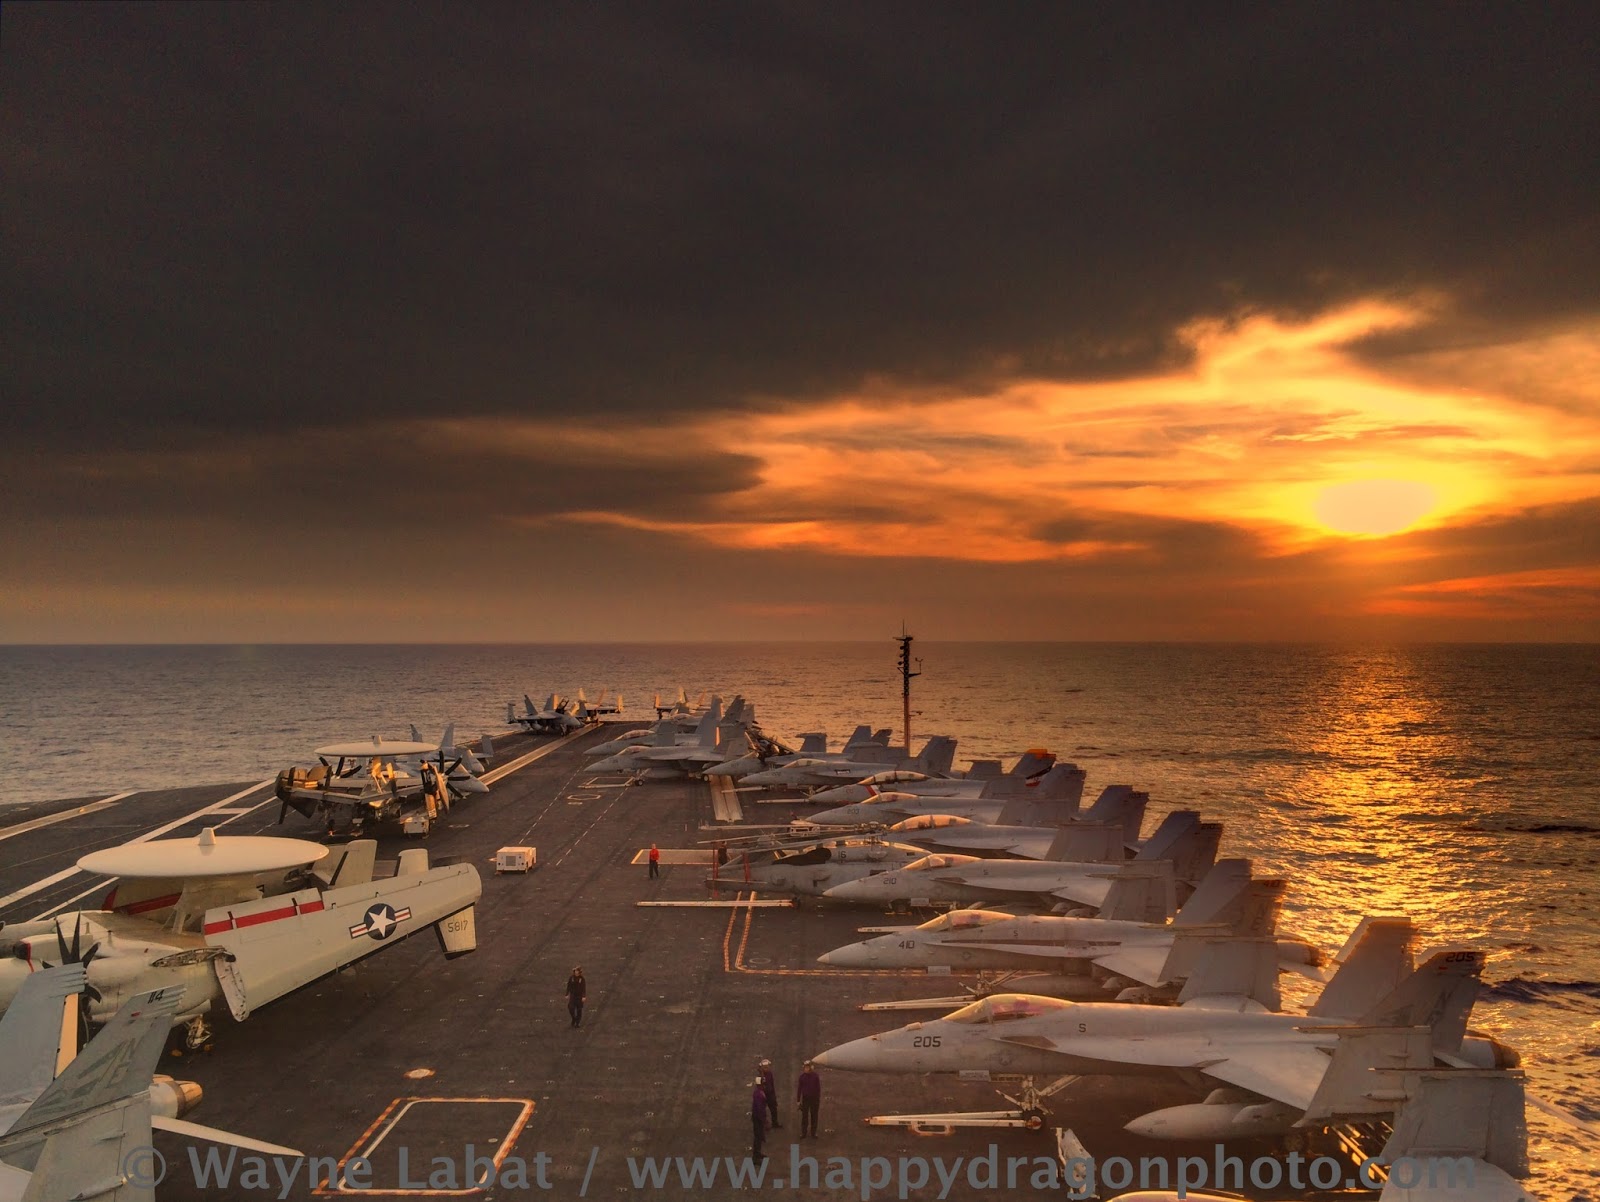
  So to summarize, paradise is wonderful, but I am very ready to head home, despite meeting some wonderful people and getting some great images. And really, even though my Naval career might be winding to a close and it discourages me that my photography career isn't picking up fast enough to give me retirement confidence, the view from my office still doesn't suck.