Like most photographers (excepting those who are lucky enough to get sponsored or those who are independently wealthy) I am always on the lookout for opportunities to get the best gear I can for the least amount of money. I have found out that there is a good way and a bad way to go about this and very recently had the distinction made very clear to me.
I'll start with the right way. Use an established, well respected gear reseller like Keh, Adorama, B&H, or your local camera store. These guys know what they are doing and want to maintain their good reputations. I haven't done much business with the other big two, but I have made several purchases from KEH and they are easy to deal with and very conservative with their rating system.
The wrong way. Unless you are an experienced camera technician, I don't recommend ebay, amazon, or craigslist. Ebay/Amazon I haven't even tried out, because buying used gear sight unseen always seemed to me like too much of a gamble and I haven't been willing to roll those dice. I have made two major gear purchases from craigslist and both turned out to be lemons despite my best efforts to protect myself:
Purchase two: You will see the reason for the reverse order shortly. I bought a used Nikon 24-70mm F2.8 from CL for about 1/3 less than I would have paid new. Guy's excuse for selling was that he was switching to Canon. He did mention that the soon ring was a little sticky. I put it on the camera, tried shots wide open, stopped all the way down, and middle apertures at both ends and the middle of the zoom range, they all looked fine on the camera LCD, so I paid him, took the lens and went my merry way. Wasn't able to tell until I got home and looked at the images 100% on the computer that none of them were sharp. Thought maybe I needed to custom focus adjust for the camera/lens combo, tried that, nothing worked. Eventually took the lens in and had to get it serviced and repaired to the tune of $500. As it worked out, I wound up paying the same total that I would have paid to get the lens brand new initially, so at least in that respect I broke even, but after lesson two I decided that I would never shop CL again for photo gear.
Purchase one: This is actually the reason I made purchase two, because I didn't realize I had gotten screwed basically until today, even though I bought this lens on CL over two years ago. Actually, since I have gotten a lot of mileage out of this lens, guess I can't really say I got screwed, but I really didn't realize what I had missed until today. The first lens I got on CL was a 70-200mm/F2.8 VR I lens. I got it for about 1/2 the price of new, guy selling it said it was because he was upgrading to the VRII. I put it on the camera, shot it at a range of apertures and focal lengths, everything worked fine. I have used the lens a lot and gotten awesome stuff with it. The first issue I noticed with this lens was last August, when I shot a soccer tournament and realized the lens would not work with teleconverters that it was supposed to work with. Based on conversations with some other shooters, I figured this was just a one off thing, apparently not uncommon. Recently the lens developed a new issue, it would occasionally just decided to stop autofocusing. At first it was really sporadic, then at the speed light workshop last week it started happening every 10th frame or so, really annoying. I knew it had to be the lens since it happened on both Excalibur and the D800. So last week I shipped it up to Nikon. They said it was a bent mount and quoted my $432. I sucked it up and paid, and just got it back this afternoon. Turns out there was more to it than the initial report. I slapped the lens on the camera and started to play, focus was awesome, if anything faster and smoother than before, everything was great, except there was this weird whining noise that the lens had never made before. I tried both bodies with no change. I thought it was weird that Nikon would send it back to me with a flaw so obvious, so I did a little goggling. Turns out that the noise I was hearing for the first time was the Vibration Reduction motor system working, which apparently had not worked for as long as I had owned the lens. I hadn't noticed the lack of a sound I didn't know was supposed to be there, and since this is the only VR lens I own I had nothing to compare it to. So even though the lens had functioned well for me, it had been crippled for the entire time I had been using it. It was shooting pretty sharp even with slower shutter speeds before, can't wait to see how it really performs now that is back to factory condition. And I guess it still didn't cost me much more than it would have to have bought it new or refurbished originally, and I also bet it will now work with the teleconverter.
But twice bitten, forever shy. No more CL for me, I obviously am not equipped to properly evaluate used gear, so I will stick to buying from people who are and provide a warranty with their used gear.
Wednesday, May 14, 2014

Sunday, May 11, 2014
Disappointment and the Bag of Holding (aka ZEN and the Art of camera bag packing)
What hurt worse was that Saturday I was supposed to do a pretty lucrative corporate gig, the start of a multi shoot arrangement. Or so I thought. We had talked on the phone, agreed to a rate and set yesterday as the first day. So this week I left a couple of emails and a voice mail to confirm and get the address of the job site I was supposed to shoot on and....... nothing. Client just evaporated. Guess I should expect this to happen more as I go on, once I don't have the Navy and a regular paycheck to rely on maybe I will have to start requiring deposits, because I did turn down some other opportunities for this one.
So pretty much I had the entire weekend off, which is strange for me. I took some of the time to see if I could reorganize my Airport Accelerator, which - if you missed my review a while back - is my primary kitchen sink bag. I had just been keeping Excalibur in it, the D3200 was living in my car as a ready camera just in case, but now that I have the D800 as a second body and some more toys, I needed a better storage solution. I was debating buying a larger bag, but decided that since I had some time I would play with the dividers and structure and see what I could do. At first I was stuck because I wanted to keep the cameras ready to shoot with a lens attached, but between reading something about keeping lenses attached being bad for the mounts and having my 70-200 fail because of a bent mount, it was pretty easy to let that go. Once I was past that, options opened up, and I am happy to say that now not only can my current bag of holding hold all of my gear it needs to, I think I have room to also add the next pair of speed lights I will be adding my lighting arsenal.
So, financially and artistically the weekend was a downer, but practically I got a lot done and emotionally it was awesome, because I got spend a lot of time with my two favorite people in the whole world. Took the D800 out to capture the fun on Mothers' day, and even though they seemed to find every shadow in the universe to hide in, had fun shooting my favorite people. I really think I need to see if I can sell my son out as a model, he's cute as heck and totally photogenic. So overall, despite the initial disappointment and loss of potential revenue, it was still a productive weekend and a good Mother's day.


Wednesday, May 7, 2014
Jayne Cobb Cosplay Shoot (my first Cosplay shoot, first shoot with the D800, first attempt at Photoshop actions...)

Last week was a week of firsts. Had my first Cosplay shoot, which just happened to also be my first time really shooting with my new D800 (other than playing with it the night before at a lighting workshop) and during editing I wound up using Alien Skin Exposure 5 for the first time as well as creating and using my first photoshop action.
.jpg)
Where to start? Let's backtrack a bit. First off, my D3200 was a great camera, I don't think I could have picked a better starter body, but I found I just wasn't using it as much anymore for a couple of key reasons: First, I just liked the depth of field and general look better from the full frame sensor in Excalibur and Second, now that I am starting to play around with more advanced things like time lapse, long exposure, stacked star trails and HDR I want a body that can do all these inherently. Been thinking about it for some time finally pulled the trigger because I am starting to line up more model shoots as well as getting ready for some travel to places where I want to shoot some good landscapes and scenics. Once again, got a good deal on a pre-loved body from Keh camera... not sure I will ever buy a new piece of photo gear again. So, sold off my DX stuff and ordered the D800.
First and foremost, holy crap 36mp resolution is incredible. I am talking count the eyelashes resolution. It's awesome, much closer to the medium format look commonly seen in publications, but much cheaper and more convenient. That being said, the ergonomics aren't as well done as on Excalibur, and for shooting with the 70-200 I will definitely have to get a battery grip so it will balance out correctly. (I want to do that soon anyway just so I can share batteries and charger between the two cameras) and the large files are eating my processing power. It's been a little over 4 years, I think it's time to upgrade the computer soon. Despite being slow, it seems like the extra resolution and detail really expands options for post processing because there is simply much more to work with. The D800 is not the see in the dark speed beast Excalibur is and it isn't as easily handled, but for controlled shoots it is going to become the weapon of choice.
Now on to the shooting. Since I decided to start setting up more staged shoots and adding to my portfolio, I have been spending a lot of time looking around ModelMayhem for cool people to work with. While browsing I came across the profile of the incredible Alanna Safarik, who mentioned wanting to do a Cosplay shoot from FireFly, which may just be my favorite series ever, so I was all over it. She just happened to have a Jayne Cobb hat and the outfit lying around, and a friend with some airsoft guns to use. We weren't able to get together and shoot before my last bit of travel, but that wound up working out pretty well because after I got back I found the Sweetwater Steel Bridge, which was perfect for the feel I wanted for the shoot.

We shot for about an hour, Alanna was a trouper because it was 100 degrees despite being May, and the very accurately named steel bridge was pretty darn warm to sit/lean/stand on, not to mention she was in spike heel boots and somewhat afraid of heights. Despite all that, we got some great shots.

This was one of the first shoots where I really went in with an image of what I wanted the final edited shots to look like, and I wanted an old west daguerrotype look. Writing about this reminds me of my initial discussion of "photoshopping." I am still far from being a master of digital image manipulation, but I think even with the work done on these, I am staying true to my ideals in that the editing directly contributes to the artistic feel of the image while keeping the model completely recognizable as herself instead of a caricature barbie.
.jpg)
I decided to give Alien Skin Exposure 5 a try to get a start at the look I wanted, because I am lazy and not up to the level of skill I need to be to do it all by myself in photoshop yet. The first thing I tried was just using the Aperture plugin functionality so that once I was ready I could batch process the images as a final step, but I didn't like the all or nothing look, something about it wasn't right, maybe it smacked too much of just adding an instagram filter and calling it done, I wanted more control, so I went into PS where I could use the original image and the filter as layers and blend them to my heart's content until I got what I wanted. But I still didn't want to have to individually work each image if I could avoid it (lazy, remember, and I am hoping one day to have to deal with high volumes of shoots and tight turnarounds, so I need an efficient workflow) so I decided to learn how to build my own action. Took a few tries and haven't worked out all the bugs yet, but I was able to get to a point where I only had to click once per image and the action took care of all the rest, so I consider that a victory.

Overall it was a great experience. I enjoyed working with Alanna and hope to collaborate more in the future. I got to test out the D800 and put into practice some of the things I learned at the speed light workshop the day before (which I will post about later most likely). I was pretty happy with what I was able to do lighting wise. The shot above looks like it could have been shot/lit in a studio, but it was just a couple of speed lights and a neutral density filter shooting in bright 3pm desert sun. I got to play with some new editing techniques and toys (speaking of which, if you are serious about photo editing, get a Wacom Tablet- trust me. Editing without one is like driving a stick shift with a sprained left ankle compared to working with one) and learned the rudiments of action creation. All in all a good shoot. You can see all the results here and decide for yourself.
.jpg)
Thursday, April 17, 2014
Lucid Dreaming redux- A different festival and first review of my Nikon 85mm F1.4 D

For the second year in a row, I had the opportunity to head up to Santa Barbara for Lucidity and be the aerial rigging assistant for one of the stages. You can read about my experience last year here, this year I took a different track. Last year I pretty much missed the whole festival and spending time with my family because I was either rigging for performers or shooting their acts when they didn't need rigging cues or change outs. This year I decided to change it up, so when you take a look at the full gallery of shots from the weekend, you won't see many pics of aerialists. You will still see a few, but those were for some specific reasons which I will get into shortly.
Last year, my son was crawling but not really walking. He and his mom came up with me, but I was too involved with rigging and taking pictures and didn't really get to spend any time with them, which really degraded their experience. This year, not only would he be walking and running around, but I was also coming back the night before we left from a month out to sea, the longest he and I have been separated since he was born. He asked where I was almost every day and went completely nuts when I got home, so I promised myself that- although the rigging part had to take precedence because I was well compensated for doing it and had committed to do it- I was going to spend as much time as I could with them. I also wanted to actually enjoy the performances myself this year and watch them without a camera in front of my face. So, if you were one of my performer friends and were hoping for lots of shots from your acts like last year, sorry to disappoint you, but at least I actually got to see you perform for once, and you were awesome!
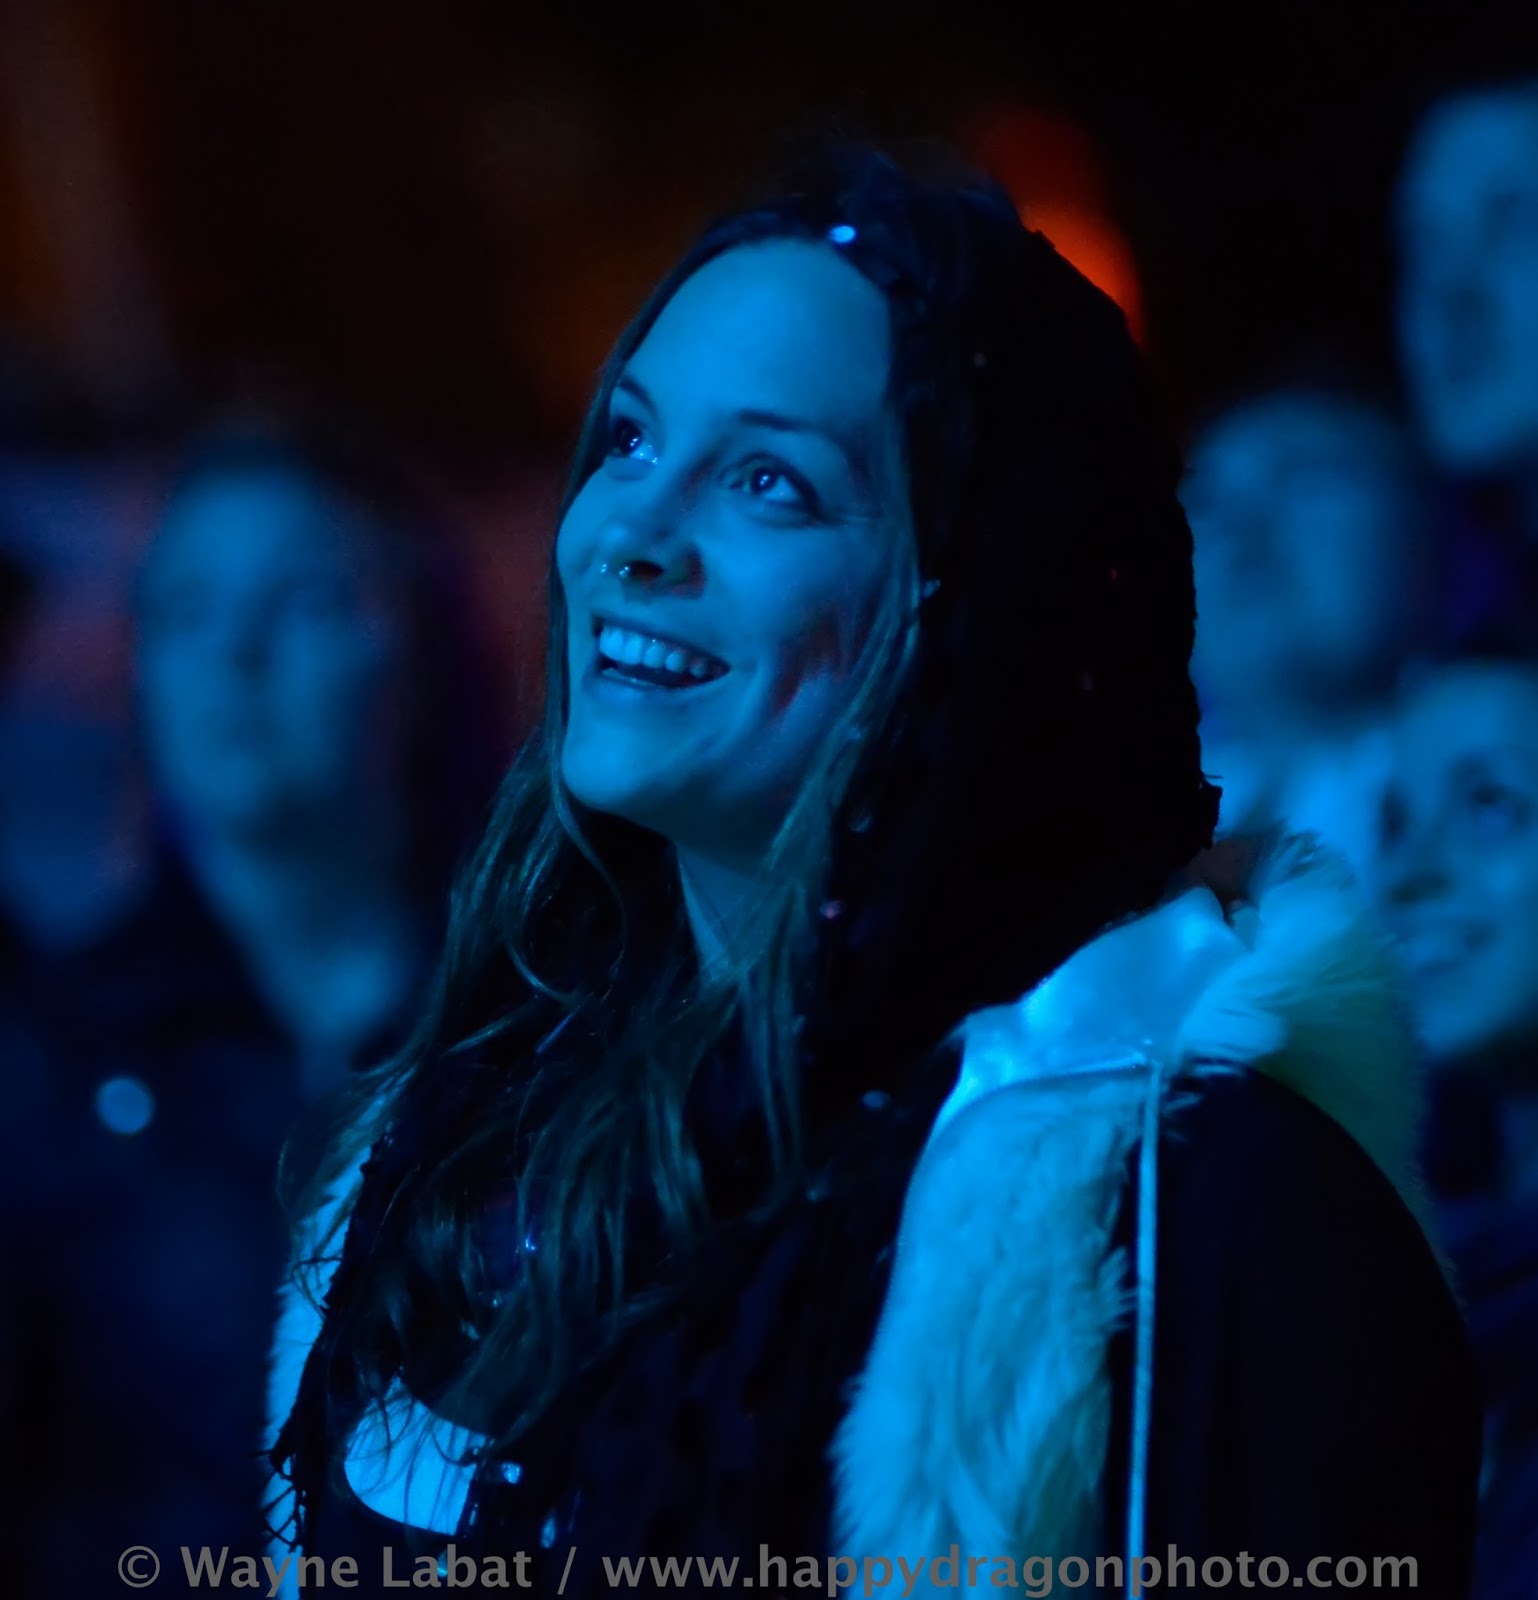
But wait, you may ask, isn't this blog about photography? Also, wasn't there a link above to a gallery of images from the weekend? You caught me, I can't sneak anything past you, the astute reader, not even the stealthy attempt to work three links my main site into the logical flow of the post. I did bring the camera and I did take some shots. But I gave myself a limitation (which actually turned into an expansion) and there is another whole gallery of shots of my family like the one I opened this post with that isn't posted for public consumption. Right before leaving, I picked up an older, used 85mm F1.4 D lens. I love the zooms I have, but decided I wanted to get something specific to use as a portraiture lens and this one is pretty much legendary for it's creaminess and bokeh wide open. It is also quite a bit faster than the 2.8 Zooms, but it relies on the camera motor for auto focus, so I wasn't sure it would be fast enough to keep up with aerialists. I decided that I would keep the shooting simple over the weekend, no flash, no huge gear bag, no changing lenses, I would take the D4 with the 85mm mounted and just get used to the new lens and working wide open. It was definitely a learning curve, but here are my initial impressions of the lens.
First, the Bokeh is just amazing. For those who don't know the term, it's a Japanese term used to describe the quality of the out of focus areas of a photo. This lens has the smoothest, creamiest bokeh I can imagine. How smooth and creamy- you ask- well, it's smoother and creamier than a hippie licking vegan chia pudding shake from a spoon. How do I know? See for yourself:

Told you so. That superior bokeh quality is one of the reasons this lens had developed quite a reputation as a portraiture lens, and I found that for most of the weekend that is what I used it for. I usually shoot wider out and crop later if I want to, because zoom lenses make it easy. With the prime, I was stuck with the composition I had unless I had time to move, and often what I noticed to shoot was close in. I decided to go with that for the weekend and concentrate on shooting people experiencing the festival more than the performers and entertainers on stage.

One of the reviews I read prior to purchasing the lens mentioned that it has just enough telephoto to allow you to stay a reasonable distance from your subject instead of shoving the camera right into their faces to get a close up without being as large and intimidating as the 70-200mm. I found this to be definitely true, I shot most of my images from between 6 and 10 feet from people, close enough to engage them without being so close in that I interfered with their moments.

The shallow depth of field shooting at 1.4 really was awesome at isolating the person I wanted to frame even against the crazy background distractions of the festival.

This leads to the hardest lesson I learned. That shallow depth of field is even more insanely shallow than I imagined. Especially as I got closer to my subjects. It took me a while to adjust to how specific I needed to be with my focus points. You can best see what I mean in the next two shots, taken from about 3 feet away from the woman. In the first, if you look closely, you can see that I accidentally focused on the bangs in front of her right eye, which threw the rest of her face out of focus.

In the second, I focused on the left eye, which worked, but if you zoom in you can see the close side of the face is slightly out of the focal plane.

I will probably make the mistake a few more times in my career, but at least near the end of the weekend I was starting to get a feel for how think the focal plane really was wide open. I saw some reviews that claimed this lens wasn't sharp, but those were dead wrong. The lens is tack sharp, but you just have to be really careful of your technique, it is both sharp and unforgiving of inattention to detail. The shots above also really demonstrate the boken, if you look at the out of focus lights behind her, they are almost perfectly round. In a few shots it's so crazy it almost looks like something photoshopped, but these are pretty much straight out of the camera. This may be my favorite round background light image.

Like I mentioned before, these shots are almost all straight out of the camera JPEGs. That was another change for me this festival. I have pretty much been an exclusively RAW shooter, only deviating when I had a specific reason too, like I was just going to hand in a card after a soccer game I was getting paid to shoot for someone else. But in addition to the new lens, I got more and larger memory cards (not a trivial expense, especially when looking at XQD cards) so I had room to use the Raw + JPEG function and still get backups on the second card without worrying about running out of space over the weekend or having to bring the laptop up with me. 90% of the time the in camera JPEGS are good enough for work I am not getting paid for, and for the other 10% I still have the RAW files to work with. The only ones I needed to use the RAW files to touch up were the single color LED washes, but I have ranted about those evils enough that I won't repeat it here. All I did to most of these was add the watermark and do a little bit of noise reduction on the higher ISO shots.
The only other thing I wanted to test was focus speed. Since this is an older lens without an internal focusing motor it relies on a screw drive in the camera to focus. Reviews were mixed as to whether the lens could keep up with fast subjects like aerialists, but I took the risk that the variation in user experience would prove to be dependent on the camera body they were using and that Excalibur would be able to drive the lens fast enough to keep up with pretty much anything I needed it to. Pretty much the only time I shot aerialists over the weekend was to test whether my camera/lens combo could keep up and I think my theory was proved correct.


So, new lens was an unqualified success. Relying on in camera JPEG took a way a lot of pressure in post and let me get shots out much quicker than my usual workflow. Limiting myself to one prime lens made we change my shooting style and come up with a lot of images I really liked. Not having the camera up to my face every instant I wasn't working as a rigger allowed me to experience more of the festival, enjoy the performances a lot more, and freed me up to spend a lot more time with my family, so an epic win on all fronts. Because for me, festivals are not only about the music and the performance but are primarily about the people and the connections, which is what I really took care to focus on at Lucidity this year. It's all about the love, and I hope you get a sense of that when you look through the full gallery.

Thursday, April 10, 2014
Think I've found my mission statement
For a while now I've been trying to figure out how to best describe where I want my photography to go, what I'm aiming for. Think I've almost got it.
For a while now I've been trying to articulate how much I enjoy being able to capture emotional moments as well as artists expressing themselves. I haven't been quite able to say what I want to say, but I'm getting closer.
While I was stuck out to sea last month with nothing to do but edit some images I hadn't gotten to yet as well as go through and rework some older shoots for stock submission, I realized that for me it was all about loving my subject. I can't put it any other way. What got me back into photography after a long hiatus was love, wanting to capture and record my new family. That expanded to wanting to capture my circus family. What I finally saw while working my images is that in some way I love all my subjects. If there is no love, the shot just doesn't work. No matter how much time I spend in photoshop, it won't get there. But when I'm loving the subject, and the subject is loving what they are doing, it's magical. The images shoot themselves and the editing is easy. After debating a lot about how much to "photoshop" an image, I realized that all I am trying to do is make the final image match what I saw when I clicked the shutter. Anything less than that feels incomplete, anything more feel overdone. I'm not able to always get it yet, but that's the goal.
I've had a few exchanges with people on Facebook that go something like this:
-wow, you made me look so beautiful/awesome/etc...
-no, you looked like that already, all I did was click the shutter.
When I think of photographers I admire, one of the common threads that links them is that they capture beauty in unexpected places, not just the typical hot model types, but the old weathered souls and faces. Everyone is beautiful, the art and talent lies in being able to not only see it, but to capture it in a way that lets others see it.
Wrapping all this together in my head it finally started to click, to come into focus, (see, back to my roots of bad camera puns,) whether I am shooting performers, posing models, getting portraits, anything, what I want to do is make the people I am shooting able to see themselves as I see them, and I wouldn't be shooting them if they weren't beautiful. What I want to do, whether it's a sunset, a supermodel or a homeless junkie on the street, is to be able to find the beauty that is there and to record and reveal it to the world.
Still working the final semantics, but my mission statement and motto is going to be something along the lines of:
"Happy Dragon Photography, Let me show you how beautiful you have always been"
That isn't quiteitI though. That's where I invite your help o faithful readers. Just can't nail it down. I don't want to say "how beautiful you can be," because it implies you aren't already beautiful or somehow need work. Maybe just "how beautiful you are."
This is raw (as opposed to JPEG) pretty much stream of consciousness, just figured I'll throw it out and see what feedback I get since I have some pretty smart and literate friends who cans put things into words better than I can. So what do you think?
Monday, March 17, 2014
Shooting in crappy lighting - lessons for life and photography...

I am sure everyone has heard the proverb that the Chinese Character for crisis, or challenge, is also the character for opportunity. I will leave the debate over this fortune cookie wisdom’s linguistic truth to others more versed in Chinese to discuss. I prefer the attitude of an old college roommate and amazing pool shark, “there is always a shot on the table, even if it isn’t easy or one you can make.” However you choose to look at it, when faced with a bad situation you have two choices: give up and go home or power through and try to find a solution. Recently, I was faced with such a situation. So here is my chronicle of an evening of despair behind the viewfinder and how I got through it.
In addition to being a photographer and Naval Officer, I am also a circus performer, instructor and rigger. In early March I was hired to set up an aerial performance rig as part of the 2014 HillCrest Fat Tuesday parade and block party. The person that set the gig up knew I was a photographer and invited me to stick around and shoot the event as well. I knew I was going to have to go straight from my ship to the location to set up before the start, so the night before I packed everything I was going to need into my truck. Since I had done a shoot the day before, I pulled the battery from Excalibur and threw it on the charger to make sure it was full. The alarm went off at 0430, I rolled out of bed and headed into work. Did my day’s work for the Navy, got off the ship and headed to the block party to set up. I tend to expect disorganization in most events like this, and I was not surprised. The area they had allocated for the aerial rig was way too small and the fire marshal said we had to move. So we swapped locations with another exhibit. This wouldn’t have been an issue except that the new location did not have the lighting we were counting on to cover the aerial performers. More on that later, but we got the rig set up, I went to grab some dinner, then went to grab the camera from the truck and get set up to shoot. OOOPS! Turns out that 0430 in my caffeine deprived state, I forgot to grab the battery (and attached battery compartment cover) from the charger and put it back in the camera. Crap. D4 is out of the picture. What about my backup camera- nope, still in the trunk of my daily car, where it lives so that I will always have a camera with me just in case. At this point, I was tired and already frustrated from dealing with the festival coordinator and the fire marshal and had no working camera, so I decided to say screw it, give up on shooting and go grab a beer because I was stuck until the event ended and I could take the rig down.
LESSON ONE: When you feel like you are stuck in a bad situation with no solution, grab a beer. You can take that literally, like I did, or metaphorically. Get out of the situation, step back, relax a bit, and distract yourself while letting the problem percolate around in the back of your head. While I was enjoying my beer, I realized that I had my spare battery in my bag, but still no compartment cover. I took this further, and figured there were no electrical contacts on the cover, so theoretically all it did was hold the battery in place… so what if….. a couple of strips of gaffers tape later and I once again had a functional camera with which to shoot the evening. Semper Gumby.

First problem solved, next issue was the complete lack of light. Despite the awesome low light capabilities of the D4, there wasn’t enough light to effectively shoot the performers. To get high enough shutter speeds to freeze them in motion I would have had to bump the ISO up so high that my noise removal software wouldn’t be able to save them. That left adding my own light, which meant flash.
LESSON TWO: Sometimes you have to break your own rules. I am against use of flash to shoot circus performers, sometimes loudly so. Mainly because it can be dangerous for the performers, but also because usually the show lights, even if they are not terribly bright, are designed for a purpose and a mood and using flash kills that ambiance. In this case that argument didn’t apply because there was no lighting or ambiance to distract from, so I just had to make sure my flash use wasn’t going to be a distraction or hazard for my performers.
Once those two issues were resolved in my head and I had gotten over my initial horror at having to use a flash, the next problem was how to keep my pictures unique and make them look different from the pictures of literally dozens of other photographers just blasting away.

My first thought was to adjust the flash power down to a low as I could take it while still getting a useable image, which would keep my shots from having the typical blown out flash look.

LESSON THREE: Change your perspective, I noticed everyone was basically standing on the same line on the same side of the rig to shoot, in the typical audience position. I, on the other hand, was free to move around and change angles as I wanted to. So I decided to get creative and shoot the scene from an unusual perspective. These were a few of my favorite flash shots.


Another thing I got the chance to play with was adjusting flash exposure on the fly. A pole dance studio was set up and performing right next door to the aerial rig. Since I was shooting manual flash in order to dial it down controllably and consistently, and the aerial performers and the pole dancers were at different distances from me, each time I swung from one to the other I had to adjust my exposure. Adjusting flash power was too much of a pain to do each time, soI played with flash ev comp but also found that to be not intuitive, since on the D4 it requires both a button and a dial so is a two handed operation, which kept me from zooming as necessary to recompose, so what worked well was adjusting aperture. It was a single dial, so I could open up a stop or so while I was recomposing between the two areas and once I got my exposure set for each shot it was consistent as long as I didn’t move, so it was a simple operation.

Of course, once I was dialed in and at least not totally depressed by my flash shots, things changed and another “opportunity” presented itself. The festival staff, realizing that no one could see the aerialists, got someone to swing a floodlight on a nearby tower to point at the rig. So, now there was plenty of light on the performers, but it was all sidelight

and it was about as ugly a light quality as anything I have seen before. (note- I am specifically referring to the light, not the gorgeous pole dancers I am taking another opportunity to show here)

About the only good thing I can say about it was that at least I didn’t have to burn through flash batteries anymore. My creative challenge again was how to get unique and maybe even good shots using the horrid floodlight. Other than correcting white balance in post, the best solution I found was to go back to LESSON THREE and change my perspective. I figured that what was a strong sidelight would also make for a good backlight and let me get some interesting silhouettes. It was a challenge moving quickly enough to keep the light blocked by the moving aerialists’ body and to keep focus against the strong backlight, but these also turned into some of my favorite shots of the evening.

If you were expecting concrete answers to specific crappy lighting solutions you may face in your shooting, sorry. This turned out more general in nature and as I finish up and look back, it seems like my advice really is more of a mindset for dealing with bad situations not only in photography but also when life throws significant challenges your way. So here is the summary of my advice for when you face any sort of challenge in your shooting or in your life:
STEP 1 – Take a break, move back and give yourself some space to look at the bigger picture, or even worry about something else and let your subconscious work on the original problem. Stay open to new ideas that may come up and ways to turn the challenge into an opportunity.
STEP 2 – Accept change, a challenge is an opportunity only if you are willing to change your usual routines and the way you always do things. Once you accept this and become willing to break your own rules, you become open to new creative possibilities.
STEP 3 – Change your perspective. This is similar to the previous step. In photography it’s fairly literal, change your shooting position, lens, etc. In life it could be literal or more metaphorical. The key is that if you always approach something the same way, you will always get the same result. If you want to change your results, or get results that are different from everyone else’s, you have to approach from a new, unique direction.

That’s pretty much it, those three steps represented what I took away from working through a rough night. I can’t guarantee success even if you always follow the steps above. Not all the shots I took were winners and I don’t really think any of the ones I got are works of art. But what I can guarantee is that if you don’t try anything, you will fail. If I had given up when I realized I had forgotten the battery, or when I saw how bad the lighting was, I wouldn’t have gotten any shots at all. Pushing through allowed me to practice things I don’t do often, pick up some new skills, expand my creative perspective and get some shots that I do really like, so it was definitely worth the effort.

As always, you can view the full gallery either on my full site or on FaceBook. As always, enjoy and feel free to provide any feedback or commentary.
Sunday, March 2, 2014
Gear Review - Optech Rainsleeve aka- the camera condom

Let me start with a little disclaimer- I live in San Diego. This means it rains maybe one or two weeks out of the year. I grew up in New Orleans, so I know what weather and real thunderstorms are like, San Diego just doesn't really have them. That being said, it finally got a little drizzly this past weekend so I can review my Optech USA rain sleeve.
Before the weather system moved in, I had a model lined up to do a pinup shoot on a beach with an antique fire truck. For some reason, the fire fighters didn't want to take their antique truck out in the rain, so that shoot got cancelled, but the model still wanted to play, so we headed out to Balboa park, figured a rainy day would be a good day to play in the fountains.
Excalibur is pretty well sealed, wasn't worried about the camera or my lenses in the rain, the wild card was my flash, I have no data whatsoever on the durability of my SB910 or Mittros flashes other than the fact that they have taken a bit of sea spray fine in Hawaii. But no fear, I had my rain sleeve from Optech, which I got before a trip to New Orleans, but didn't wind up needing then.
My model was worried about her outfits being a little "skanky," I told her that was ok because my camera had a condom- which is basically what the Optech rain sleeve boils down to.

There are two versions of the rain sleeve, the regular and the flash model, I went for the flash model, as seen above. There are no instructions in the two pack, just two rain sleeves. Took me a second to figure it out, there is an opening on the side where the bottom of the camera winds up, and a hold with a drawstring where the lens goes. The trick that took me a second to get is that to put this on, you put the flash on the camera body, then remove your lens. Insert the camera/flash combo into the main part of the sleeve, then insert the lens through the lens opening and attach it to the camera body. This is not as easy as it sounds because the plastic had a tendency to get caught in the lens mount, but with a little practice I don't think it would be too hard. Once the lens is on, cinch the drawstring down around the lens hood to seal it up.
This is the first minor issue I had with the sleeve- the drawstring was stupidly long, not a problem if you only shoot horizontal and never move your camera, but if you are running and gunning and shifting from horizontal to vertical a lot, you need to either tie the excess drawstring out of the way or stuff in back inside the sleeve, otherwise you may wind up with drawstring in your shots.
The second issue is lens selection. As you can see above, I used to 70-200mm and had some sleeve to spare. Not sure what the largest lens this will fit is, the site lists measurements, not actual lenses, but there was some excess with my 70-200. I think I could have made it work with my 24-70mm but anything shorter, like my 50mm or the 18-55mm kit that came with my D3200, would have been wayyy to short for this sleeve to work easily.
Once the sleeve was on, operation was easy, right hand goes into the bottom of the sleeve to work camera controls, left hand runs zoom through the bag. Flash was completely unaffected, if there was any diffusion effect or loss of light from the sleeve I couldn't notice it. Looking through the viewfinder was also not an issue with the sleeve in place, it was slightly more trouble than without the sleeve, but not so much that I noticed after the first shot or so.
What did become an issue was chimping on the LCD screen. The cover fogged up a bit after a few minutes of shooting, and to effectively view the LCD screen, either to see the histograms or to show the model how things were looking, I had to pull the cover up and over the LCD because it was difficult to impossible to effectively see the screen through the sleeve. Not a big issue for me, but if you shoot primarily live view or video this could be a show stopper for you.
So- verdict on the Optech Rain Sleeve? It did as advertised, kept my camera and flash dry and let me get some shots in a rare spate of pretty nasty weather.

I have not used other more expensive rain protection, like the Think Tank line, so I cannot speak to the comparison other than generally. If you live or work somewhere such that you have to deal with inclement weather on a regular basis, you should probably look to one of the more hard core protective systems like the Think Tank one. On the other hand, if you are like me and live somewhere that 51 weeks out of the year you don't have to have a care in the world for the weather, save your money and go for the Optech. It is comparatively cheap, is easier to use than kludging together a set of ziplock bags, and it does the job. The one other bonus is that it is transparent - if for some reason you haven't been shooting long enough to memorize all your camera's controls and operate them by touch, the optech lets you see what you are doing. Is it perfect- no, but it works. Make sure it will fit your camera/lens combo, buy a two pack, shove it into a corner of your camera bag, car or wherever, and forget about it until you need it, then it will give you the confidence and feeling of security you need to bring your camera out to play when the weather gets nasty.
Conclusion- Pros who regularly shoot in inclement weather will probably want something more robust. Part timers or pros who don't frequently need protection from the elements should consider spending the $8 to put a set of these in your bag. They don't take up much more space than a set of filters and will get you through a rainy day that catches you by surprise.
Subscribe to:
Posts (Atom)